Shoutout to all the small business owners out there hustling every day turning dreams into reality. We see you! Running your own small business is definitely not easy, but having the right tools can make all the difference.
The Ikonart Custom Stencil Kit can be used by small business owners in a lot of different ways to save time and make money. Check out our recent blog post 25 Ikonart Crafts You Can Sell To Make Money for real world examples of crafters who are already using the Ikonart Kit to make a profit. But selling your handmade crafts isn't the only way to use Ikonart for your small business. You can also make your own swag by turning your logo into a reusable Ikonart stencil.
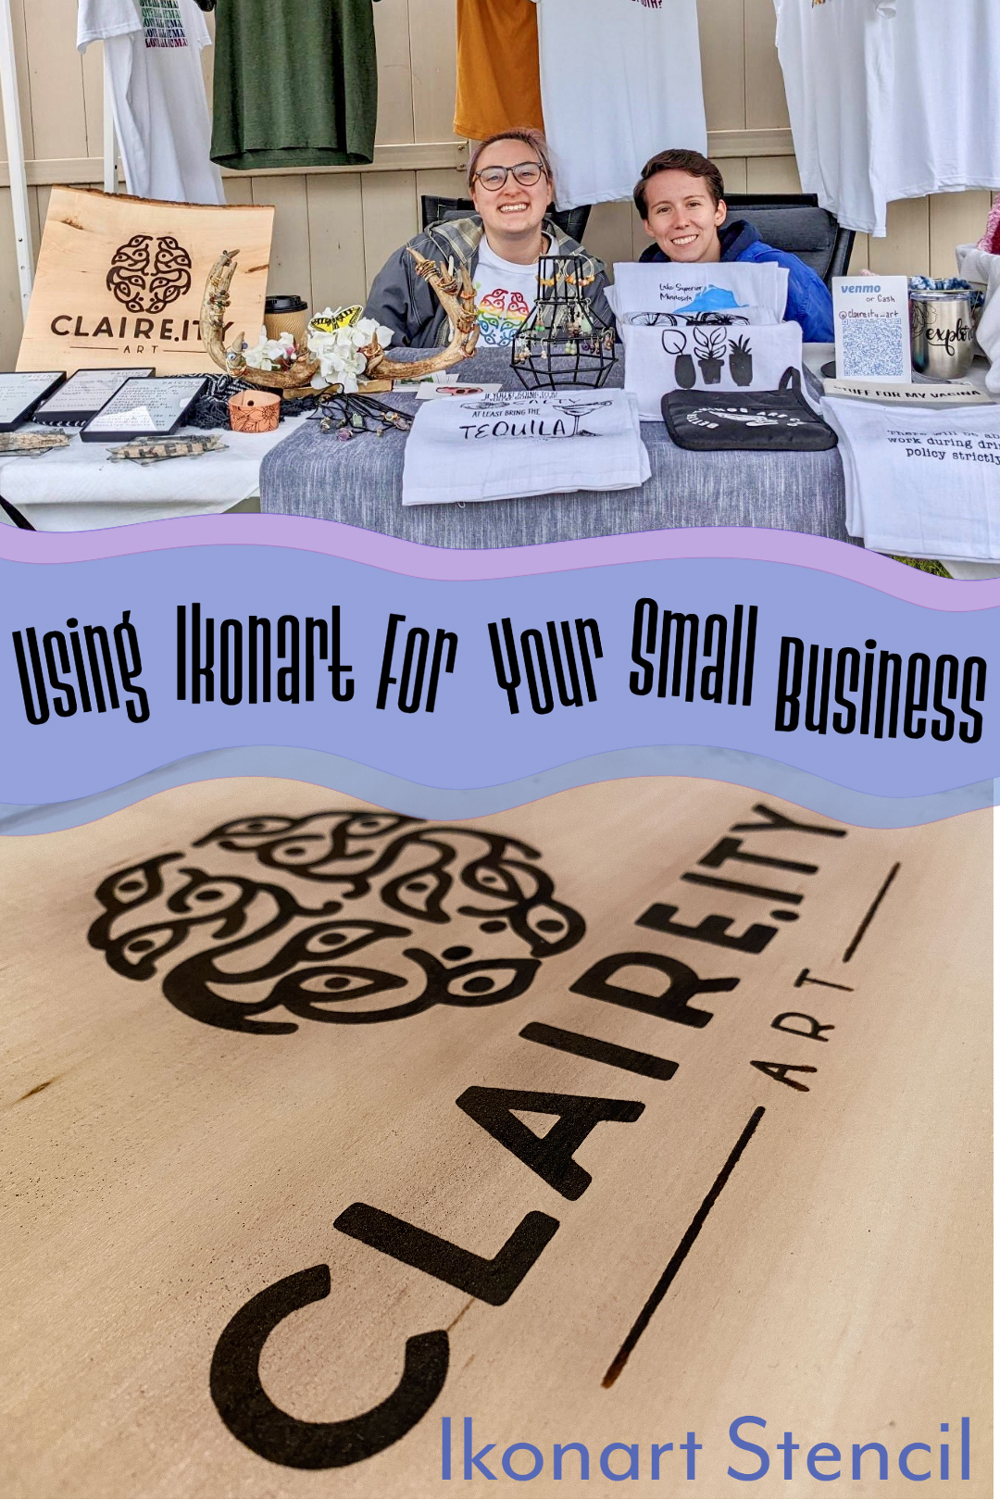
In this post our intern Claire shows how she turned her logo for @Claire.ity_art into a reusable Ikonart stencil and then she uses the stencil for two different projects. First she creates a custom wood burned sign and then she screen prints a t-shirt.
How To Make A Custom Ikonart Stencil
Hello, I'm Claire. As a senior in college I started selling my art on Instagram. When I came to work for Ikonart it opened a whole new world of opportunities for me to get creative with. I now use my Ikonart Custom Stencil Kit in majority of my products, and also have found it to be a great way to create display items for market booths and pop-up shops as well as promotional merchandise like shirts, sweatshirts, mugs... really anything! Here is how I created a large stencil of my logo.
What You'll Need:
- High quality digital file of your logo or design (whatever it is you are wanting to turn into a stencil)
- Inkjet or Laser printer
- Ikonart Custom Stencil Kit
- Sprayer (we use the
TriggerJet Nozzle but your kitchen sprayer should work fine)
1. PRINT: Open your logo or design in the design program of your choice. Be sure to use high quality artwork that is all black as this will give the best results and ensure the edges of the design on the stencil are nice and crisp. Load your printer film into your printer and print onto your clear printer film using either a laser printer or inkjet printer.
IMPORTANT! Make sure you print in black only and adjust your printer settings to print as dark as possible.
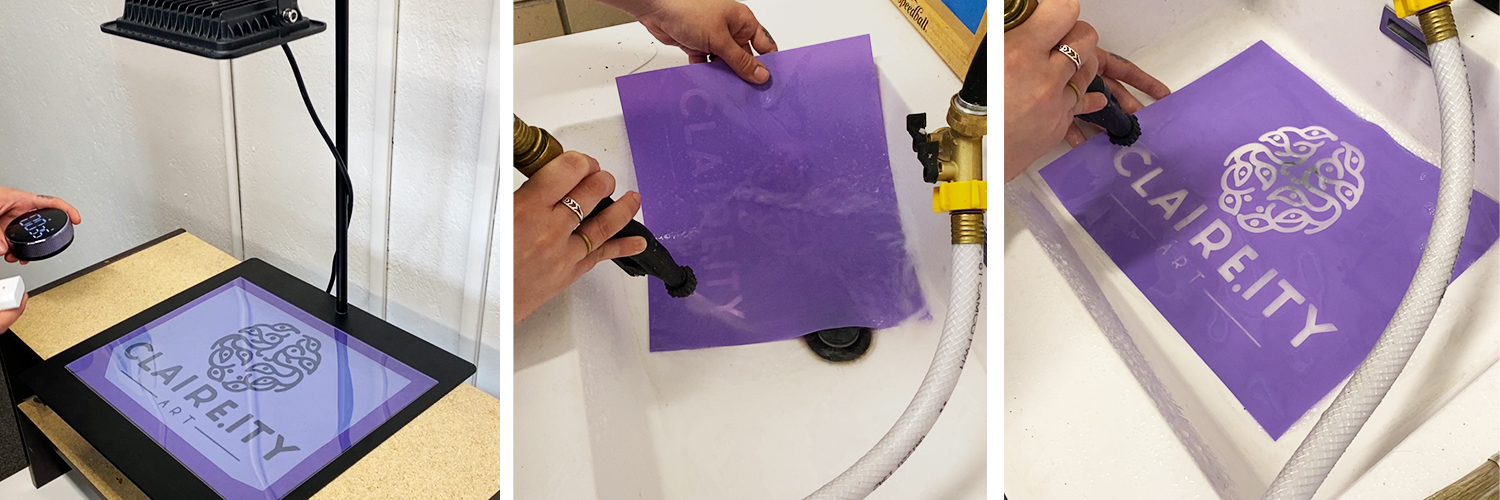
2. EXPOSE: Cut a piece of your Ikonart Stencil Film to your desired size BEFORE exposing. No point in wasting a whole precious sheet of stencil film if you are only making a small stencil! For this project I am making a pretty large one, so trimming wasn't required. I used the purple Ikonart Textile Film. Place your printed design on top of the textured side of the film sheet the way you want it to look when it is finished (so if there are words on your design you should be able to read them). Now, place one of the clear cover sheets (two come in every bag of stencil film) over both the design and film, pressing it down tight and smoothing out any air from between the printer film and stencil film. Turn on your light and expose the screen under your Ikonart light (35 seconds if you used the inkjet printer film, 30 seconds if you used the laser printer film).
3. RINSE: Now it's time to rinse! Soak your exposed film in warm water for 1 minute to soften the image. This is the exciting part because your image will start to appear almost instantly. Using warm water works best because the warmth allows the exposed emulsion to soften and wash out of your design. Once your screen is rinsed out and you feel confident in your details, lay it out to dry. Be patient. Wait for it to be COMPLETELY dry before you proceed.
4. POST-EXPOSE: Once your stencil is completely dry, place it back under your Ikonart light to post-expose for a minimum of two minutes. This is a very important step and makes your stencil more durable when you want to reuse it. After you have post-exposed your stencil, it's ready to use!
NOTE: Additional instructions for creating your Ikonart custom stencil can be found in the Ikonart Quick Start Guide or watch one of our demo videos.
>> Watch me make this Ikonart stencil on TikTok
Wood Burned Sign with Ikonart and Torch Paste
WHAT YOU'LL NEED:
- Imaged Ikonart stencil
- Squeegee (provided in your Ikonart Custom Stencil Kit)
- Wood sign or board (I just picked mine up from Michael's)
- Sandpaper (220 grit)
-
Torch Paste
- Heat gun (at least 1000W)
1. SAND YOUR WOOD: Make sure your wood surface is nice and smooth before adding your stencil. I like to sand the whole thing down, and the wipe it down again with a cloth or paper towel to remove any sawdust left behind. I recommend writing the word ''back" in permanent marker on the back side of the clear backer (the side not adhered to the stencil) so you know which way to reapply it later. You can now apply your stencil to the wood surface, making sure to place your clear backer sheet somewhere safe/clean/dry for later. Do not throw it away!
2. APPLY TORCH PASTE: Grab the squeegee provided in your Ikonart Kit and begin to apply a coat of Torch Paste. A little goes a long way with this stuff. You want a nice, even coat over your entire design. Scrape off any excess and return it to the container.

3. REMOVE YOUR STENCIL: Once you have applied the Torch Paste to your liking, you may remove the stencil carefully and take it to your sink to be rinsed off. Do not forget to put the clear backer back on your stencil prior to drying, or you could ruin the adhesive on your stencil.
4. APPLY HEAT TO YOUR DESIGN: Plug in your heat gun and allow it to warm up. I use the Seekone 1800W heat gun and set it between 5 and 6, letting it get nice and hot before I hold it over the design. I hold the heat gun between 1-3 inches away from the board, moving the gun over the pasted design carefully so I don't burn the surrounding areas of the board. The pasted areas can go from a light toasty brown to a fairly dark burn quickly, so watch closely.
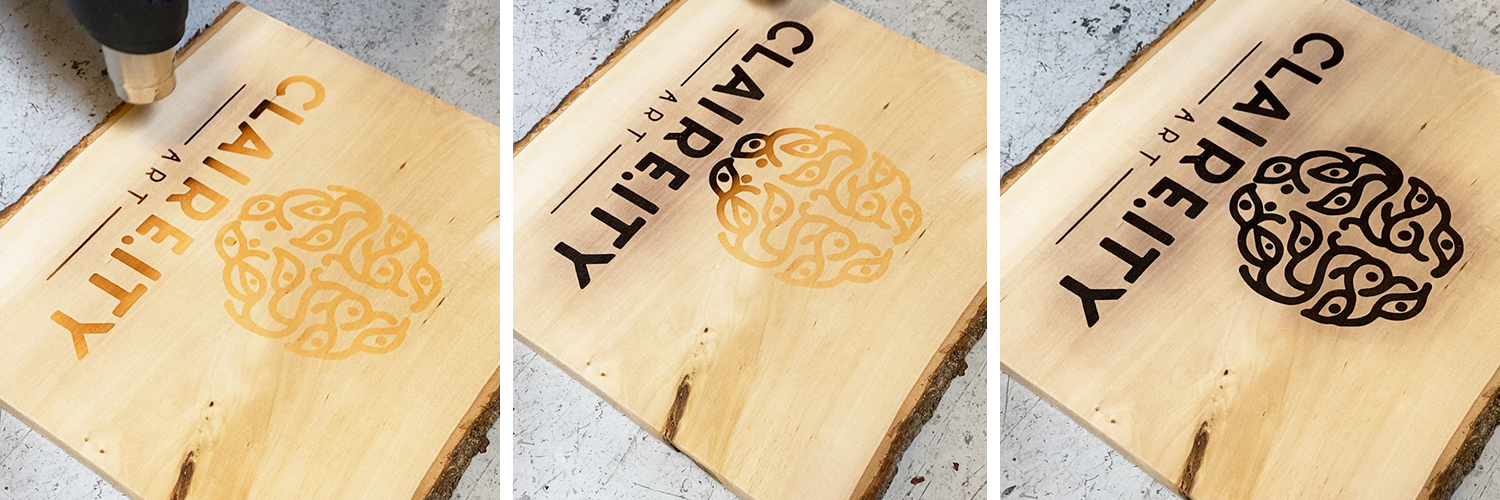
5. FINISHING TOUCHES: Allow the whole board to cool thoroughly. At this point you may give the board a good wipe-down with a damp cloth. You can either leave it as-is, stain it, or use an oil to seal your sign.
>> Watch me wood burn this sign on TikTok
Screen Printed Shirt with Ikonart and Speedball
What You'll Need:
- Ikonart custom stencil with your logo/design
- Squeegee (provided in your Ikonart Custom Stencil Kit)
- Fabric ink of choice (we use
Speedball Fabric Ink)
-
Tacky Textile Mat
- T-shirt, sweatshirt, or other clothing to be screen printed
1. PREPARE TO SCREENPRINT: To get your workstation ready for screen printing, make sure your work surface is clean. If there's any wet paint smudged on the table, it will end up on your shirt at some point, trust me. If you are planning to mix some of your inks to create a different color/shade, do this now as well. Place the tacky textile mat inside your shirt, ensuring that the mat is behind wherever you plan to put your design. Press the shirt against the mat, smoothing out any wrinkles.
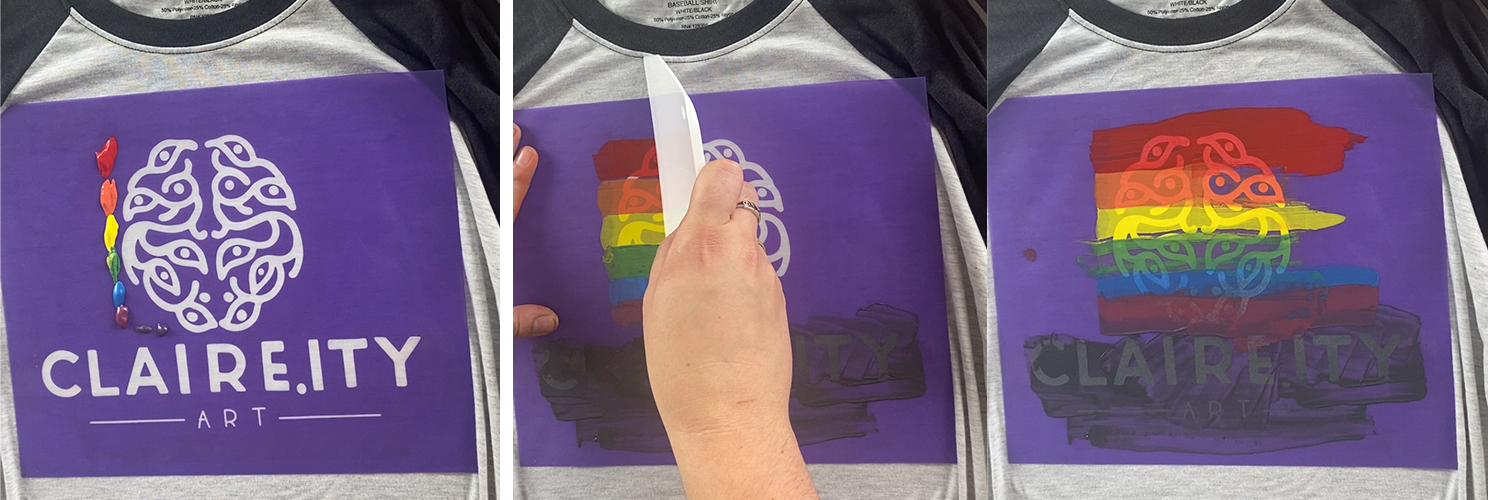
2. APPLY YOUR STENCIL: Peel off your backer and apply the stencil to the fabric. You can add your colors however you'd like using the squeegee. I decided to do a rainbow Ombre on my logo. To do this, apply a dollop of each color ink to the side of the stencil, creating a line of colors. Next, take a squeegee and glide it across your whole design from one side to the other, being careful to hold the stencil in place so it doesn't shift with the sideways motion. It's okay if your colors don't make it all the way across, you can always add more ink and go over it again. swipe the squeegee across as many times as necessary for your desired look. The more you swipe over it, the more diffused the line between colors will be.
3. REMOVE YOUR STENCIL: Remove your stencil and rinse, placing it back against the backer sheet and leaving it to dry. Allow your shirt to dry completely.
4. HEAT SET YOUR DESIGN: Once fully dry, heat set your inked design to finish curing it and make it more durable. I used the same heat gun as for the wood burning, but you can use a heat press, Cricut press or household iron, heat gun, or even the oven! Check out our recent blog post for 4 Ways To Heat Set Screen Printing Ink.
>> Watch me screen print this shirt on TikTok

Creating your own custom signage and merchandise is easy with Ikonart. I love the versatility of being able to use the same stencil for different projects and I'm always finding new and unique ways to use them. If you have any additional questions, please contact us or visit of Ikonart Crafters Facebook Group to learn more.