There's nothing more disappointing than screen printing a shirt and pulling your new work of art out of the wash for the first time to find half of it has disappeared or faded. Screen printing is unique because the ink sinks into the fabric rather than sitting on top of the fabric like vinyl, but you have to heat set the ink to make it last longer.
We make our screen printing stencils with the Ikonart Custom Stencil Kit, then we use Speedball Fabric Screen Printing Ink to add designs to our shirts. The screen printing ink holds up better over time compared to vinyl, especially if you heat set the ink properly. Heat setting is a crucial (and frequently overlooked) step when screen printing on clothing or other fabric products like tea towels or tote bags. Heat setting allows the ink to cure and will greatly increase the durability of your screen printed design when washed.
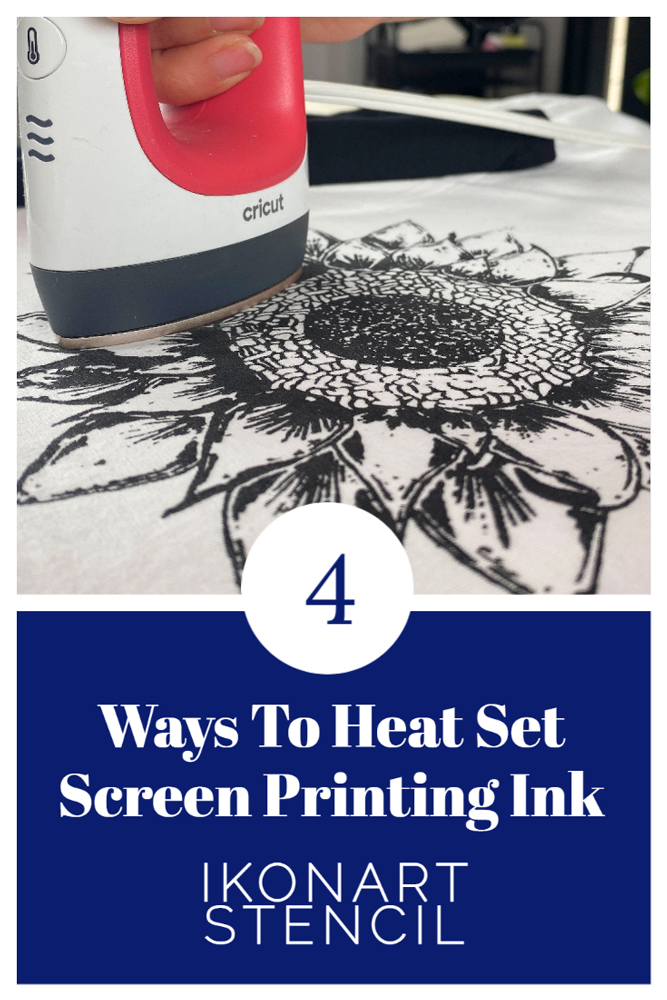
4 Ways To Heat Set Screen Printing Ink
Heat setting your ink is the last step in the screen printing process when using water-based screen printing ink like Speedball Fabric Ink. This screen printing ink needs to be heat set after applying it to your fabric to make the ink permanent. If you skip heat setting you may experience fading in the laundry.
Most water-based inks are likely to require a heat setting step in order to be permanent and last over time. Check your ink's packaging for specific heat setting or curing instructions to be sure your project lasts as long as possible.
Here are the four ways we recommend to heat set your fabric ink.
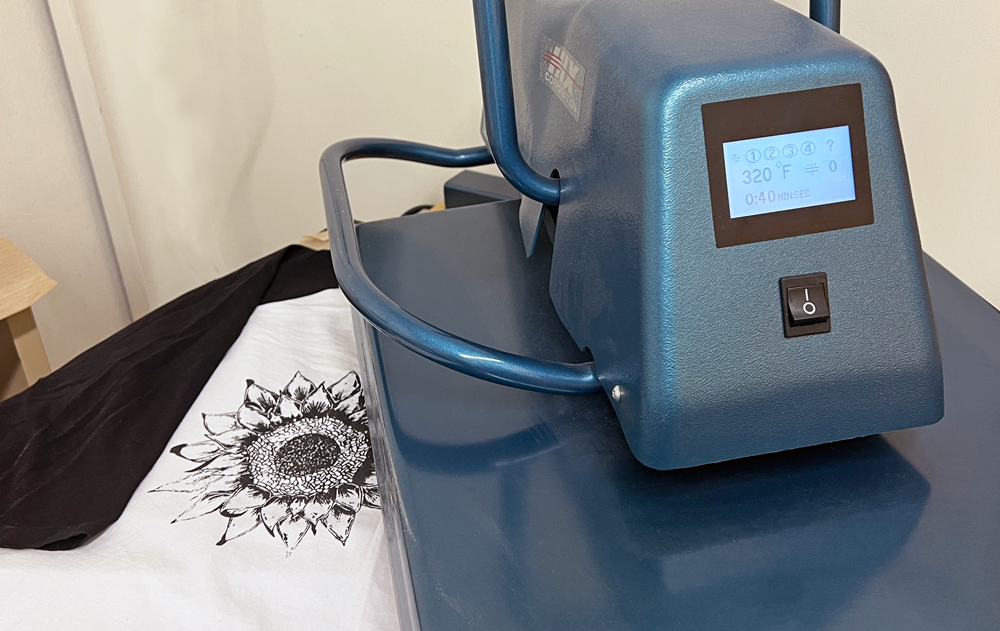
1. Heat Set Fabric Ink: Heat Press
If you are familiar with using Heat Transfer Vinyl (HTV) or do sublimation you may happen to have a heat press as part of your current crafting setup. Due to it's large surface you can usually fit your entire stenciled design under the press at one time. This can be a great time saver, as it only takes around 40 seconds under the press and then you can move on to another project.
HOW TO: Make sure your screen printing ink is completely dry. Adjust the temperature of your heat press to 320°F (160°C) and press your project for 40 seconds.
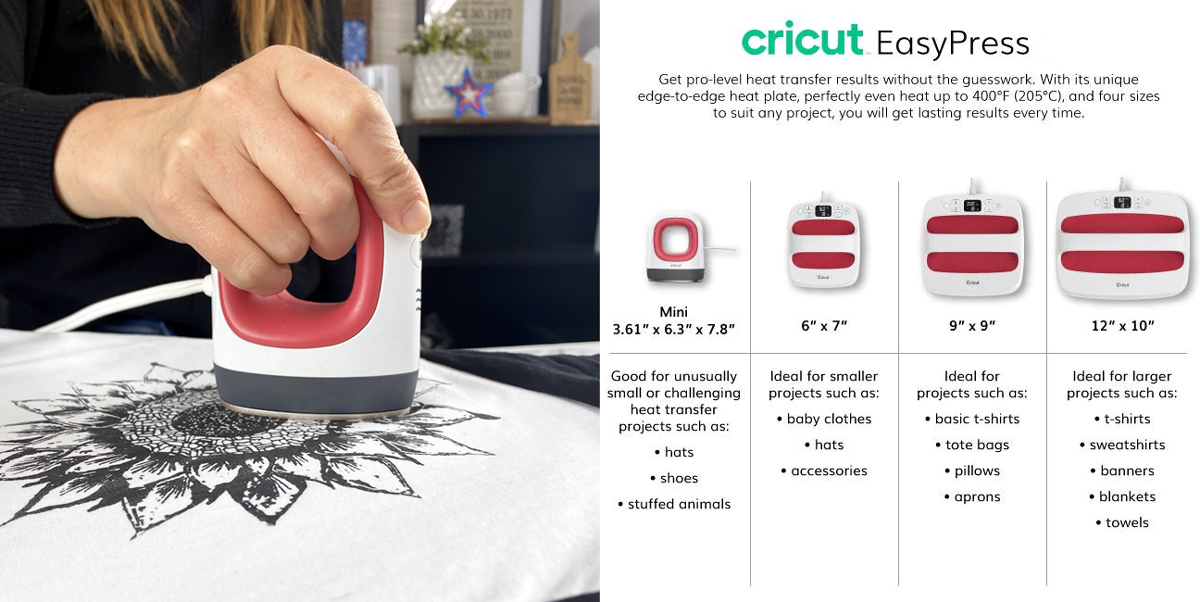
2. Heat Set Fabric Ink: EasyPress
If you're a Cricut crafter, you're probably aware of Cricut's line of EasyPress devices. In case you're not, it is essentially a hybrid between a traditional clamshell heat press and your regular household iron, and Cricut sells several models, including a 9x9in press, a 12x10in press, and a mini size with a heat plate that's about 2 x 3.5in. With its compact and portable design, an EasyPress makes a great alternative to the heat press when you're more limited as far as craft space/storage.
HOW TO: Heat setting with an EasyPress is just about the same as with a Heat Press. You'll what to press your design for 40 seconds with the temperature set to 320° F (160°C), being sure to do this to the entire design. If your design is bigger than your press, that's okay! Just press one area/side/part of the design first then move to your next area and repeat until the entire surface of the design has been touched by the heat plate.
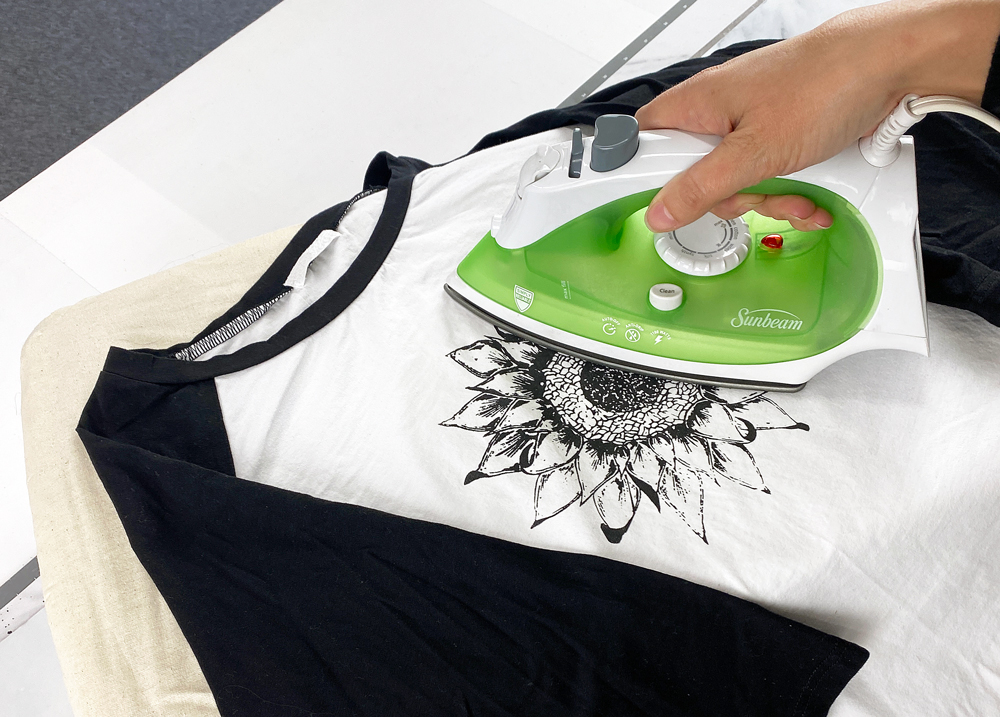
3. Heat Set Fabric Ink: Household Iron
Craft budget running low? Maybe you're just getting started? If you're not ready to purchase another piece of craft equipment don't worry, your regular household iron will do the trick too! Be sure to use a piece of parchment paper between your iron and your design, and be aware that the heat press and Easypress both have a very consistent heat output or the entire heat plate surface, however household iron's heat plate is often less consistent throughout, with the rear end and the pointed tip of the iron typically slightly cooler than the center.
HOW TO: When using a household iron to heat set, be sure to adjust your iron's settings to match the fabric material that you are heat setting. Cover your design with a piece of parchment paper and run the iron over your design for 3-5 minutes, keeping your iron in motion constantly as you do this.
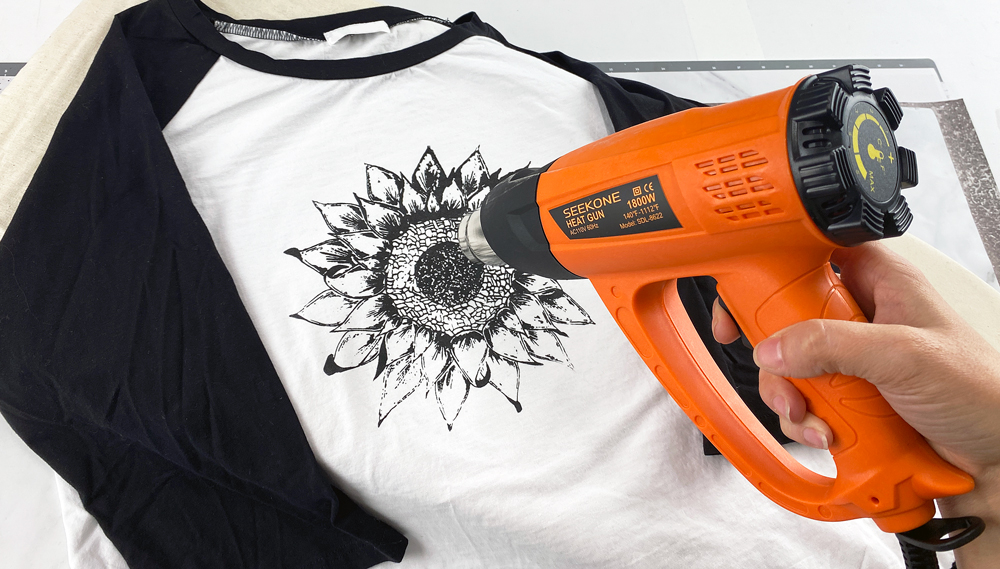
4. Heat Set Fabric Ink: Heat Gun
Using a heat gun to do your heat setting can also be very convenient, as many Ikonart crafters own a heat gun to use for wood-burning projects with Torch Paste. We recommend the SEEKONE Heat Gun from Amazon, which is also linked in our Amazon Recommendations under the Resources tab. This list also contains many other products found on Amazon that can really upgrade your Ikonart crafting experience.
HOW TO: To heat set your ink with a heat gun, set your heat gun to a medium-high heat setting and hold it over design for 1-2 minutes, moving constantly to apply equal heat over the whole design. Keep the heat gun about 4-5 inches away from the fabric material, and be careful not to leave the heat gun in one place too long or it may burn the fabric around your design.
Heat setting is such a simple way to ensure your designs and products hold up through multiple washes. If you have any additional questions regarding heat setting methods or the equipment used, please contact us or check out our Ikonart Crafters Group on Facebook which is full of helpful tips and tricks for all things Ikonart.