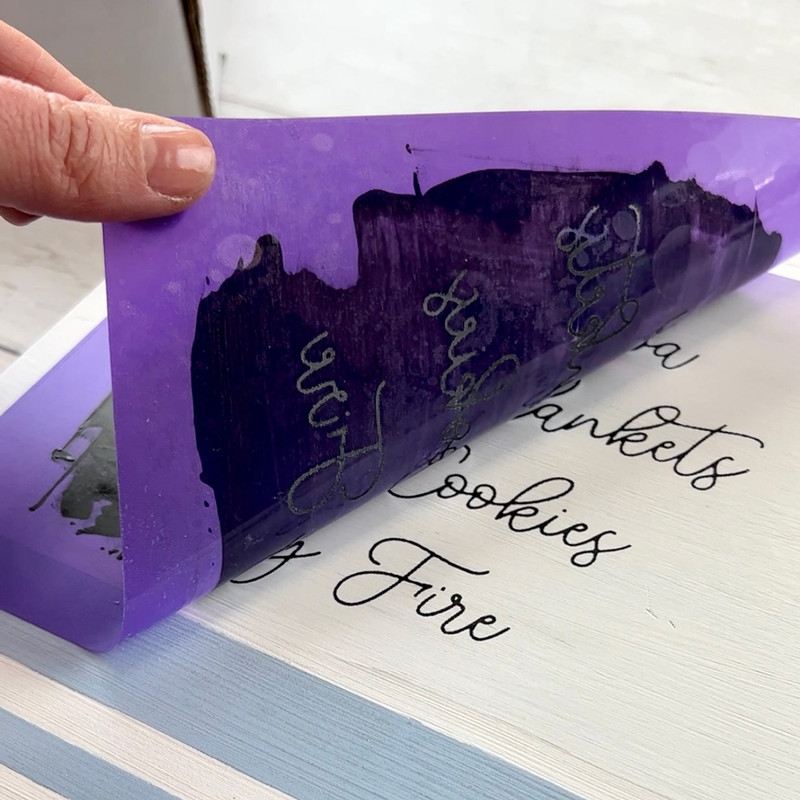
When stenciling with your Ikonart Custom Stencil Kit, a crisp edge is the difference between a homemade project and a professional finish. Bleed happens when paint or ink sneaks under the stencil, but with the right prep and application you can keep lines clean on wood, fabric, glass, and glazed ceramics.
Below are our best tips by surface, plus a quick guide to choosing paints and inks that play nicely with Ikonart stencils.
How To Avoid Bleed When Using Ikonart on Wood Signs
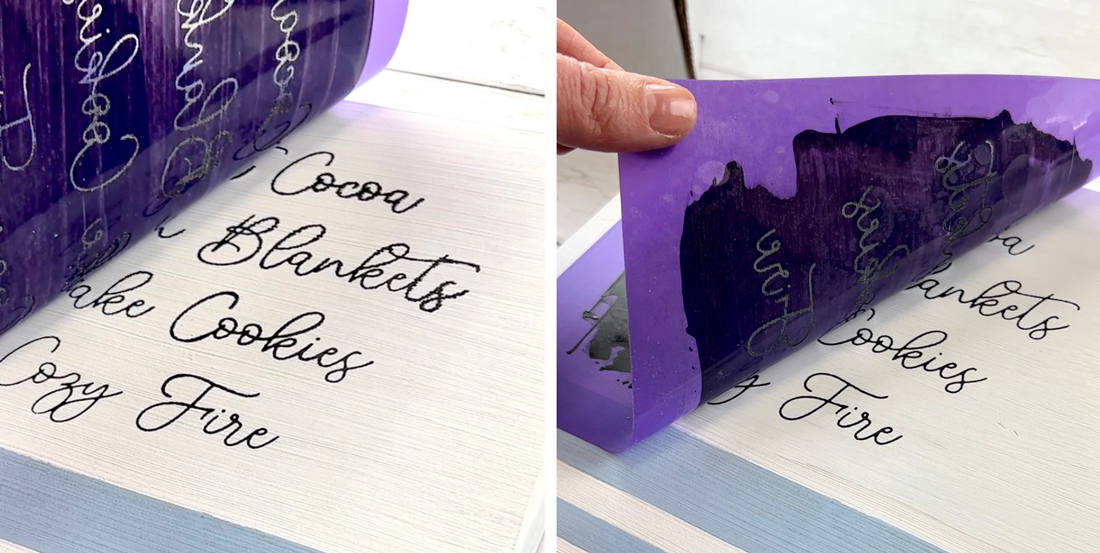
For wood signs, start by sanding the wood until it feels smooth to the touch. If you paint the wood, let the paint dry, then sand the paint lightly to knock down texture. We recommend using at least a 220 grit sandpaper for a smooth finish. In the example above, the background on the left was not sanded and the background on the right was sanded. Thicker paint helps keep edges sharp, so avoid thin paints or inks. If you need thicker consistency, add Coco’s Chalky Powder to make a DIY chalk paste that stays where you put it.
Pro tip: seal the wood with a clear sealant first so any small mistakes wipe away easily before the paint cures.
Paint recommendation: Any acrylic paint, chalk paste, or chalk paint will work on wood. We like making our own DIY chalk paste with Coco's Chalky Powder. When wood burning, we use Torch Paste.
WATCH VIDEO: Reversible Wood Sign with Ikonart Stencils
ON THE BLOG: Tips for Creating Wood Signs with Ikonart
How To Avoid Bleed When Using Ikonart on Shirts and Fabric
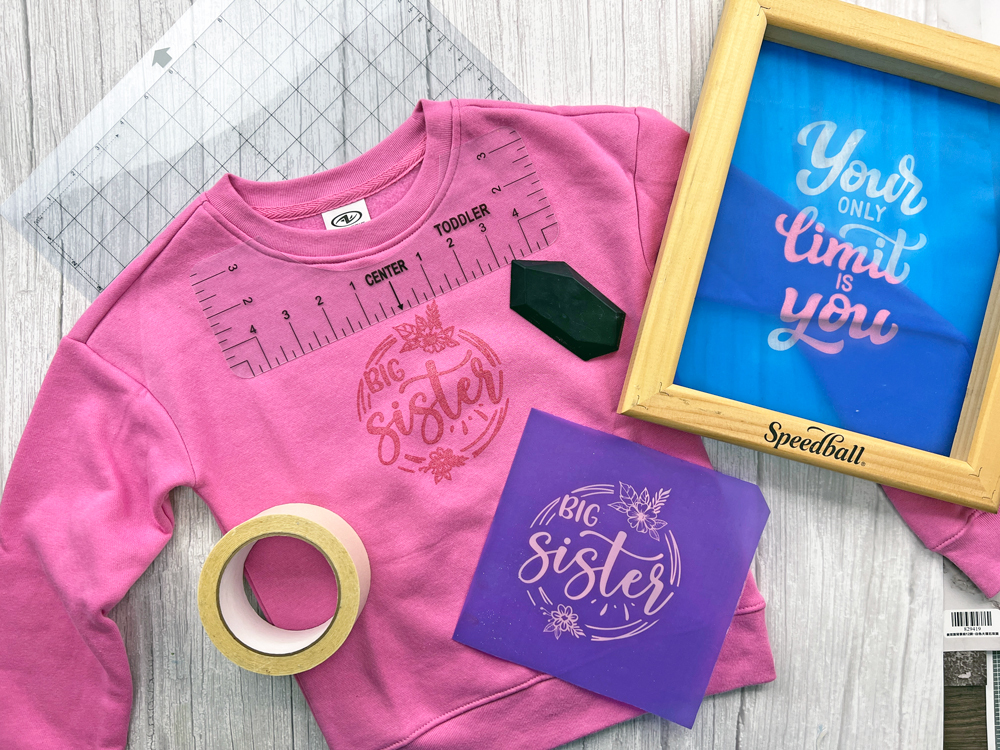
For shirts and fabric, place the garment on a Tacky Textile Mat so the fabric stays flat and does not shift. Use a modest amount of ink and glide the squeegee across the top of the stencil like you are buttering bread. Keep pressure firm but not heavy so the stencil does not buckle against the weave. Make a single smooth pass in one direction rather than scrubbing back and forth.
Pro tip: peel the stencil slowly and watch the print as you lift so you can spot any mesh openings that need a tiny touchup pass.
Ink Recommendation: We use Speedball Fabric Inks when stenciling on fabric. Either the Speedball Fabric Ink in Black, the Speedball Fabric Ink 4-pack, or the Speedaball Opaque Fabric Ink 6-pack. When we want to add a special effect to our print, we mix in the Speedball Puff Ink Modifier.
WATCH VIDEO: Tips for Screen Printing Shirts with Ikonart
ON THE BLOG: Ikonart Screen Printing Tips for Beginners
How To Avoid Bleed When Using Ikonart on Glazed Ceramic or Glass
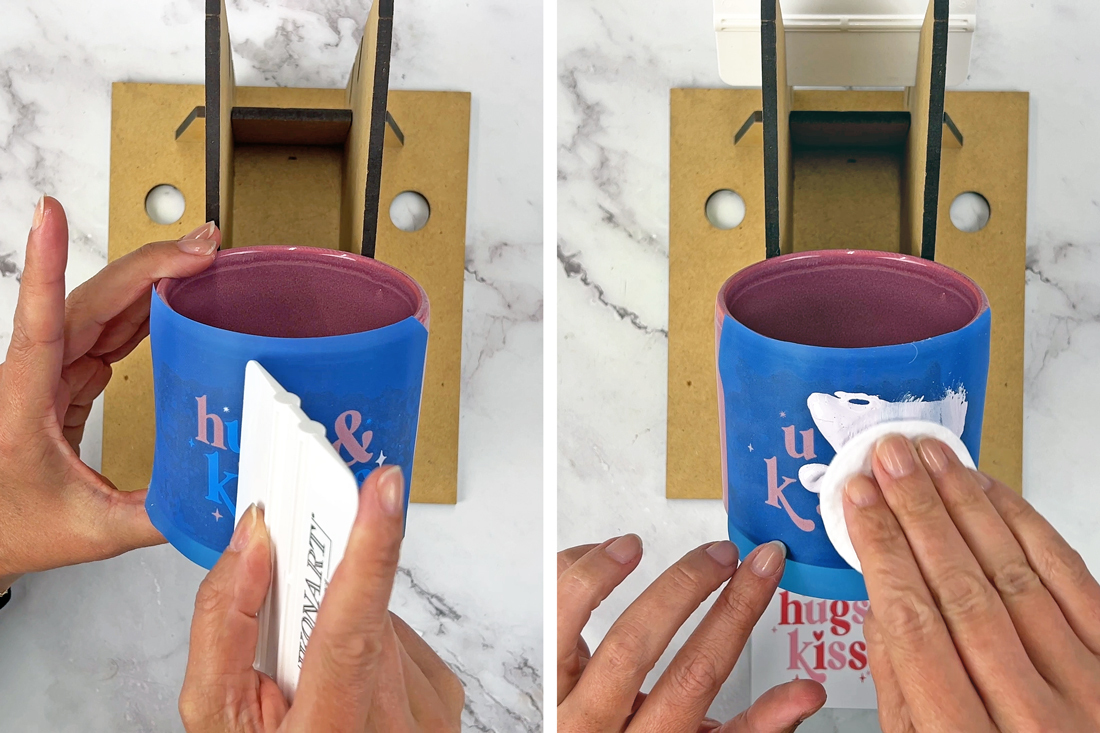
On glazed ceramic or glass, confirm your stencil is completely dry so the adhesive does not over-stick on the slick surface. If the stencil feels too sticky, “fuzz” it by patting the adhesive side on a microfiber cloth or on your jeans to soften the grab. Position the stencil, then burnish until the film is perfectly smooth to the surface with no bubbles, using the white plastic squeegee. Instead of a squeegee application, dab or swirl color on with your finger, a makeup sponge, or a cotton round for better control on slick substrates.
Pro tip: use a Smart Jig to hold your glass in place and remove the stencil quickly once you finish applying color so edges stay crisp.
Ink Recommendation: We use the DecoArt Multi-Surface Acrylic Paint when stenciling on glazed ceramic or when we want to add color to glass. You can bake it in the oven to make it top-rack dishwasher safe. When we want an etched look on glass, we use Etchall Etching Creme.
WATCH VIDEO: 5 Tips for Using Ikonart on Ceramic Mugs
ON THE BLOG: How To Stencil on Ceramic with Ikonart
Extra Ikonart Stencil Tips That Help Everywhere
Great results start with a clean surface, a fully dry stencil, and light, even pressure. Take a moment to remove dust, oils, or lint, make sure your stencil is completely dry after rinsing, then position and burnish before you start. Small habits like these reduce touchups and make every project easier.
- Work on a level surface and avoid overloading your stencil with ink
- Burnish or rub the stencil to the surface before applying color
- If you are layering colors, let the first layer dry to the touch before placing the next stencil
- Keep a damp cotton swab nearby for quick cleanups and a dry towel for your hands so you are not transferring moisture to the stencil
- Rinse stencils promptly after use and let them dry fully before the next project
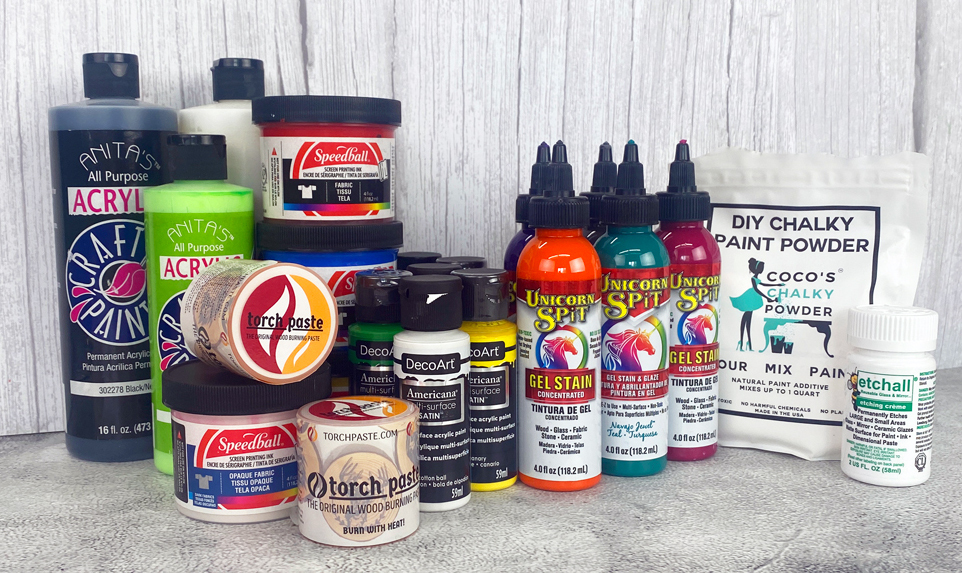
Which Paints and Inks To Use with Ikonart Stencils
Still not sure which medium to choose? Our comprehensive Paint & Ink Selection Guide explains how to match water-based paints, pastes, and inks to different surfaces, how consistency affects bleed, and how to troubleshoot common issues. It also covers tips for fabric, wood, glass, and ceramic so you can get crisp edges with Ikonart stencils across a wide range of projects.
Contact Ikonart Stencil
Bleed-free results come from smooth surfaces, the right paint or ink consistency, proper stencil adhesion, and light, controlled application. Ready to put these tips to work? Grab your Ikonart Custom Stencil Kit, pick a surface, and tag @ikonartstencil with your crispest edges. If you still have questions about how to avoid bleed when using your Ikonart stencils, post in the Ikonart Crafters Facebook Group or contact the Ikonart support team.

