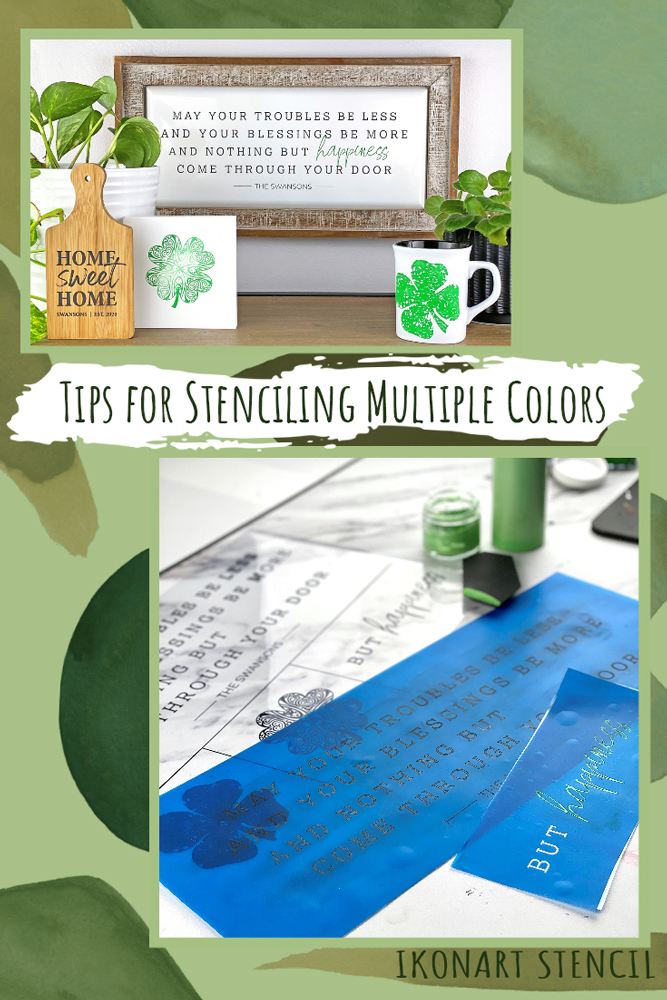
When you want to make a design with multiple colors you have two options. The first option is to leave all your artwork on one stencil and carefully add colors to your stencil in sections, trying to only get each color where you want it. This method can be tricky depending on your design. You risk mixing colors and if you are using chalk paste it can be difficult to work fast enough. My preferred method it to put the different colors on separate stencils.
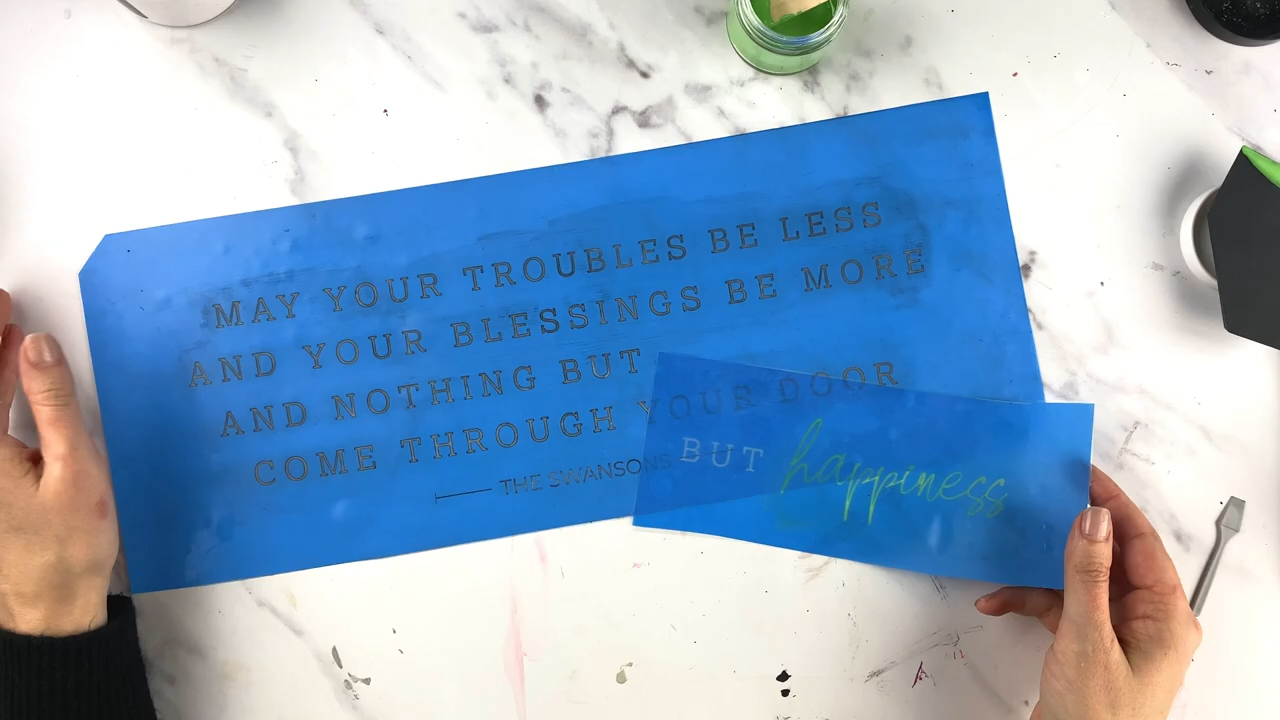
In the example below, most of my text will be black, and then only the word "happiness" will be green. But why did I leave the word "but" on both stencils? Let me show you my trick for registering two colors.
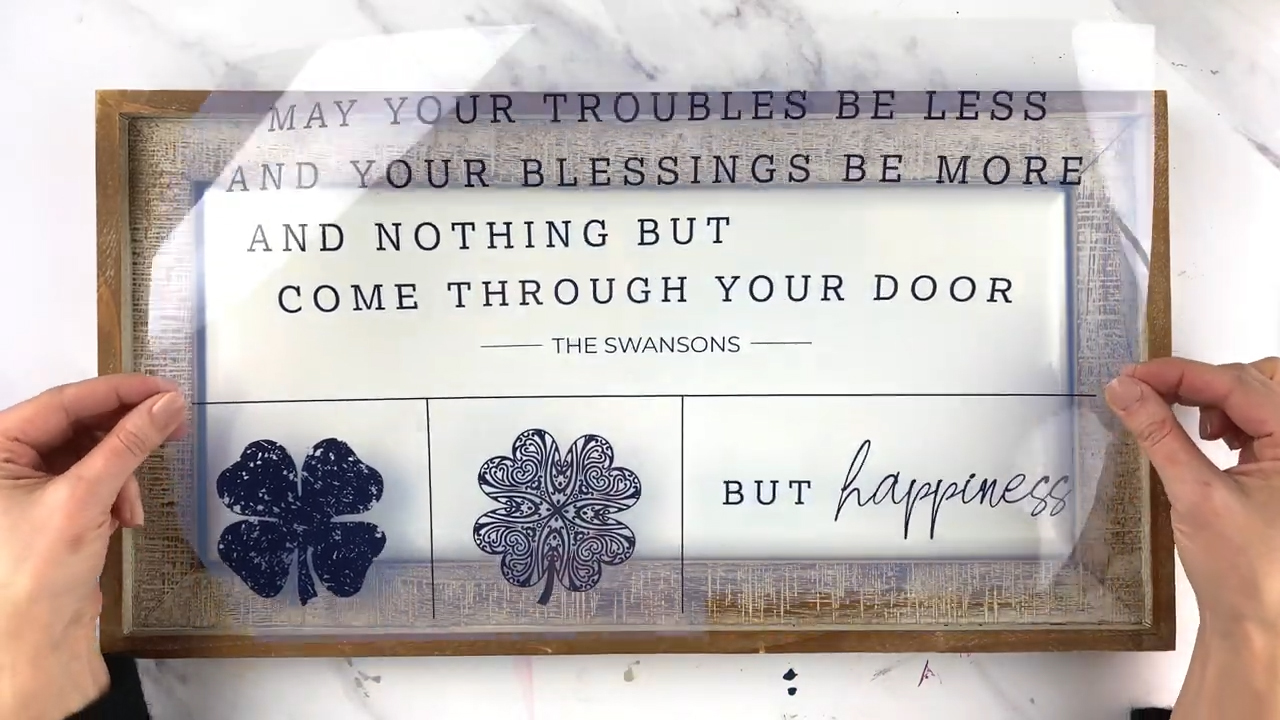
The first thing you are going to do is design and adjust your artwork. If you would like to follow along with my Inkscape tutorial on how I adjusted this artwork, you can download the free Irish Blessing SVG from our Free Artwork page. After you have your artwork designed the way you want you're just going to print it out on the Inkjet Printer Film or the Laser Printer Film, depending on which printer you have. Make sure to adjust your print settings so that you are printing as dark as possible. Check out our Inkjet Printer Tips or Laser Printer Tips if you are having issues printing.
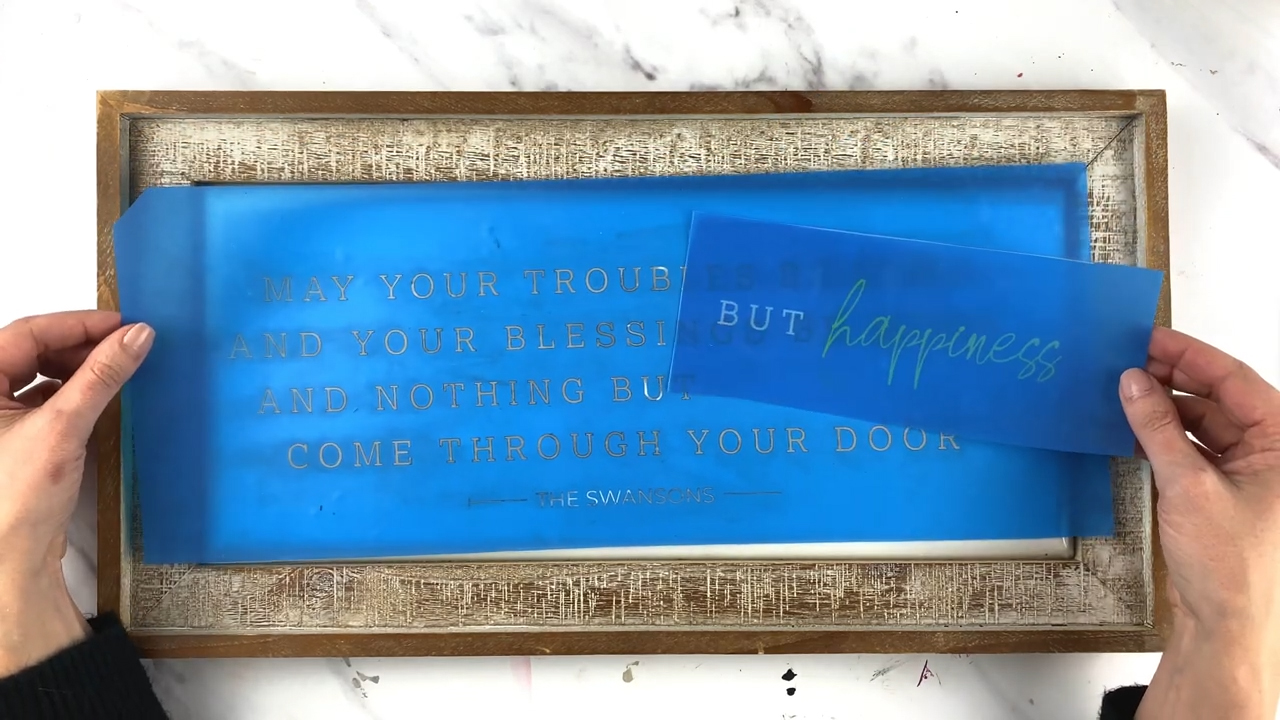
After your artwork is printed it's time to make your stencils using the Ikonart Exposure Stand. I used our blue Ikonart Stencil Film for this metal sign because our purple Ikonart Textile Film is just a little bit too sticky for metal. If it sticks too much to the metal it can distort when you peel back the stencil so I find that our blue film is perfect for metal. For this project I used our 12x18 Ikonart Stencil Film, but you could also use the 10x12 Stencil Film.
To make your stencil just lay down your Ikonart Stencil Film under the exposure light with the textured side facing up, then lay down your artwork so you can read it. Next add your clear cover sheet that comes in the stencil film packet and rub down to ensure a good seal between your artwork and your stencil film. Expose for 35 seconds then wash out your stencil under warm water. Dry completely. If you would like to see the entire stencil making process check out our Beginner's Guide To Ikonart.
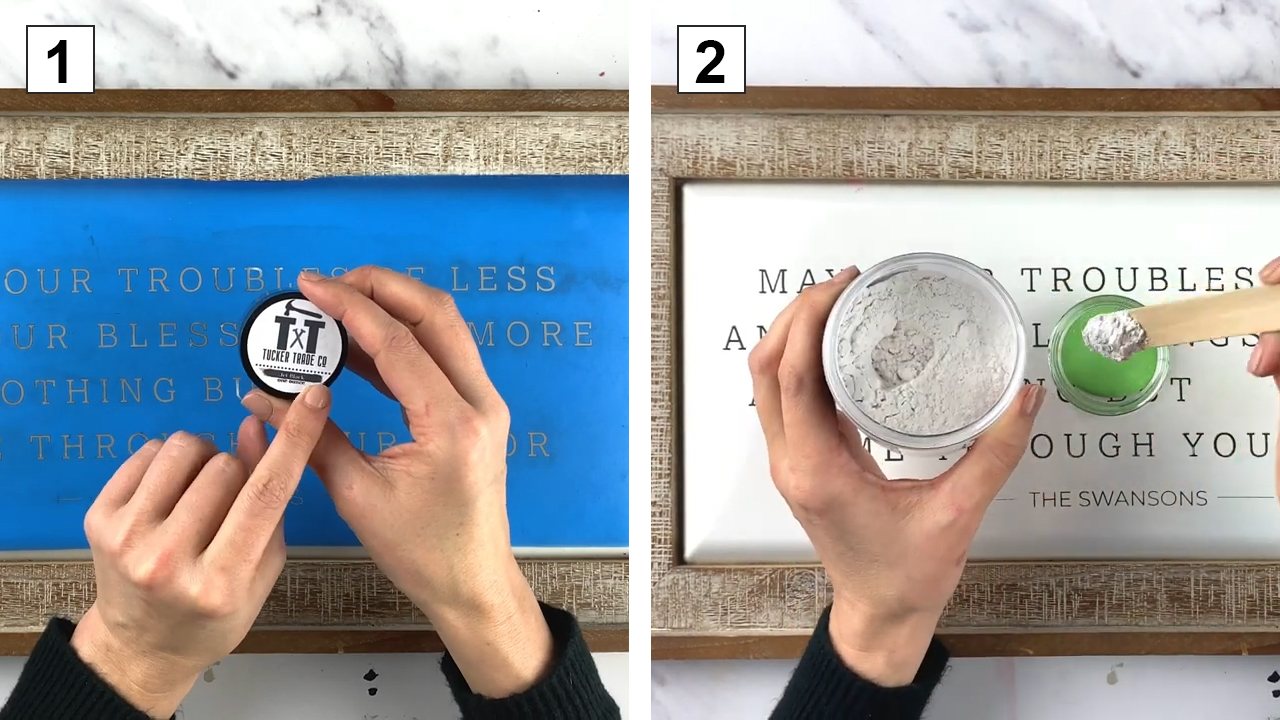
For this project I am using chalk paste so that I can remove it after St. Patrick's Day is over. You can either use a pre-made chalk paste (1) or you can make your own using Coco's Chalky Powder (2). In this video I used our Tucker Trade Co chalk paste in Jet Black and then made my own green chalk paste by mixing Anita's acrylic paint with the powder. When I make my own I start by mixing my acrylic paint and powder in a one-to-one ratio, then I adjust the amounts to get the consistency that I want.
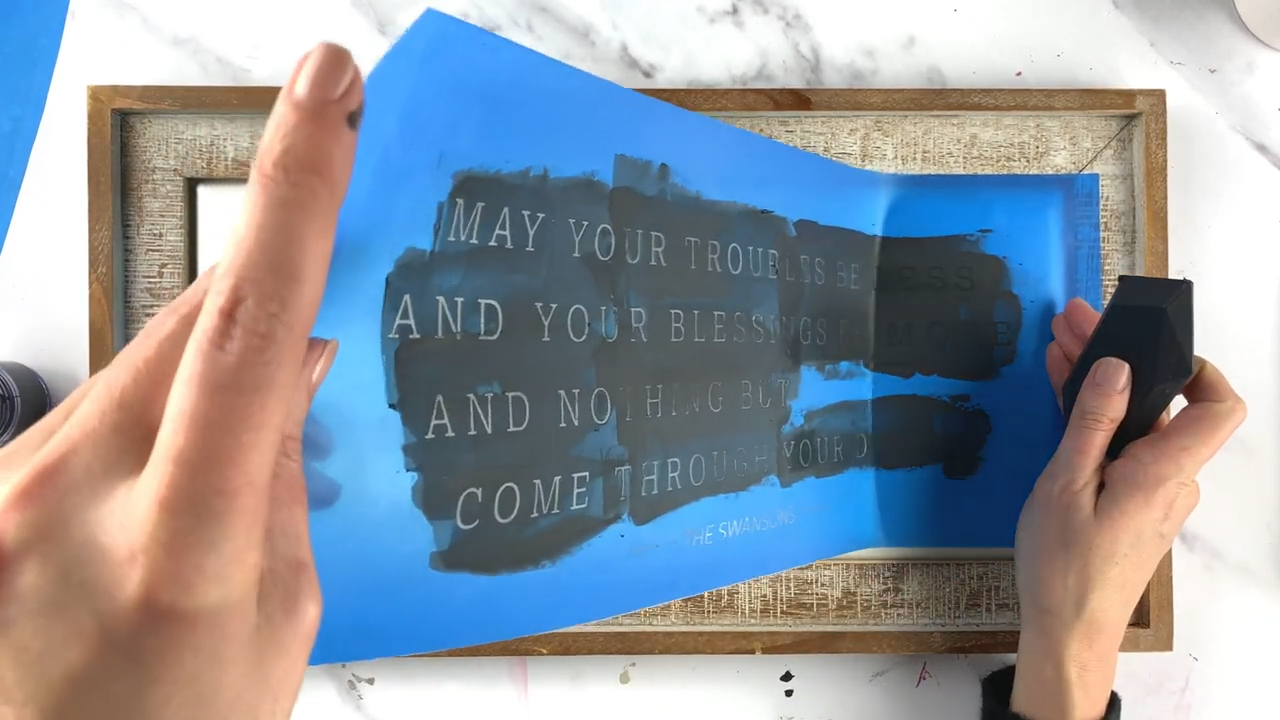
When I’m doing larger designs like this I like to work in sections. I just add chalk paste to the first section, squeegee it through the openings, then peel that section up. I continue doing that until the whole design is covered. Chalk paste dries very fast and I don't want to let it dry in the mesh openings. If it dries in the mesh openings before you lift up your stencil the paste will actually lift up with the mesh that's in the stencil and you don't want that to happen. I like to work quickly and lift as I go and that usually helps me avoid any chalk paste lifting up with my stencil.
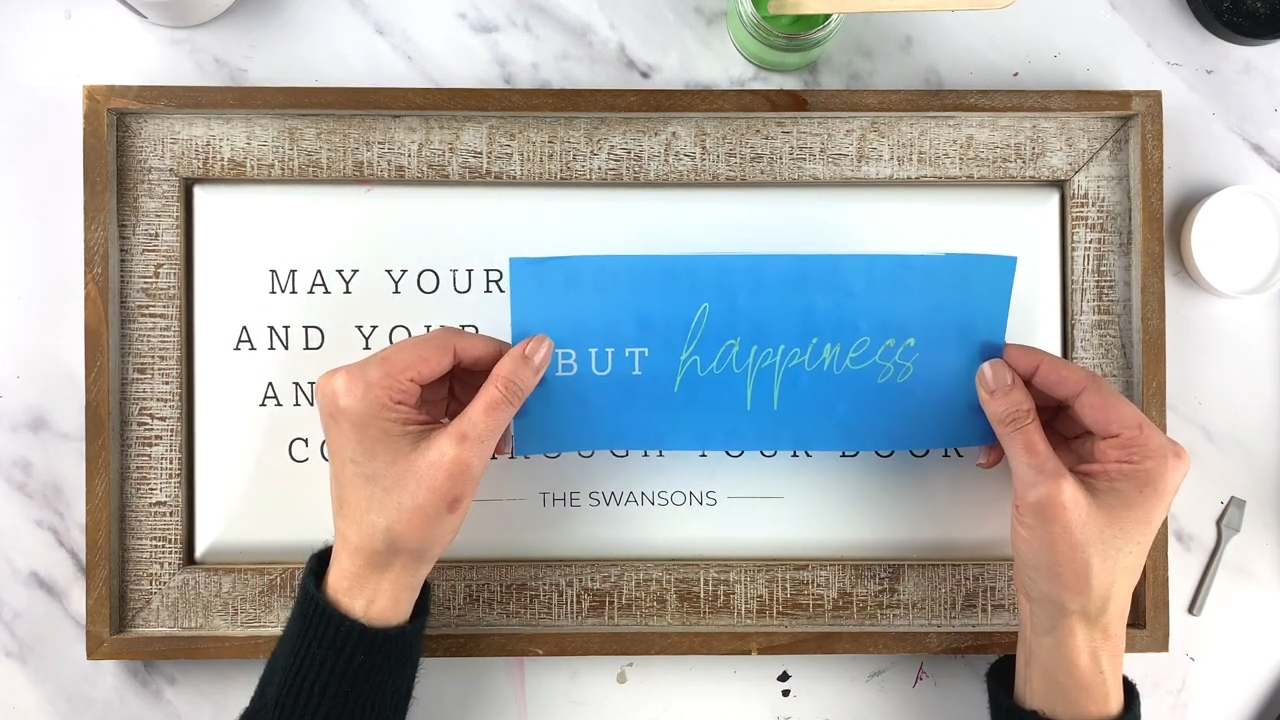
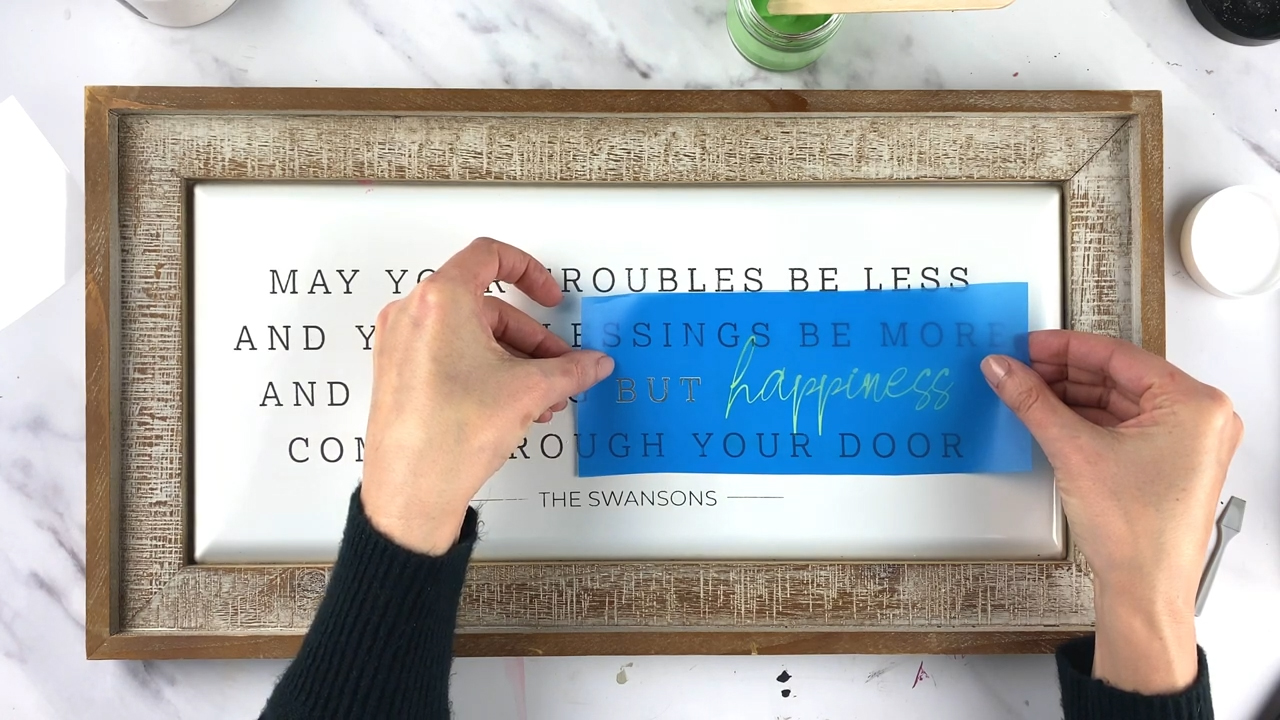
Now for the fun part. Here is my little tip when I want to stencil multiple colors. When you are setting up your artwork keep part of the design from your first color on the stencil for your second color. In my example, the word "but" is actually part of my black artwork, but I put it on the same stencil as the word "happiness" so that I would know exactly where to line up my second stencil. This trick helps me line up my two colors perfectly so I know exactly where my second color needs to go. This tip works really well to help with registration when you're doing multiple colors on two different stencils.
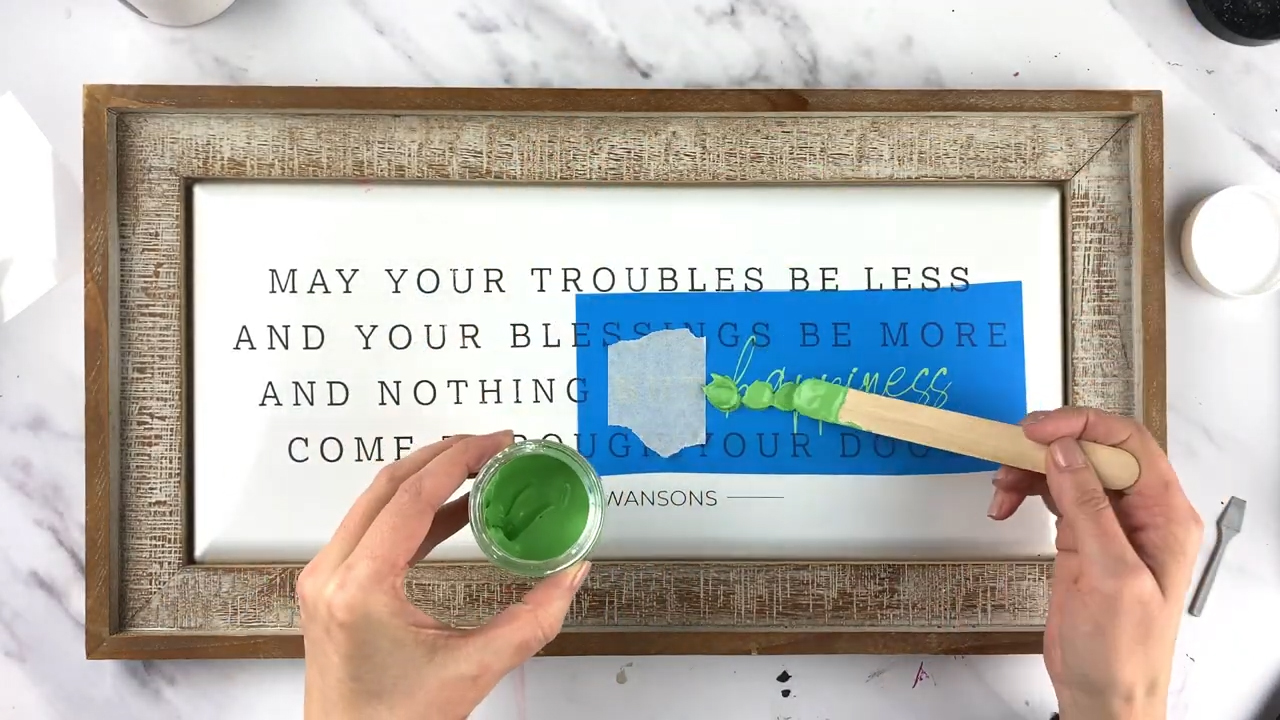
When stenciling your second color, you can either be really careful not to get paste over the registration artwork, or you can tape it off. For this project l used a small piece of masking tape to make sure that I did't get any green paste on the word "but".
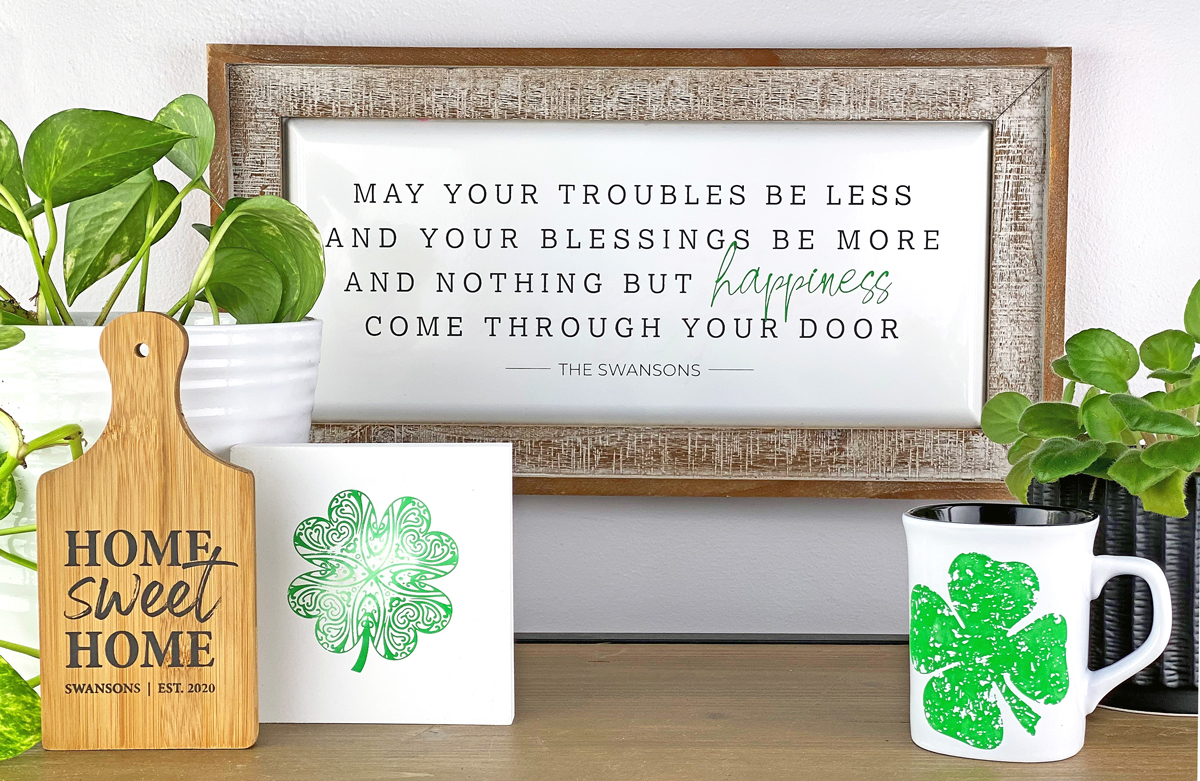
And that's it! The great thing about Ikonart is that the stencils are reusable. After you are done you just wash off the chalk paste and return them to the clear backer sheet or a Release Sheet. I've used this same metal sign to make a fall bucket list sign, Christmas sign, Valentine's Day sign, and now my St. Patrick’s Day sign. When I want to make a new sign I'll just wipe off the chalk paste and it will be ready for the next holiday. I will save these stencils and then next year I’ll be able to make this same exact St. Patrick’s Day sign all over again.
If you have any questions about Ikonart please contact us or join our Ikonart Crafters Facebook Group for more tips, tricks and troubleshooting help.