
Are you interested in screen printing multiple items efficiently? Screen printing multiple items in a row using a hinge frame setup can save you time and effort, especially when working with flat items like these folders. I have also used it to screen print napkins for my sister-in-law's baby shower and centerpiece mirrors for a friends wedding.
This method is a game changer! With the right tools and your custom Ikonart stencil, you can achieve consistent and professional results. In this tutorial, I will walk you through the process of screen printing multiple items in a row using a screen printing hinge setup.
How to Screen Print Multiple Items in a Row: A Step-by-Step Guide
Screen printing multiple items in a row using one Ikonart stencil isn't difficult, but remember, practice makes perfect! We always recommend having a few practice items on hand until you get a feel for the technique. Once you learn how to screen print using the hinge frame method you will be creating beautifully customized items for all sorts of occasions.
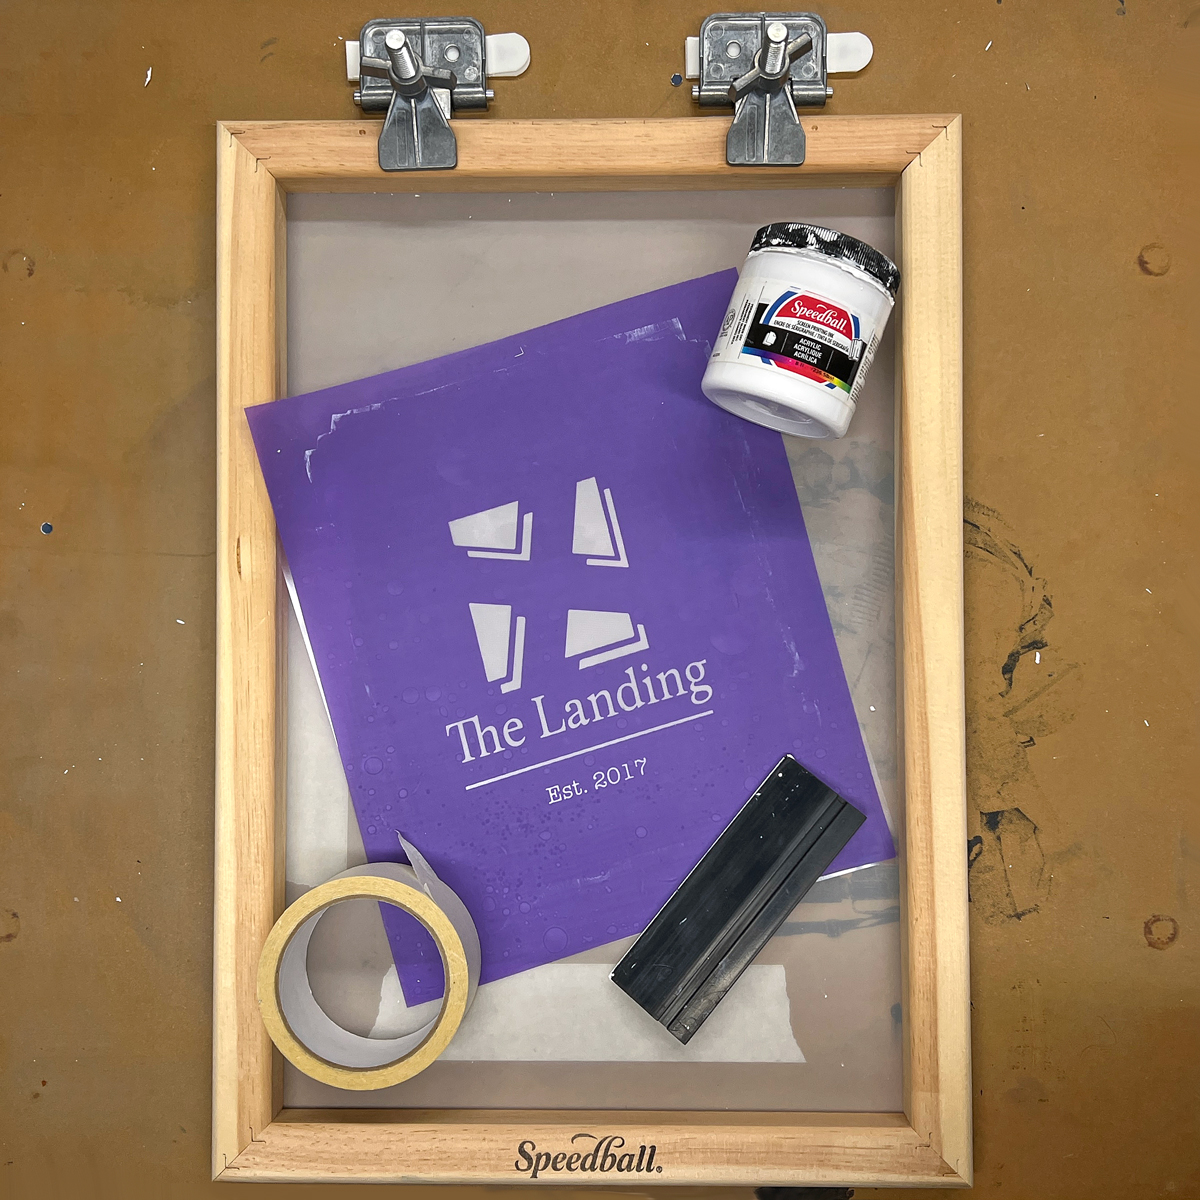
Tools and Supplies Needed:
Before we dive into the process, let's gather all the necessary tools and supplies:
- Butterfly Clamps: These are screen printing clamps, and you can find them online. You can attach them to a board using the screws they come with, or use command strips for a temporary solution.
- Screen Printing Frame: You'll need a screen printing frame. I used a Speedball 12x18 frame for the folders, but a smaller screen works as well. Your screen size will depend on how large your design is and what you feel comfortable with..
- Ikonart Stencil: Prepare your stencil in advance. I suggest using the purple Ikonart stencil film, which is stickier and sturdier than the blue film. Check out this tutorial, How To Make Your First Ikonart Stencil, if you need help making your stencil.
- Ink: I used Speedball Acrylic Screen Printing Ink for these matte folders. Your ink or paint choice will depend on what surface you are screen printing on, but you want to use something that won't dry out too quickly.
- Squeegee: Ideally you should use a squeegee that is big enough to cover your entire design. This will require less screen printing passes and will give you a cleaner print.
- Masking Tape: You'll need masking tape to secure the stencil to the screen printing frame and protect the ink from bleeding.
The Process:
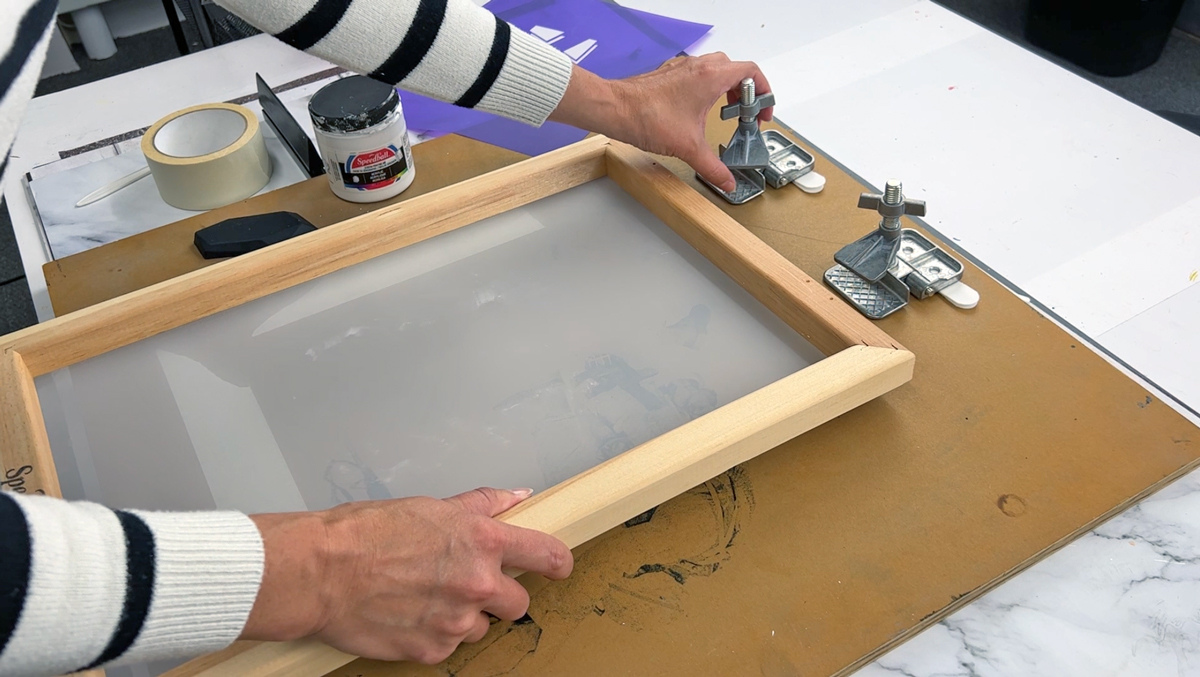
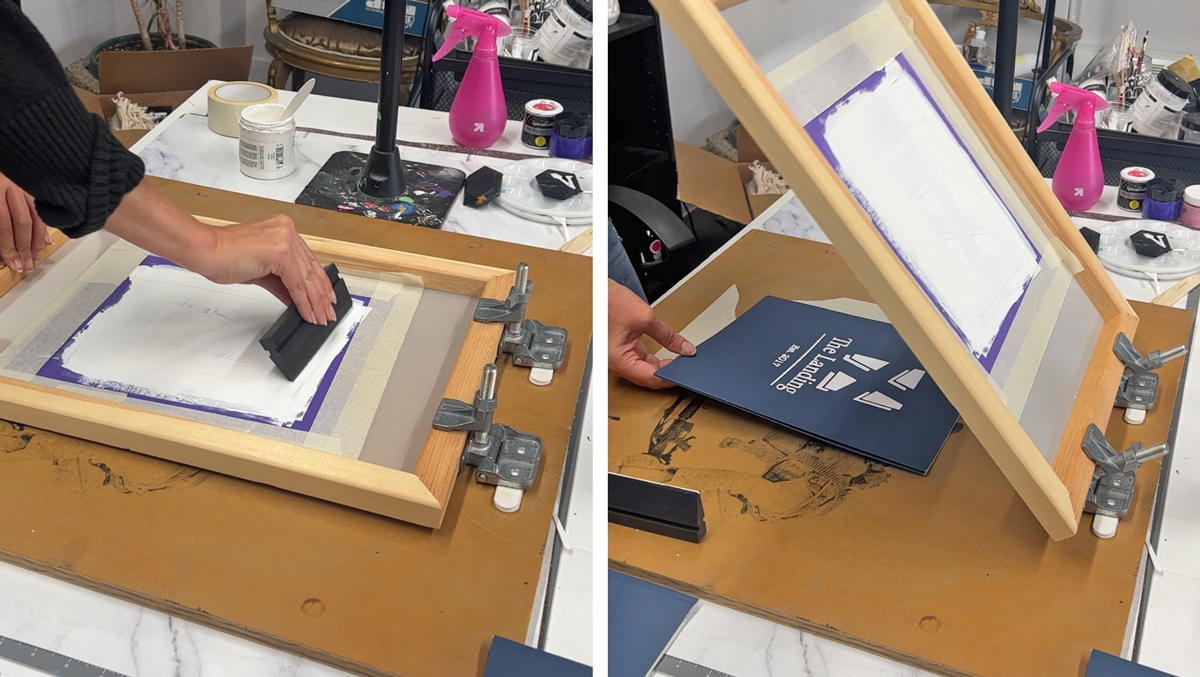
- Prepare Your Workspace: Set up your workspace with the screen printing hinge setup. Attach the butterfly clamps to a sturdy surface using screws or command strips, making sure they are sturdy.
- Secure the Frame: Place your screen printing frame into the butterfly clamps and tighten them to hold the frame securely.
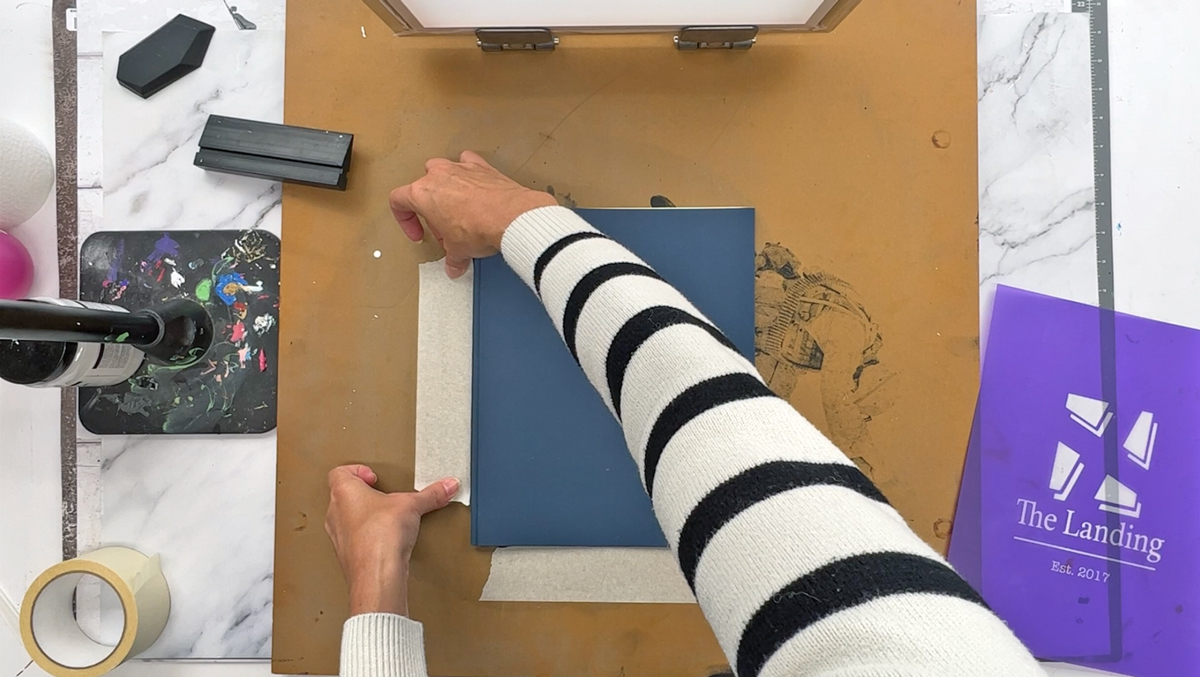
- Tape Off the Item: Before adding the stencil to the screen, place the item you want to print (e.g., a folder) on the work surface. Use tape to mark its position so that you can consistently align items in subsequent prints.
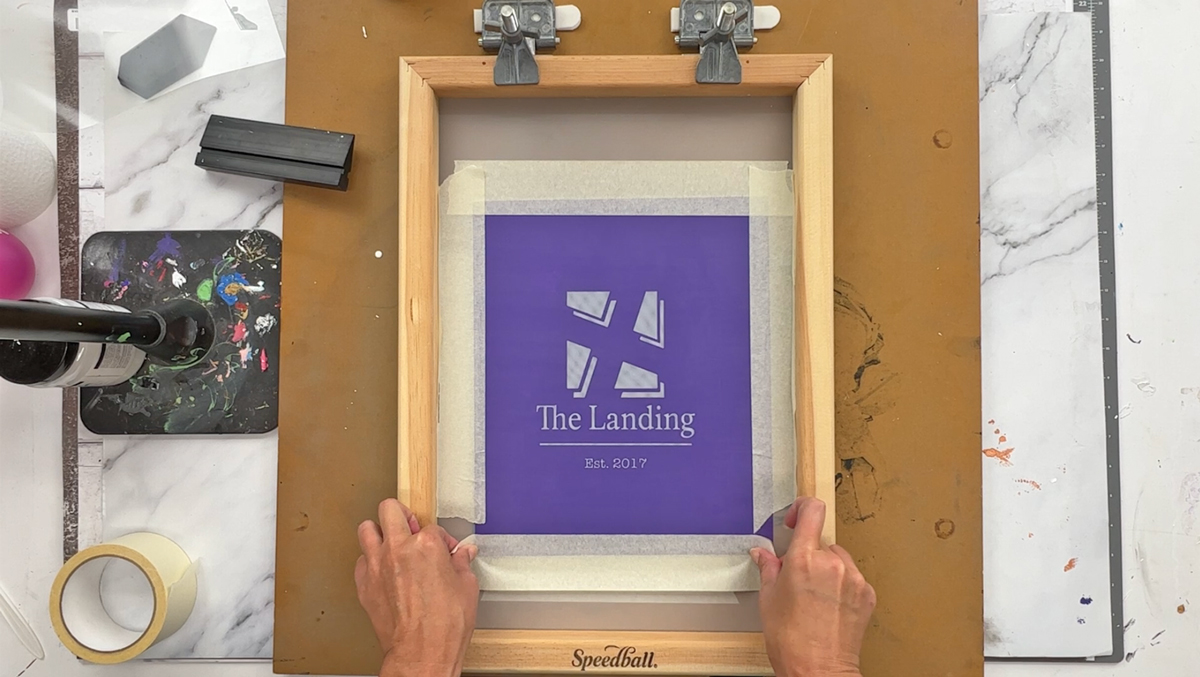
- Attach the Stencil: Take your prepared Ikonart stencil and line it up on the screen. Ensure there are no bubbles, as the stencil needs to adhere securely to the screen.
- Tape the Edges: To prevent ink from bleeding, tape off the edges of the stencil to protect the surrounding area and keep the stencil in place.
- Prepare for Printing: Add the acrylic ink to the stencil, flooding it first to ensure proper coverage. Lift and lower the screen to print the image onto the item.
- Repeat the Process: Place the next item in the marked position, lower the screen, and print. Repeat this process for all the items you wish to screen print.
- Cleaning the Screen: If you notice any ink on the back of the screen or any smearing, use a dry paper towel to wipe it off between prints. You do not need to remove the entire stencil and clean it. I did 50 folders in a row and I wiped the back of my screen three times.
- Stencil Reusability: After printing multiple items, you can still reuse the stencil. Clean it by using a soft bristle brush in warm water. Put the clear backer back on and dry the stencil. Once dry it is ready for future projects.
- Final Cleanup: Remove the frame from the clamps and rinse off any residual ink. You can also leave it in the clamps and wipe down with water and a paper towel.
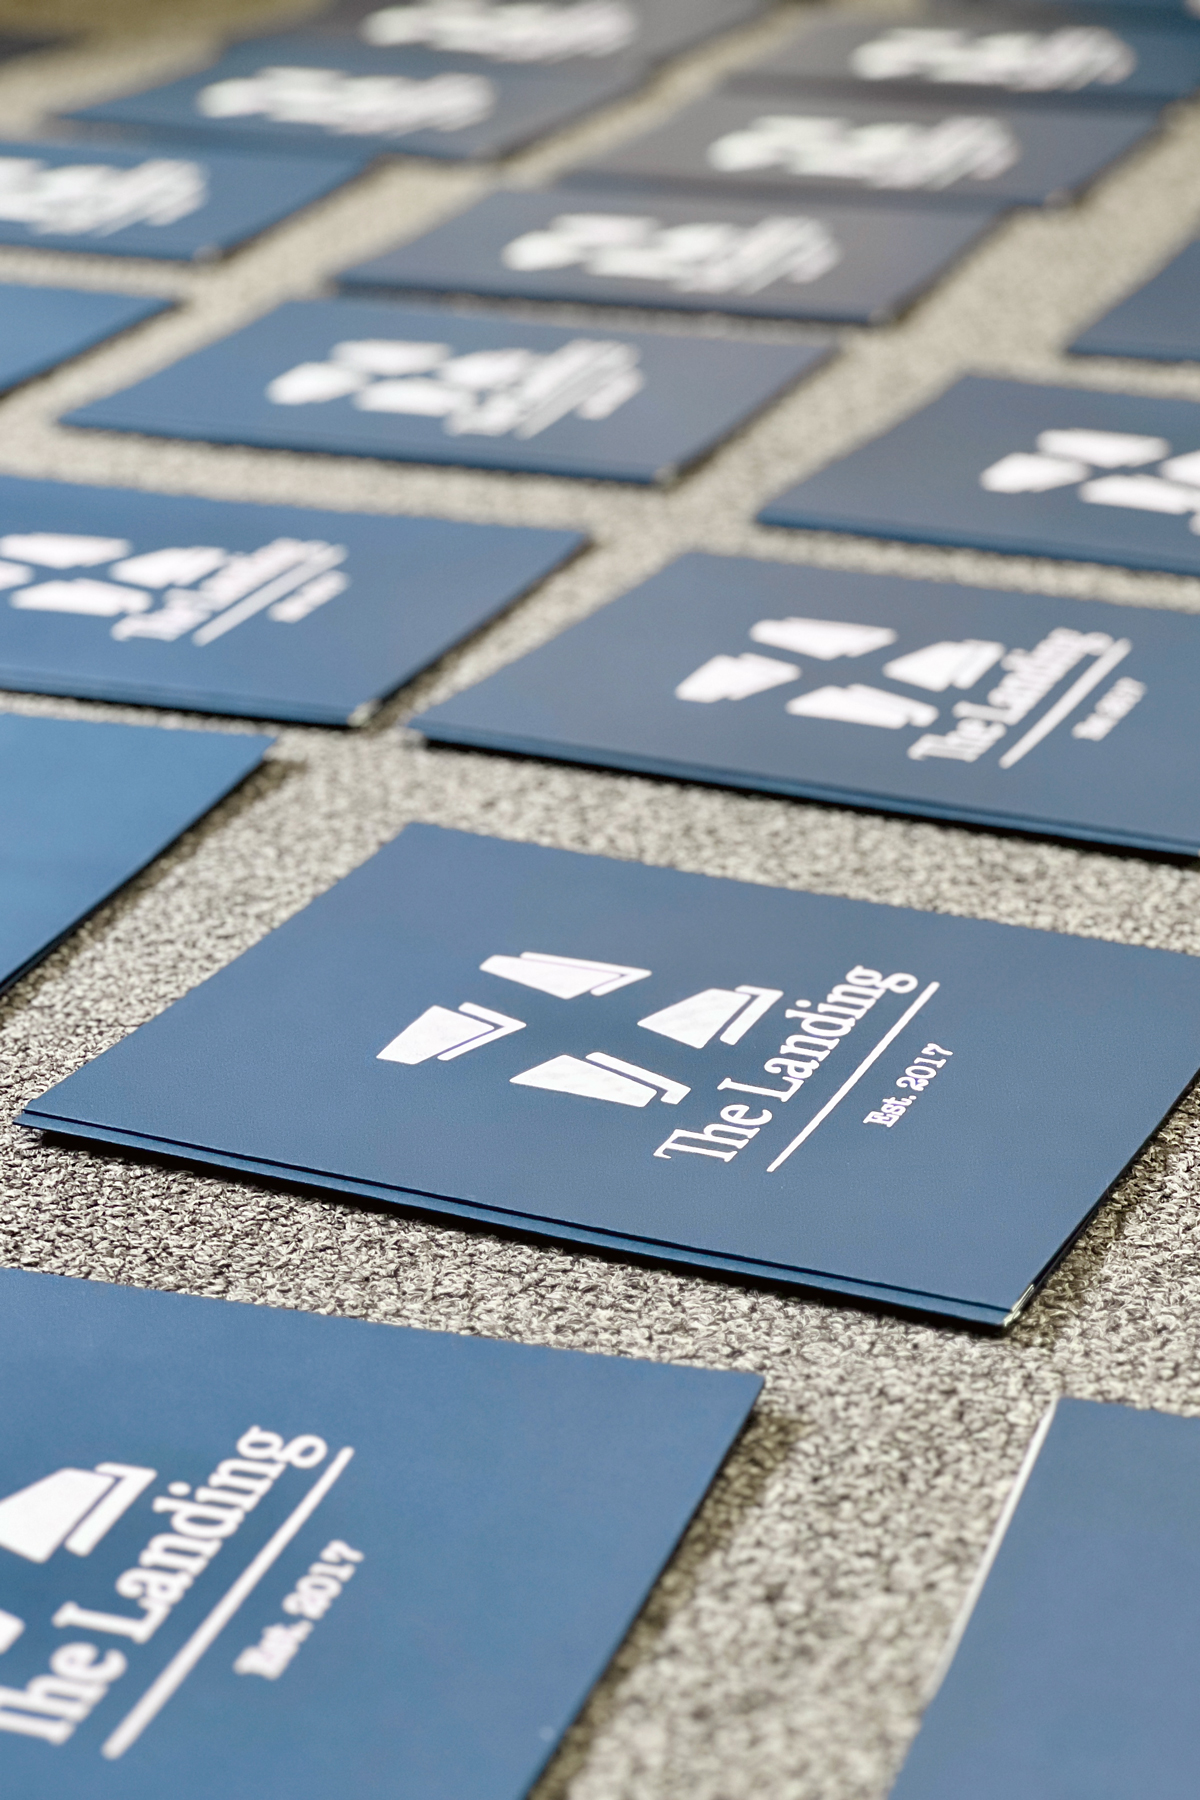
Mastering the art of screen printing multiple items in a row can be a game-changer for creative individuals and small businesses alike. This efficient and cost-effective technique opens up a world of possibilities for customization, from promotional materials like folders to special event items like wedding centerpieces. This method offers a versatile and time-saving solution for bringing your creative visions to life.
For more detailed tutorials on screen printing and stencil making, you can check out our other video tutorials. If you have any questions on how to use a hinged screen printing frame with Ikonart stencils, feel free to leave a comment on the video, make a post in our Ikonart Crafters Facebook Group, or contact us for assistance. Happy screen printing!