
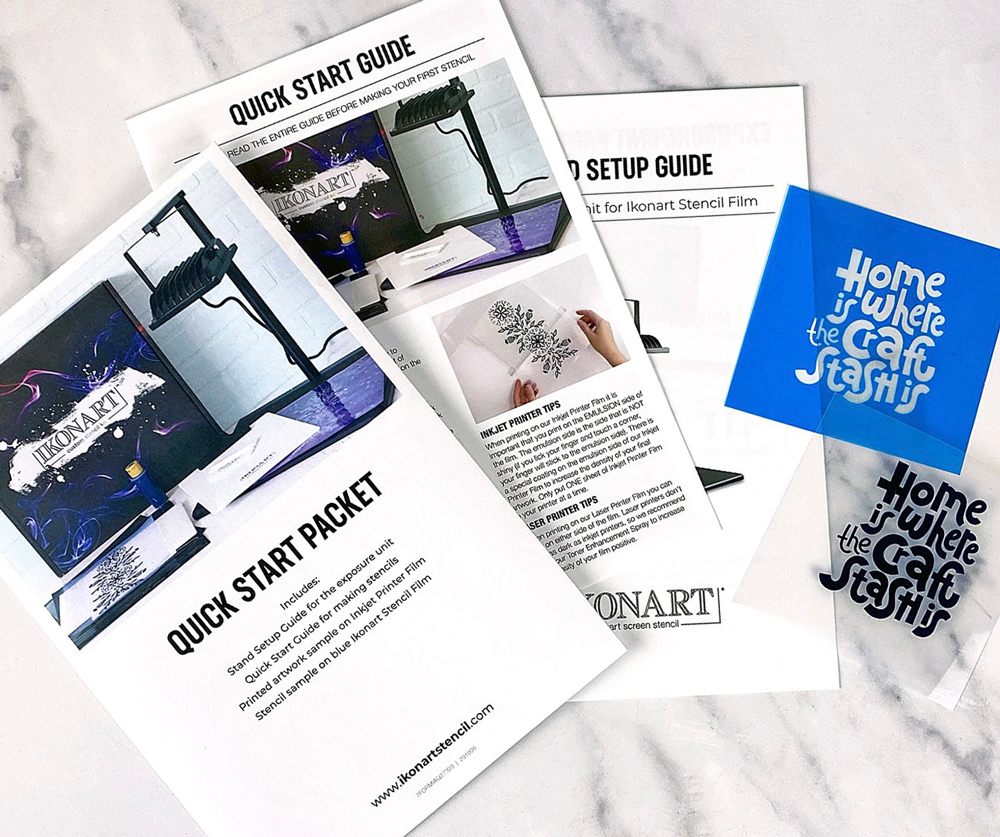
Are you feeling overwhelmed on where to start with your Ikonart Custom Stencil Kit? I recommend making your first stencil right away using the artwork sample that is included in the Quick Start Packet in every kit.
Once you make your first stencil with this sample and you see the magic happen during washout, you will feel inspired to find your own artwork, make your own stencils, and create your own custom projects. Follow along with me as I show you exactly how to make your first Ikonart stencil.
For more information and video tutorials on getting started with your Ikonart Custom Stencil Kit, check out our Ikonart 101 page.
How To Make Your First Ikonart Stencil
You've opened your Ikonart Kit, you've set up your Ikonart stand, now it's time to make your first Ikonart stencil. Today I'm going to show you how to quickly use the stencil sample that comes in the Ikonart Kit to make your first stencil.
Step 1: Artwork
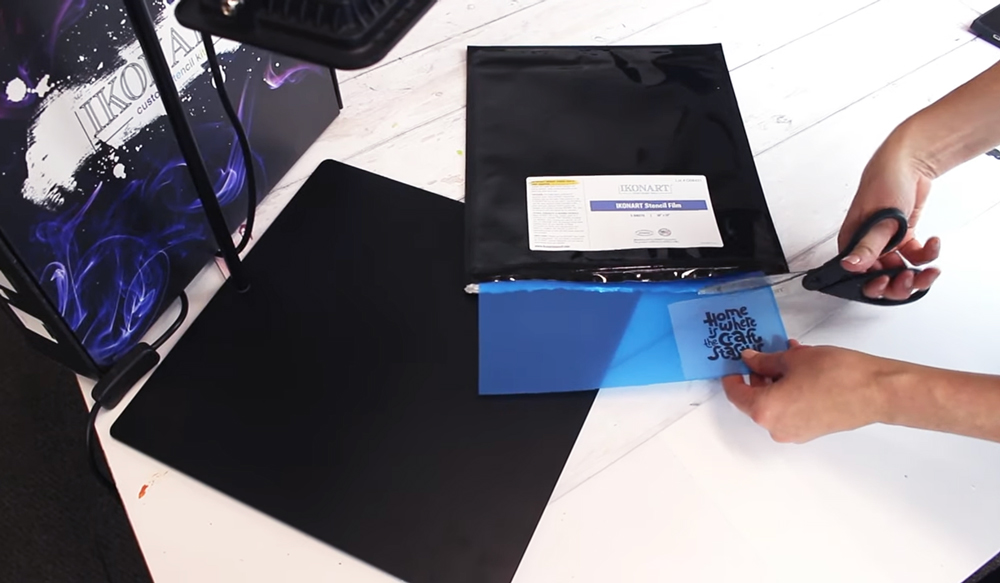
For this tutorial we will be using the pre-printed artwork that comes in the Ikonart Kit, but you can also use your own artwork. If you aren't sure how to get started with artwork, check out our Artwork FAQ page for tips and resources. If you are printing your own artwork, make sure to adjust your print settings so your printer prints as dark as possible. Compare your printed artwork with the printed artwork sample in the kit to see if yours printed dark enough. Check out our Inkjet Printer Tips or Laser Printer Tips blog posts for more information on printing.
Step 2: Expose
One of the great things about Ikonart is you don't need to use a whole sheet of stencil film at once. You can just cut the sheet of Ikonart Stencil Film or Ikonart Textile Film to size you need. So if you're using the artwork that comes in the kit to make your first stencil, you would just cut a little piece of stencil film and put the unused part back in the stencil bag to be used at another time.
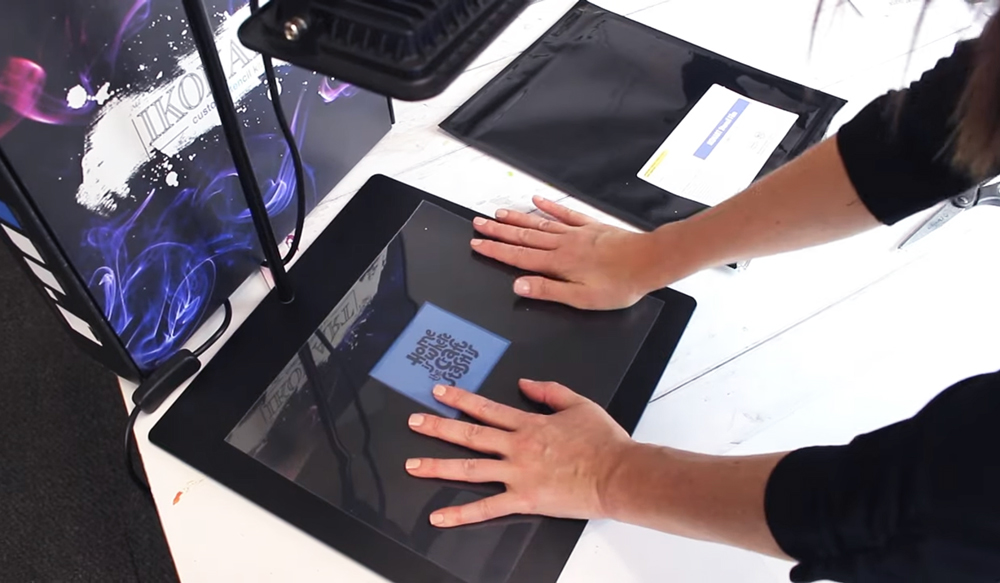
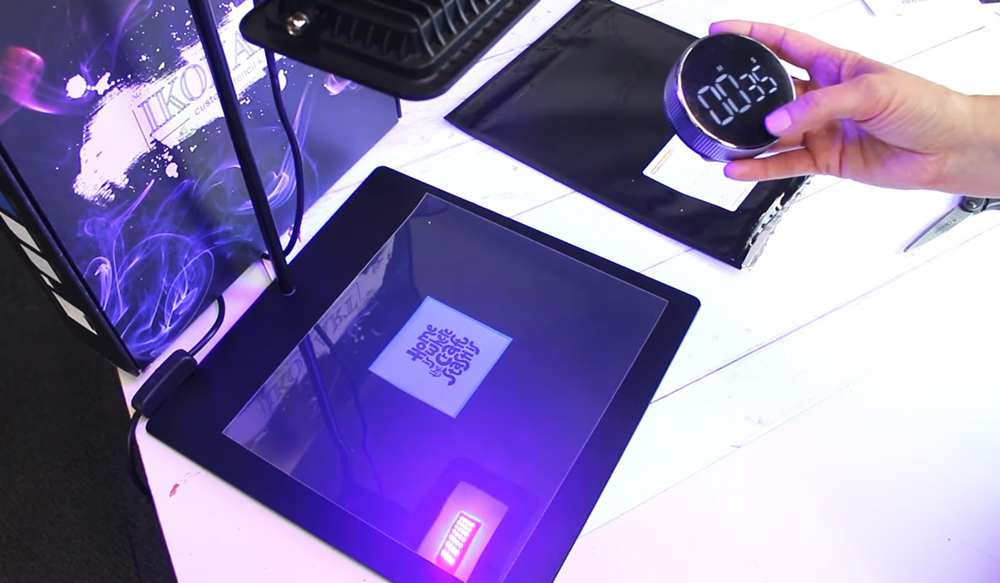
After you have your stencil film cut down to the size you need, just put the stencil film down on the base of the Ikonart exposure stand with the textured side up (shiny backer side down). Then put your artwork on top of the stencil film so you can read it. Next put one of the clear cover sheets on top of the artwork (two cover sheets come in each bag of stencil film). Rub down to remove any air or gaps between your artwork and stencil film. Then you just turn on the Ikonart exposure light and expose for 35 seconds (inkjet printer film) or 30 seconds (laser printer film).
Step 3: Washout
After your Ikonart stencil is exposed it's time to washout. I like to soak my stencil in lukewarm water for about 45 seconds before I do my washout. This helps to soften the emulsion and makes washout faster. You don't want to leave it soaking for too long because it can break down the stencil, but 45 seconds to a minute is fine.
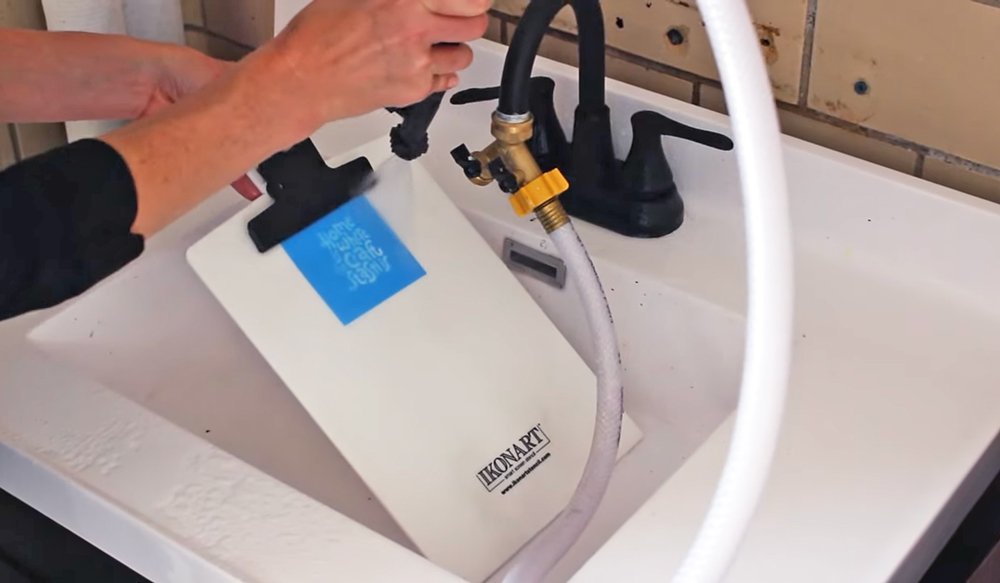
After the stencil soaks for a little bit attach it to the Ikonart clipboard and spray it out. You can use the TriggerJet Nozzle that we sell on our website or you can use your kitchen sink sprayer. If you don't have a high pressure sprayer you can also try a water pik or one of the nozzles from our Amazon Recommendations List. For a stencil this size washout shouldn't take you more than 30 seconds.
Step 4: Dry & Post-Expose
After your stencil is completely washed out blot off the excess water with a paper towel and leave it lay flat to dry. If you want to speed up the drying time you can try one of the drying techniques mentioned in our blog post, How To Dry Ikonart Stencils. After your stencil is completely dry just pop it back under the Ikonart exposure light for 2 minutes to post-expose. This will finish hardening the emulsion coating on the stencil and helps to make the stencil more durable.
And that's all there is to it. You made your first stencil. So exciting! It's so fun to watch the washout process, see the magic happen, and get excited about making your own stencils.
If you have any additional questions about making Ikonart stencils you can contact us directly anytime, or join our Ikonart Crafters Group on Facebook for more tips and examples from other Ikonart crafters. If you learned something here be sure to pin this post!