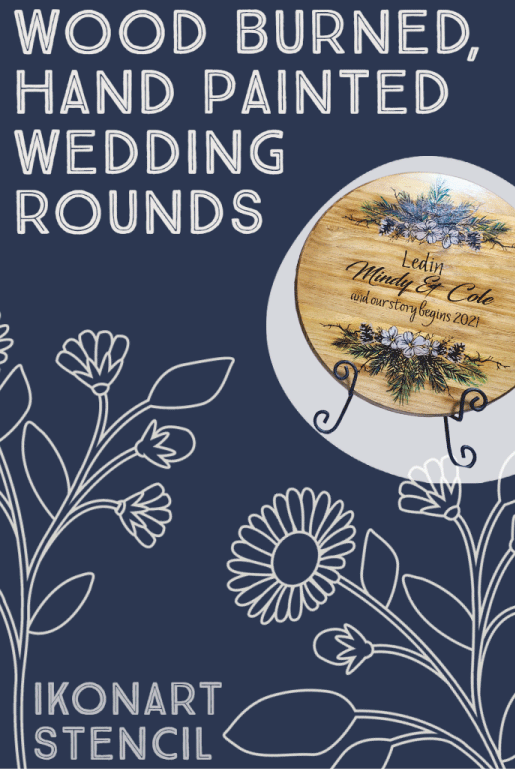
As we shift from summer wedding season to fall wedding season you may find yourself looking for something extra special and unique to give as a bridal shower gift or wedding gift. We like to combine a gift off the wedding registry with a personalized handmade gift, and these custom wood rounds from Ikonart Crafter Pat Adcock have us swooning.
Pat was kind enough to share her step-by-step process for creating these beautiful personalized and hand-painted wood rounds, which would make the perfect gift for any set of newlyweds on your calendar this year.
How To Make a Unique Wedding Gift with Ikonart
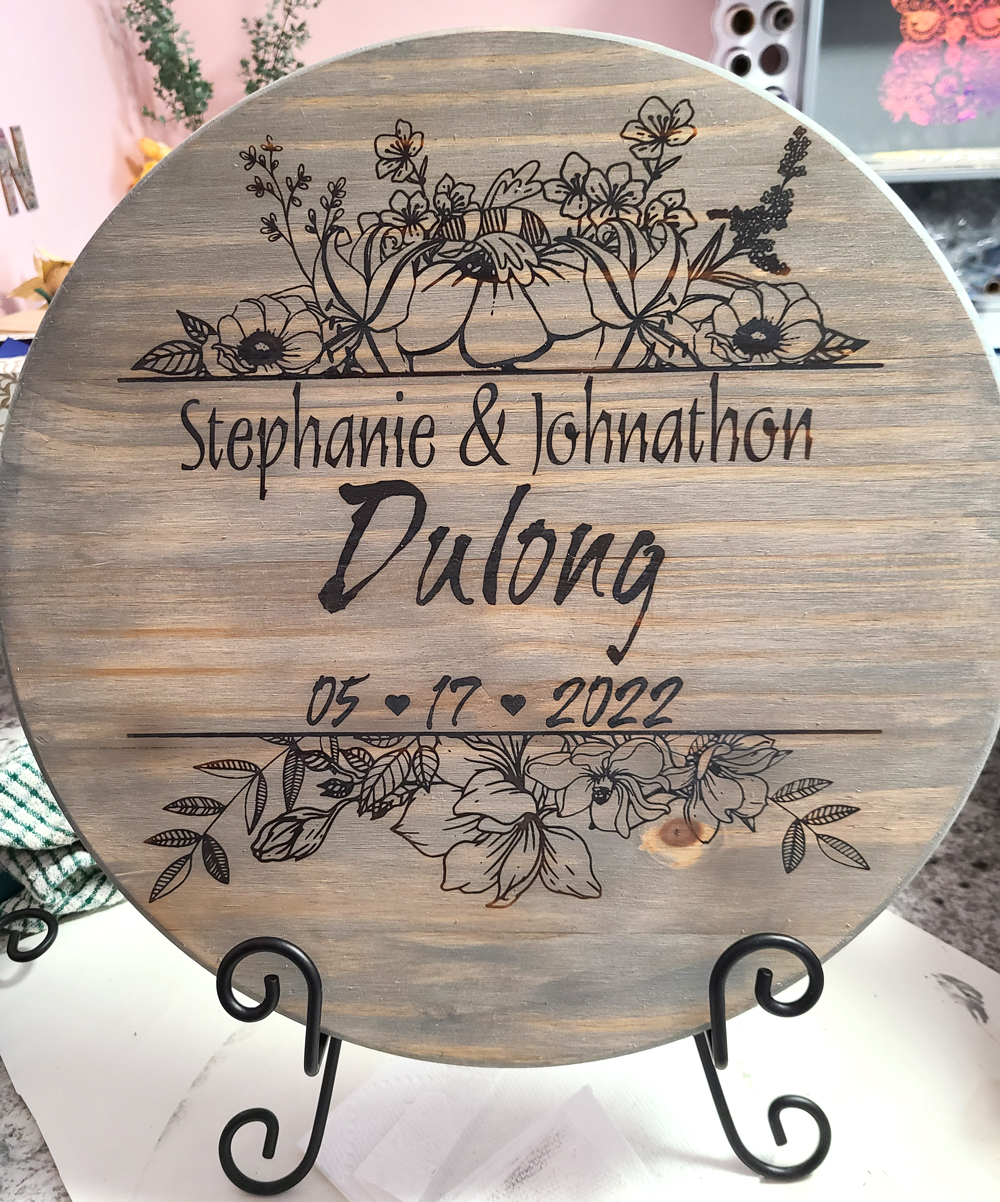
Hello my name is Pat. I have been creating these hand painted wood rounds for wedding gifts and they are a huge hit. First I use Torch Paste and a custom Ikonart Stencil to add my design, then I wood burn the design with my heat gun. After that I add color with diluted acrylic paint and seal with a clear coat. Keep reading to learn more about the products I use and my exact process.
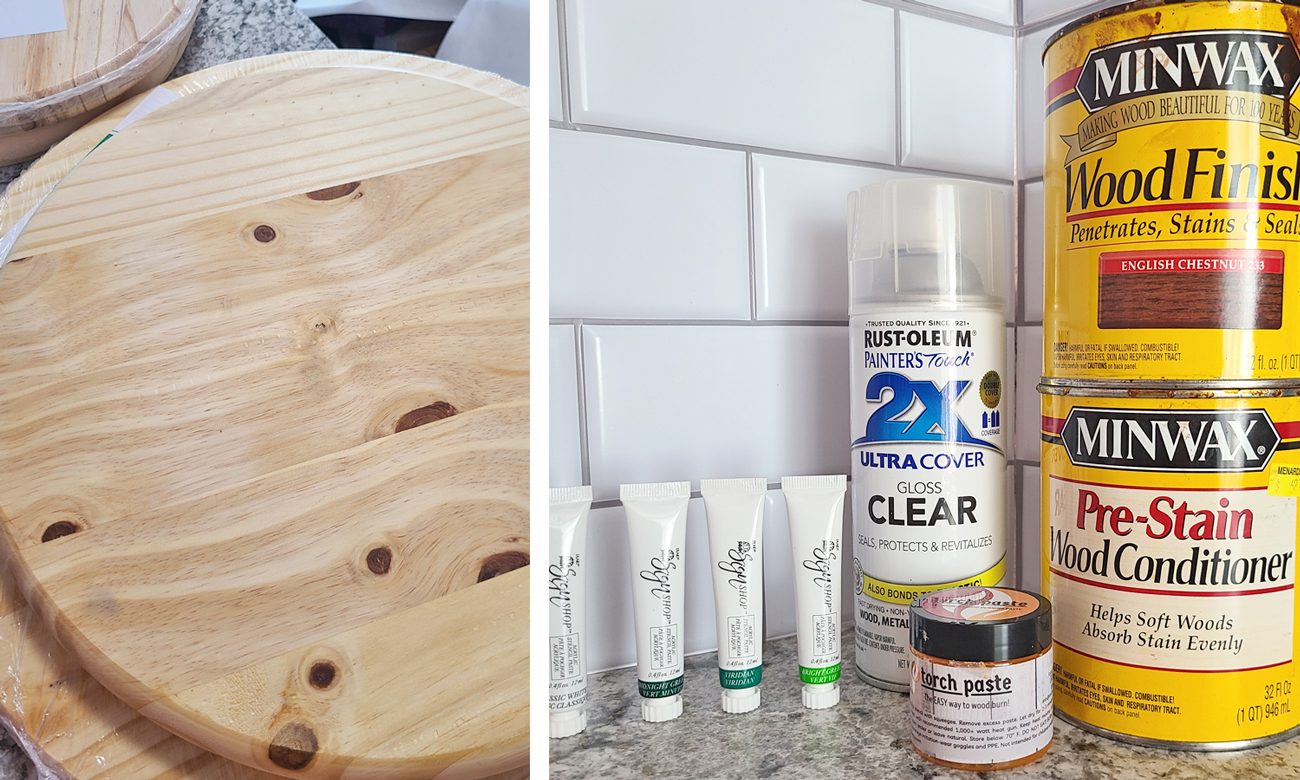
My Supplies List:
- 15” Pine Wood Round
- Ikonart Custom Stencil Kit
- Ikonart Blue Stencil Film (also comes in the kit)
- MinWax Pre-Stain Wood Conditioner
- MinWax Stain (I use the color English Chestnut)
- Acrylic paint or paste (I use FolkArt Sign Shop Acrylic Stencil Paste)
- Rust-Oleum 2X Gloss Clear Coat Spray
- Torch Paste
- Fine grit sandpaper (220 grit or more)
- Lint cloth
- Squeegee
- Heat Gun
- Rag or Scrap Fabric (for applying stain)
- Paint of choice (for this one I used white and 3 different shades of green)
- Wall hook/Stand to display
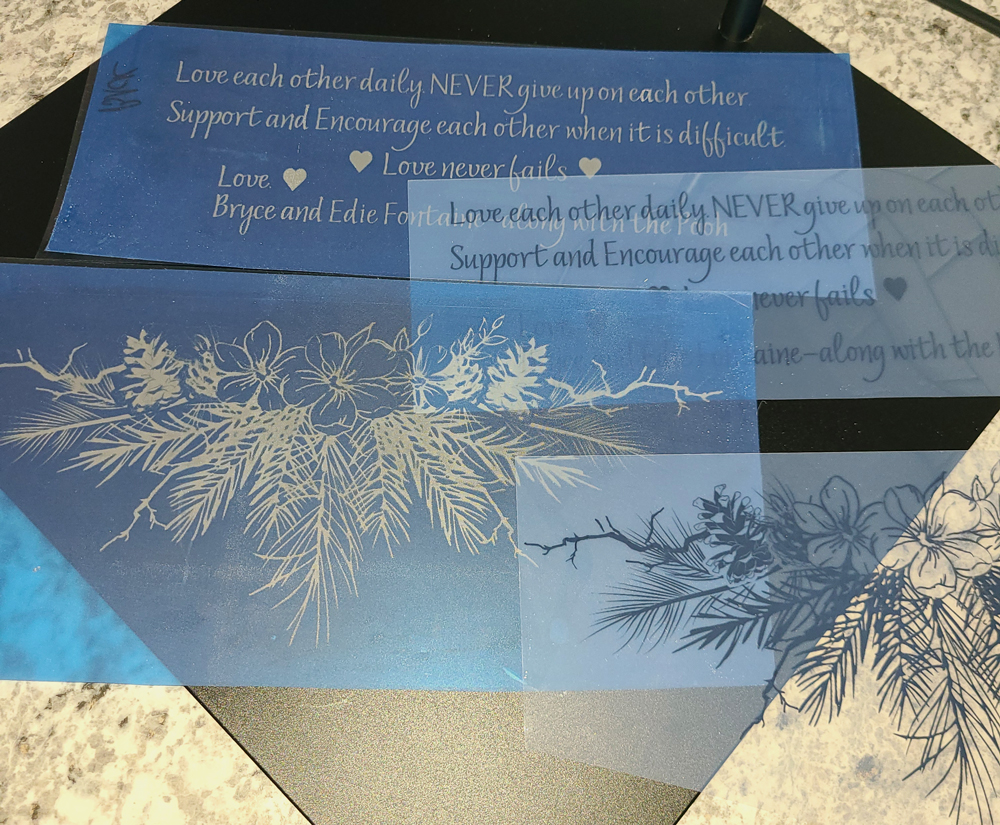
1. Create Your Stencil
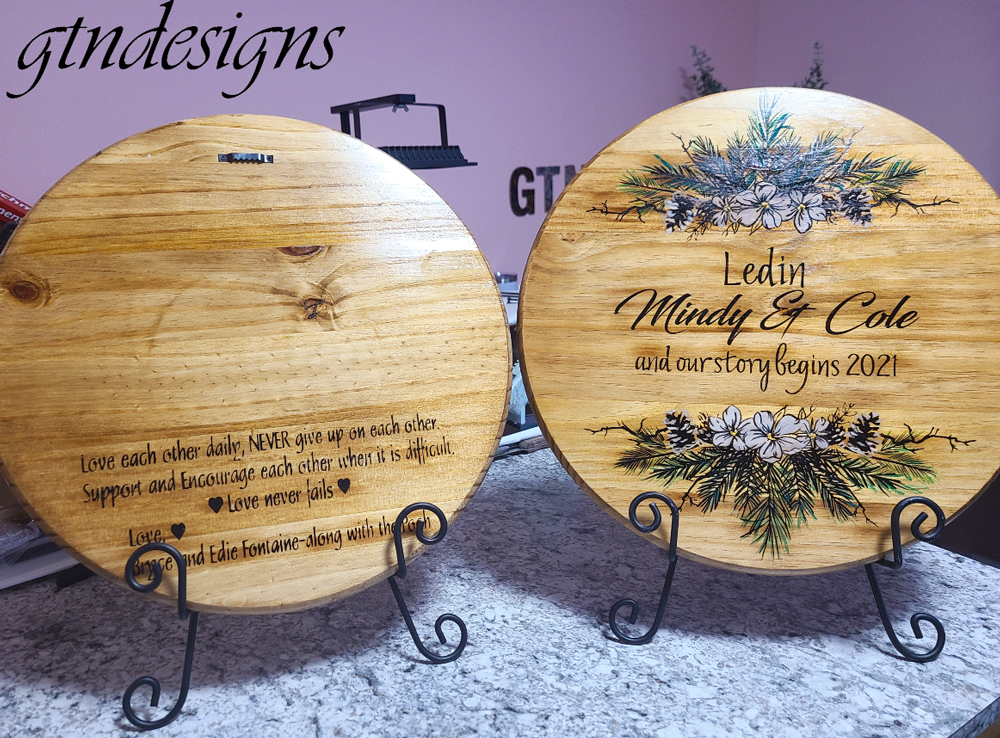
After designing my image on my computer, I print it out onto the Ikonart Printer Film and used my Ikonart Stencil Kit to expose my design onto my blue Ikonart Stencil Film. To make my Ikonart stencils I follow the steps from their Quick Start User Guide which comes in the kit. For this project I made a total of three stencils - one stencil of the greenery and flowers, one of the couple's names, and a third with a personalized message for the back side.
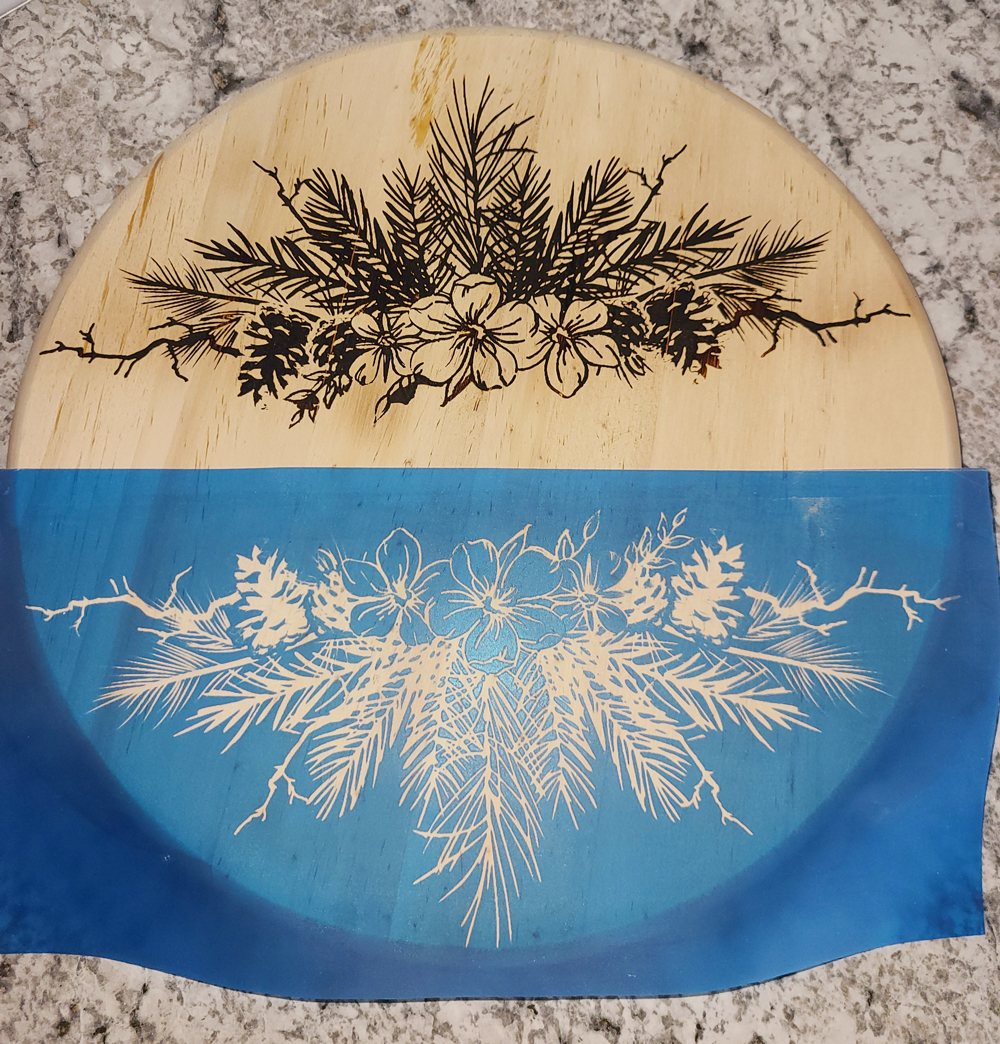
2. Wood Burn with Torch Paste
To prep my wood round for Torch Paste I give the surface of the wood a light sanding with a fine grit sandpaper. After it is sanded I wipe down the surface with a lint-free cloth to be sure I've removed any and all dust. I am then ready to apply my stencil to wood and spread the Torch Paste gel across my stencil. I use a squeegee to ensure the Torch Paste makes it into all of my mesh openings in a smooth, even layer.
After removing my stencil I'm ready to apply heat to the surface with my heat gun and watch the magic! I did each of the three sections on the front of the round separately so that I didn't smudge any of it. Once the front side was finished I flipped over my round and repeated the process once more for the personal note stencil on the back.
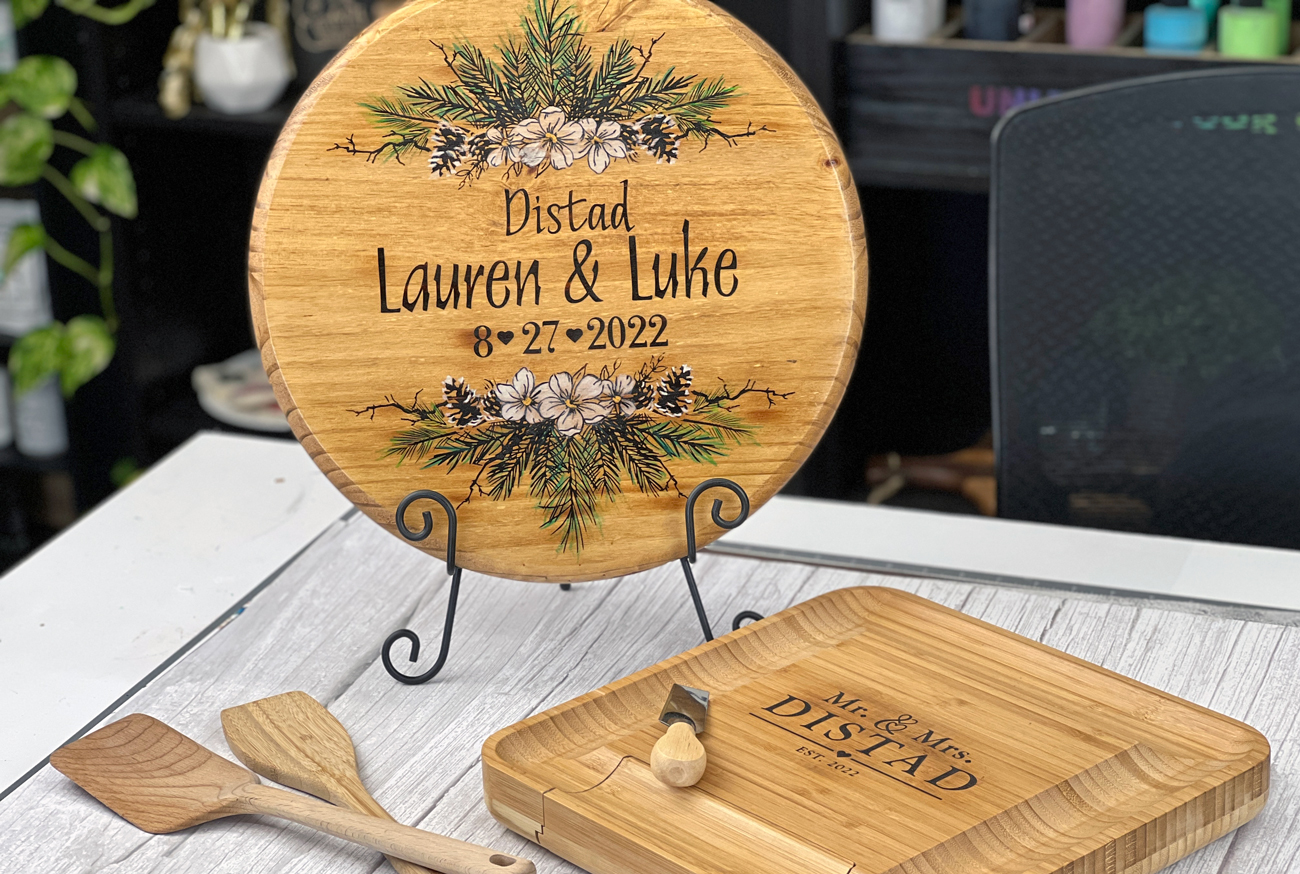
WATCH VIDEO: For a detailed video on how to wood burn using Torch Paste, check out this Torch Paste tutorial video that Fawn shared in the Ikonart Crafters Facebook Group where she wood burned a matching wedding charcuterie board.
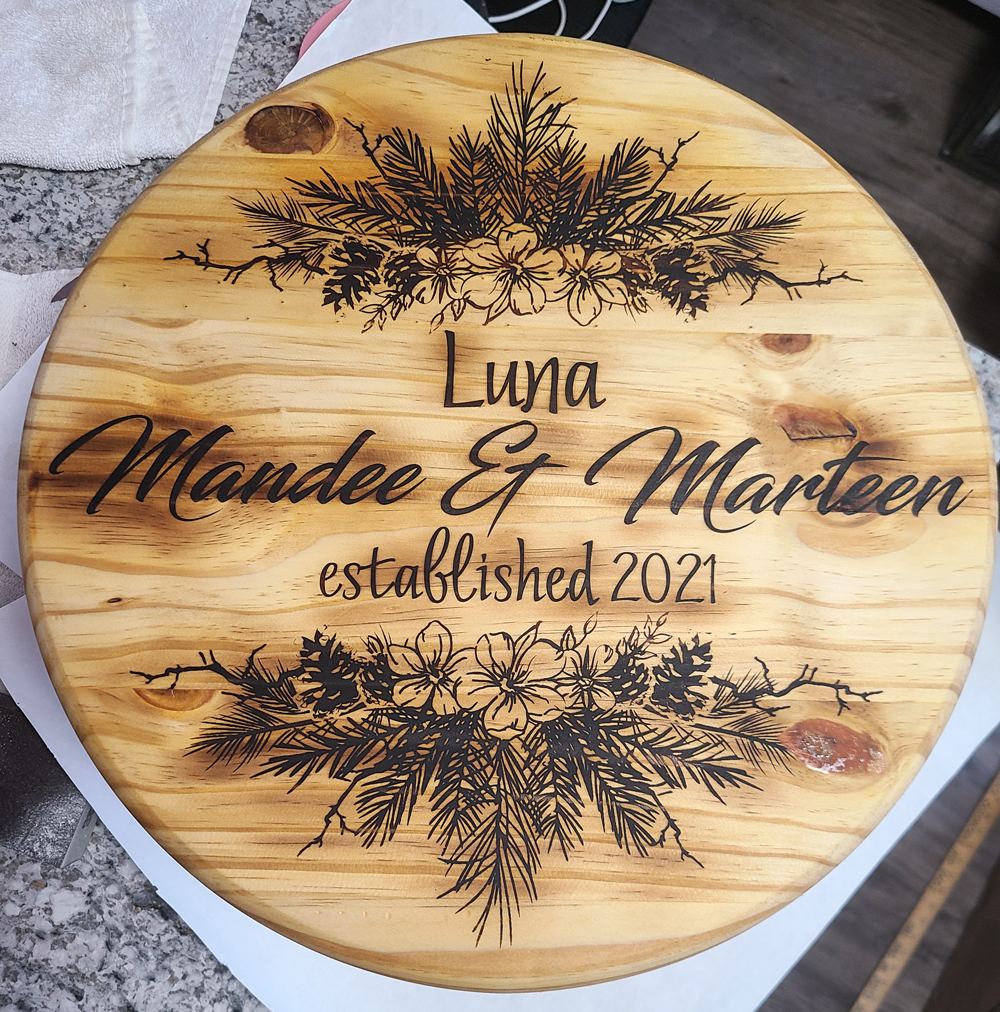
3. Stain The Wood
Once all my images and text were burned into the wood I wiped the wood down thoroughly with my cloth to remove any excess char from the surface. Then I applied MinWax Pre-Stain Conditioner over the whole round and left it to dry overnight. Next I applied MinWax Stain in the shade English Chestnut and rubbed it into the wood using a rag. I let this dry overnight as well.
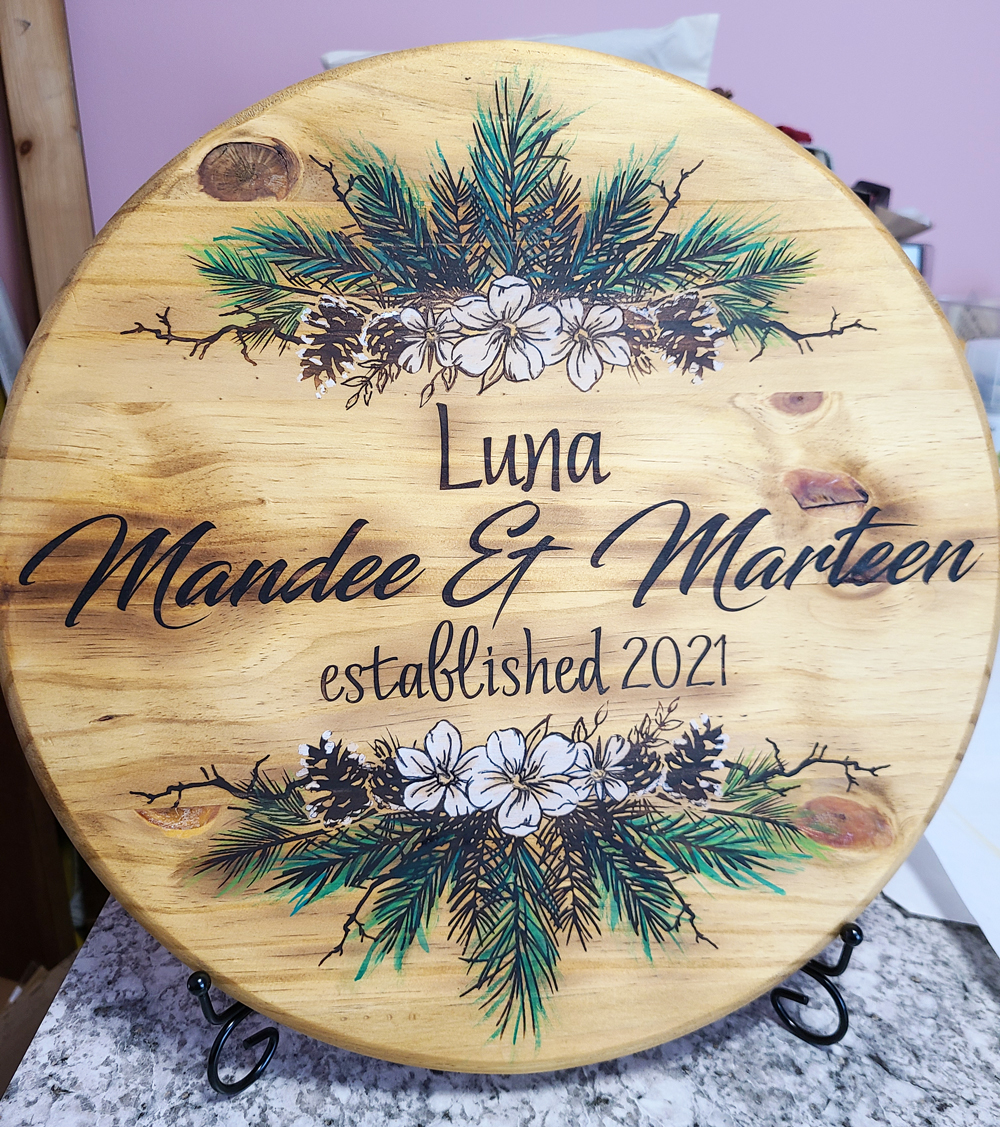
4. Hand Paint Your Wood Burned Design
To make the greenery and flowers pop, I diluted some paint with water little-by-little until I achieved my desired consistency. For the wood round pictured above I used FolkArt's Sign Shop Acrylic Stencil Paste in white and three different shades of green. I simply filled in my wood burned design as I saw fit. No need to be too careful with your lines, that's the beauty of the style!
5. Clear Coat & Add Hardware To Finish
Once the paint has dried down completely, I sprayed the whole round in a light coat of Rust-Oleum 2X Gloss Clear Coat Spray and let that dry for a few hours. Once dry, I went in with my fine sandpaper and lightly sanded the surface once more, wiping it down with my lint cloth, and then applied one more layer of that clear coat spray.
Once the clear coats are completely dry I like to apply a wall hanger to the back side as well as include a stand (I find mine at Hobby Lobby) so that my customer can choose how they would like the piece displayed.
Here are two more wood rounds that I have created using this same technique. The top one is a board that I made for Ikonart and they wood burned a matching charcuterie board, and the bottom one is one that I made using a grey stain with no color added. This was a special customer request to match their specific home decor style. I love playing around with different color combinations, stain color options and designs to match each customers personal style. So many possibilities!
To see more of my creations, join my GtnDesigns group on Facebook. I hope this tutorial inspires you to create your own custom wood round for yourself, your family or friends.
Happy Crafting!
Pat Adcock
For more project ideas, troubleshooting support, and to share your Ikonart creations, join our community of crafters on Facebook. If you have any questions about our Ikonart Stencil Films or the Ikonart Custom Stencil Kit, please contact us.