UPDATE: In August of 2022 Gravit Designer was renamed to Corel Vector. All features work the same, just a different name.
Are you overwhelmed when it comes to creating artwork for your Ikonart stencils? We understand. Getting started with artwork creation can feel intimidating, but we don't want that to stop you from creating your own reusable stencils using your Ikonart Custom Stencil Kit. We are here to help!
We put together this step-by-step tutorial for beginners who have never created artwork before. I cover how to download free designs from our Free Artwork page, how to open your file and manipulate the size, how to add your own text, and how to print your designs. Just take it one step at a time and you will be creating stencils in no time!
If you prefer to watch your tutorials rather than read them, we do have this full tutorial on YouTube as well:
>> WATCH VIDEO: Ikonart Project Start to Finish - Artwork & Stencil Tutorial
Benefits of Gravit Designer To Create Artwork
There are a lot of different artwork programs that you can use to create your own digital art, and we cover some of them on our Ikonart Artwork FAQ page, but for the beginner we recommend Corel Vector (previously Gravit Designer). Here are some of the benefits:
- Easy-to-use - the interface is intuitive without a lot of extra buttons that you don't need
- Free - Gravit is completely free to use and the free version works great for the majority of what you will need to create Ikonart stencils (there is a paid version if you want to upgrade)
- Nothing to download - Gravit can be used directly in a browser window so you don't have to download a program to your computer
- Download optional - but if you want to download the program, you certainly can!
- Print - you can print your designs directly from Gravit
How To Use Gravit Designer for Ikonart Stencils
One of our favorite design programs for beginners is Gravit Designer because the streamlined interface is intuitive and clutter-free. You can also hover over the different tools and a box will popup for tips on how or why to use that tool. This all creates an easier experience for beginners who have not created artwork before. Create a free account before starting the tutorial.
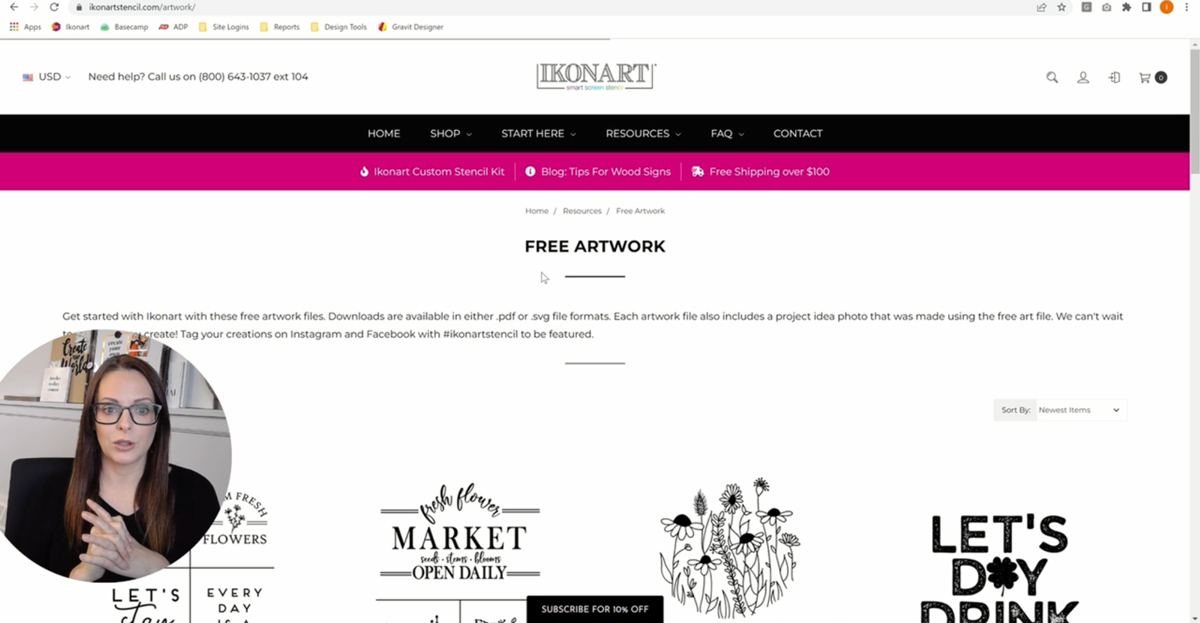
1. Download Free SVG Artwork Files (optional)
If you want to jump right into making your own text designs you can skip this step, but we find if you are just getting started it is easier to download one of our free pre-made SVGs as a starting off point. For today's tutorial we are using this free hand drawn Flower SVG. Each of our free designs includes a link to the free svg in the description. Click on the "Download svg" link. The file will open in a new window. Right click on the image file and save to your desktop.
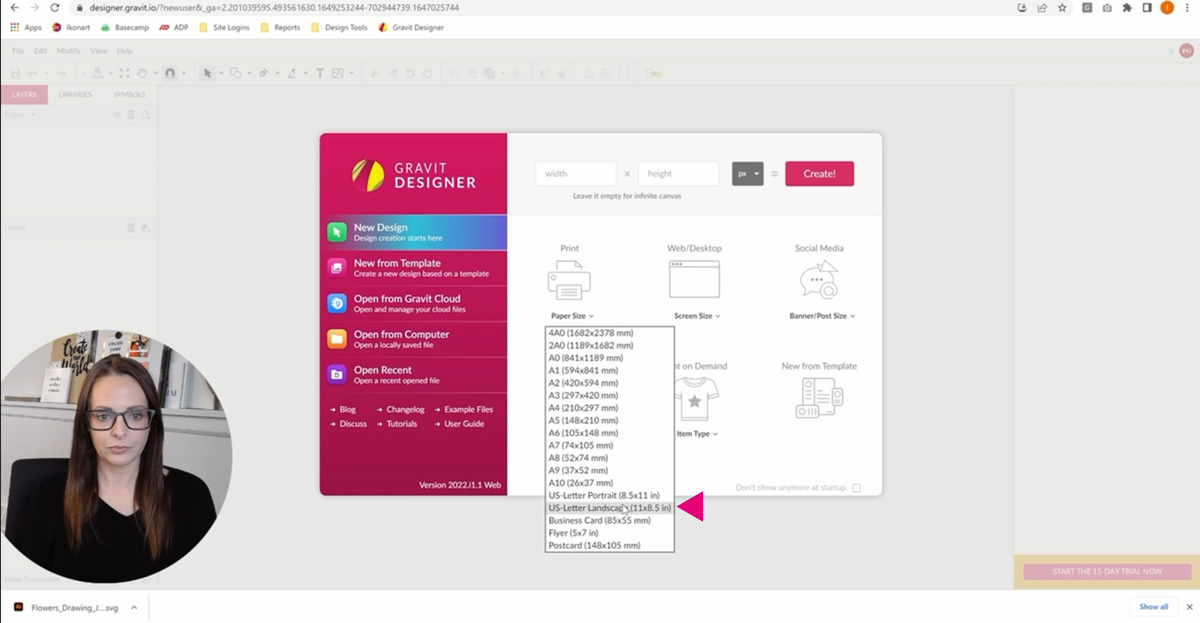
2. Setup Your Page Size in Gravit
Once you have downloaded the SVG file to your desktop you can login to your free Gravit account in a browser window. You should see the screen above. Select "Paper Size" then select "US Letter" from the dropdown menu (landscape or portrait mode, depending on your artwork).
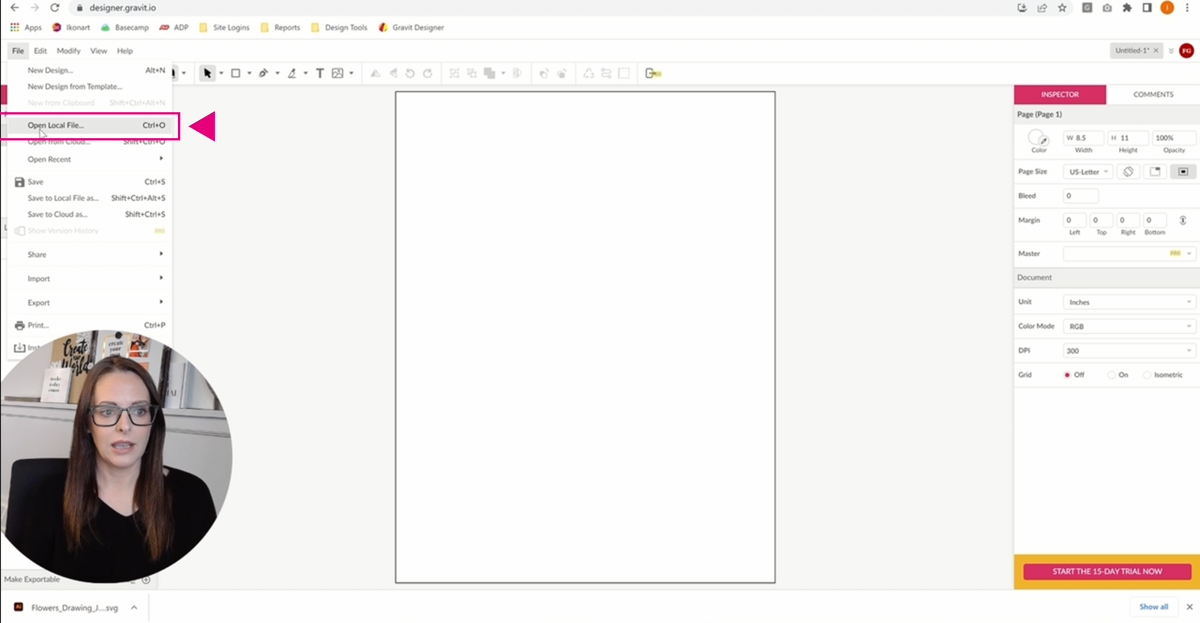
3. Open Your SVG in Gravit
At this point your screen should appear like it does above. Click "File" and then "Open Local File", then find and select the SVG you downloaded in step 1.
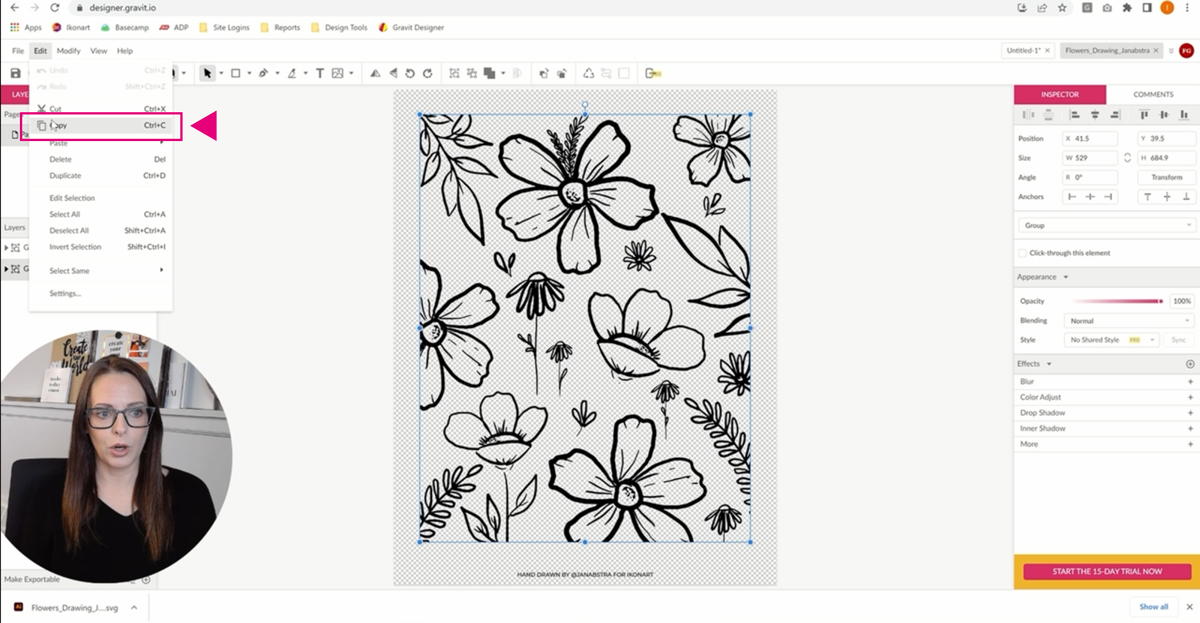
4. Copy Your Artwork Design
Your SVG file will open in a new document. Select the part of the design that you want to use and click "Edit" then "Copy (or Ctrl+C).
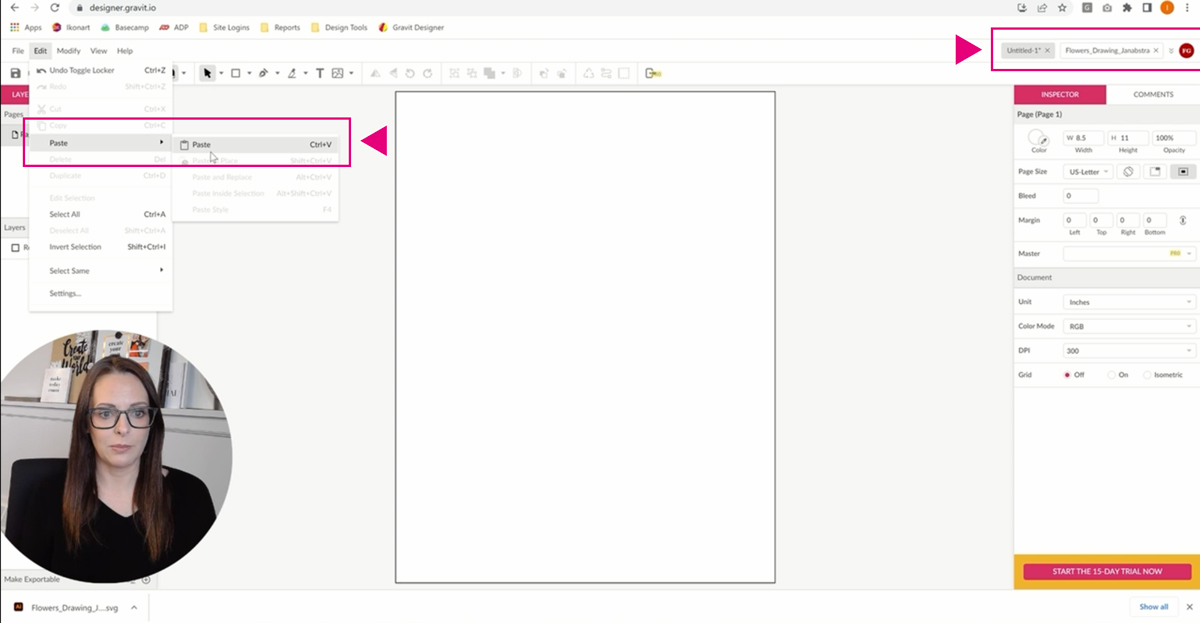
5. Paste Your Design In New Gravit Document
In the upper right part of the toolbar next to your account circle you will see your different document windows. You should see the name of the SVG file that you opened from your desktop and also an untitled-1 document. The untitled document is the US-Letter document that we created when we opened Gravit. Select that document then go to "Edit" then "Paste" (or Ctrl+V) to paste in the design that you copied.
NOTE: I like to always copy my downloaded SVGs into a new file that I create so that I know the document size and how I set it up. This is personal preference, but if you are having issues with your images getting cut off when you print this may be something for you to try. This is also helpful if you are opening multiple SVG files and want to combine them all onto one page.
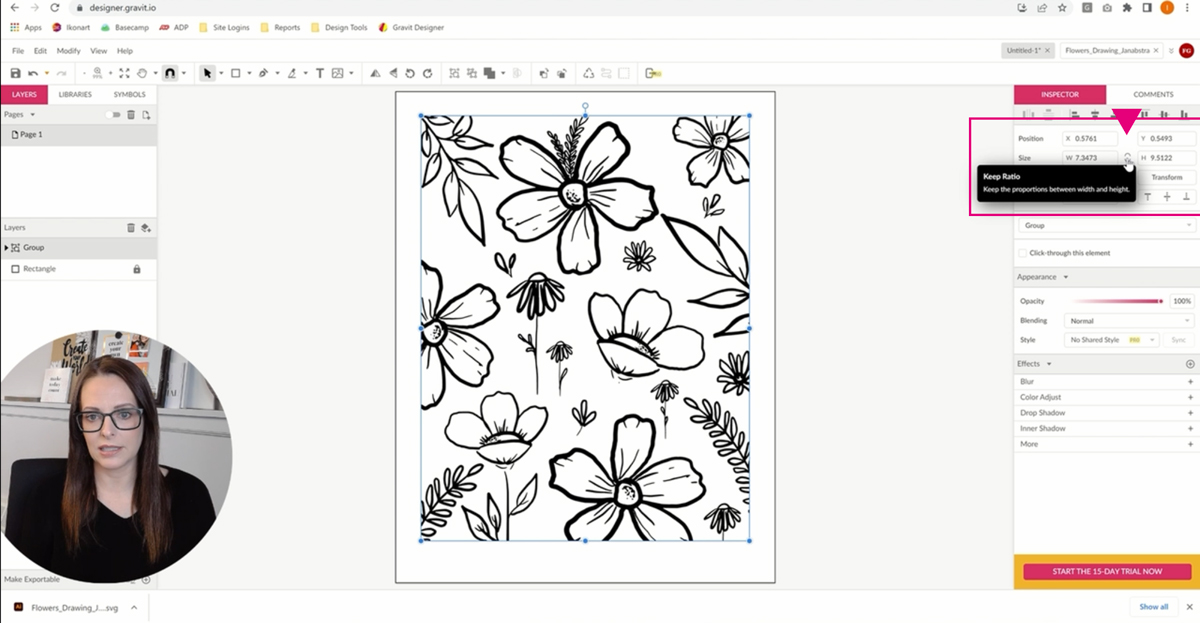
6. Resize Your Artwork In Gravit
Once you have your design in your new document you can resize it and adjust it to be the size you need for your project. On the right hand side of the screen there is an Inspector window. This is where all your adjustment tools will be. Click the small lock between the width and height to 'lock' the proportions so that your image does not get distorted when you resize it. For this project I knew I wanted my design to be 5" wide so I made sure my art was selected then I typed 5 in the width field and it automatically adjusted the height proportionally.
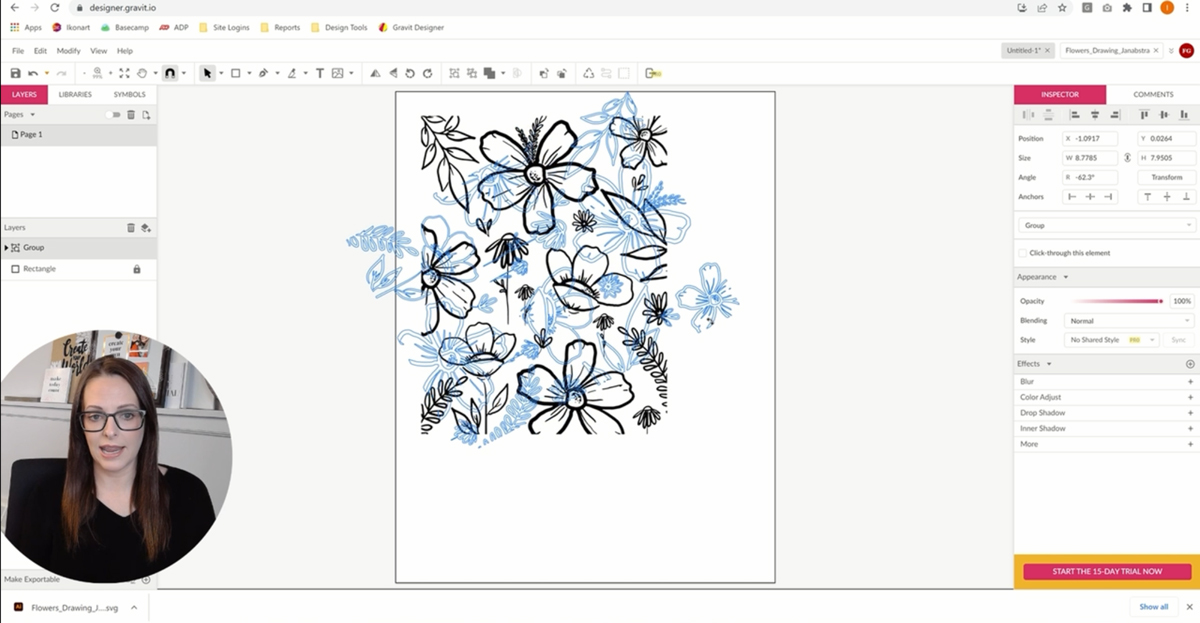
7. Rotate Your Artwork In Gravit
You can rotate your artwork by using the "Transform" section in the Inspector window or you can manually rotate it by using the blue controls that are around your artwork when it is selected. Hover over one of the blue corner circles and the rotate icon will appear. Click and drag until you rotated the way you want it to be. You can hold the shift key down to snap to specific angles.
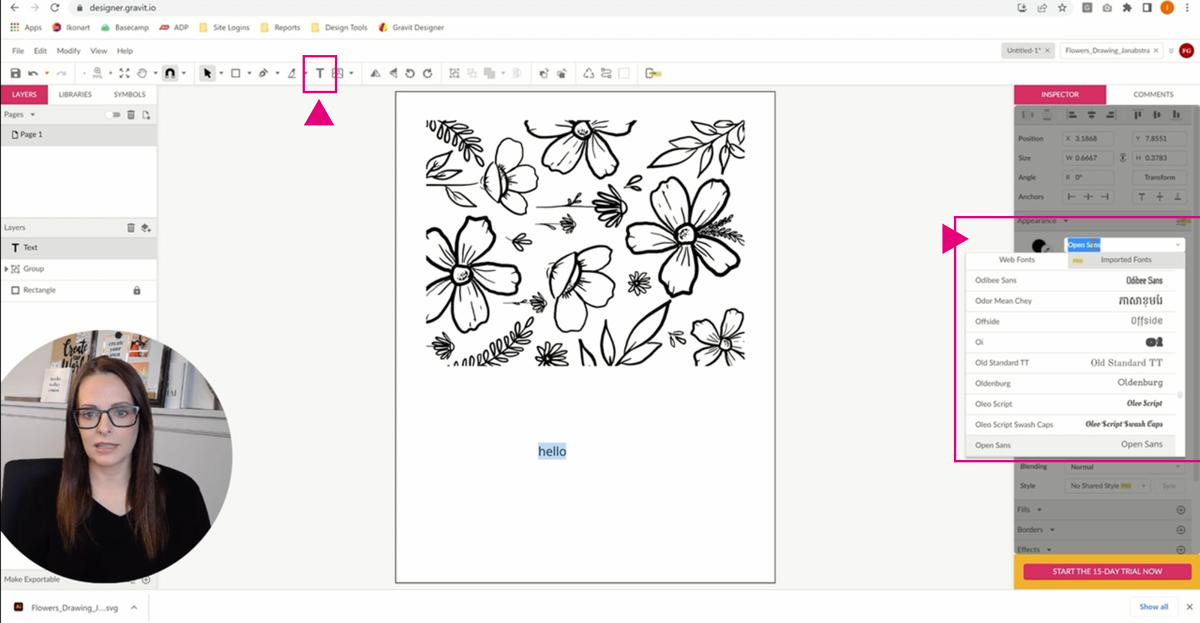
8. Add and Adjust Text in Gravit
To add Text to your document, click the "T" in the top tool bar. Click anywhere in the document and it will auto-add "Your text here". Double click inside the text to select it all and then type the word you want. Select your text again and the "Appearance" window will show up in the Inspector panel on the right. This is where you can adjust the font, font size, font color, alignment, spacing, etc.
NOTE: The free version of Gravit includes a set of fonts for you to use. If you want to use the fonts from your computer you will need to upgrade to the paid version.
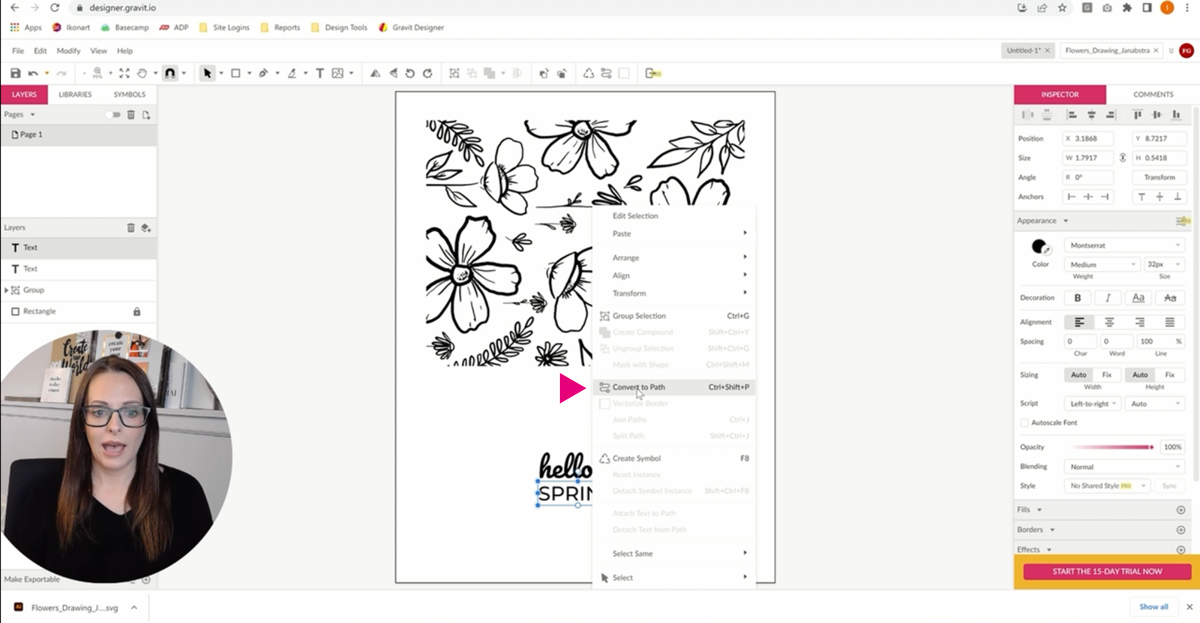
9. Convert Text To Path in Gravit
Once I have my text the way I want it, I prefer to convert my text to an object. Make sure you artwork is selected then right click and select "Convert to Path". This creates an object out of your text which means you can no longer edit the words. This step is optional but it allows you to modify and adjust the text element the same way you would with an art element.

10. Mirror Your Artwork in Gravit
At this point, your art can be edited to your liking. If you want to add cut lines between your art files you can do that using the Line tool which is in the dropdown menu next to the black arrow in the toolbar. Hold down the shift key while you are dragging your line to keep it in a straight line and adjust the thickness under "Borders" in the Inspector palette.
We also recommend mirroring your artwork before printing. Gravit makes it really easy with just a click of a button. Select your artwork and click the "Flip Horizontal" button in the toolbar (or go to Modify --> Transform --> Flip Horizontal).
NOTE: Mirroring the art means that you will place the printed artwork with the ink side touching your stencil when you expose. This helps to avoid light from seeping under the edges of your artwork during exposure which can cause undercutting during exposure (click the link for a video that explains undercutting in more depth). This step is most important if you have very thin lines or fine details.
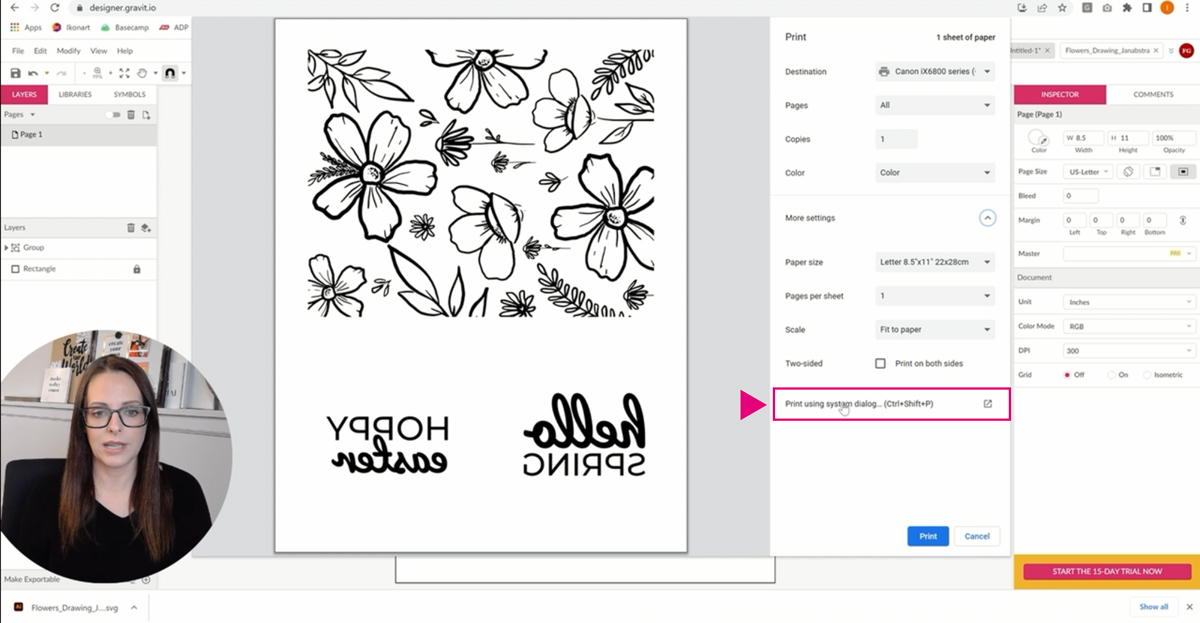
11. Print Your Artwork in Gravit
Once your artwork is all edited to your liking, go to "File" then "Print". Click on the area where it says "Print using system dialog box" so you can adjust your print settings.
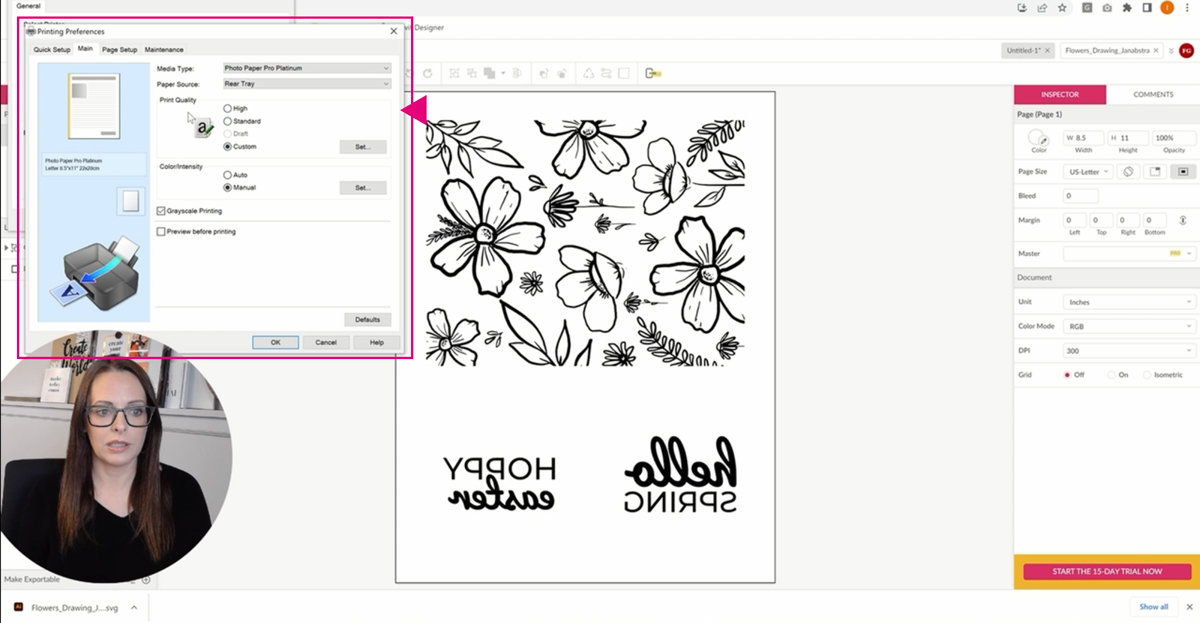
12. Adjust Your Print Settings for Darker Prints
Don't skip this step! You need to adjust your print settings to print as dark as possible. I am using a Canon Pixma iX6820 so these are the exact print settings I use to make my Ikonart stencils, but every printer will have different options. Go through your settings to see what will print the darkest. Usually that means adjusting your paper type, changing your print quality to high, and adjusting your brightness/contrast if possible.
For additional information on adjusting print settings and printing on the Ikonart Printer Films make sure to check out our other blog posts, Printing Tips for Inkjet Film and Printer Tips for Laser Film.
Congratulations! You did it!! You are now ready to create your own designs, add text to pre-made designs, or adjust designs that you download. If you have any additional question about using your Ikonart stencils or creating and editing artwork, please contact us or visit our Ikonart Crafters Group on Facebook.
WATCH VIDEO TUTORIAL: