
Whether you're a seasoned crafter looking to add new dimension to your work or a beginner eager to explore the endless possibilities of crafting and screen printing with mesh stencils, you've come to the right place.
With its user-friendly approach and remarkable versatility, Ikonart opens up a world of creativity to all crafters, allowing you to effortlessly transfer intricate designs onto various surfaces without needing to weed vinyl. In this blog post, we'll dive into the seven most common mistakes we see people make when creating their Ikonart stencils using the Ikonart Custom Stencil Kit. Let's get started!
7 Common Mistakes When Making Ikonart Stencils
Below we guide you through the essential steps of making your very own stencil by showing you the seven most common mistakes to avoid. When you follow these tips you will be able to hold fine details and washout shouldn't take you longer than about a minute or two (depending on your artwork and size of stencil). For this tutorial I used our free Lake Life Beach Life SVG.
1. Didn't Adjust Printer Settings
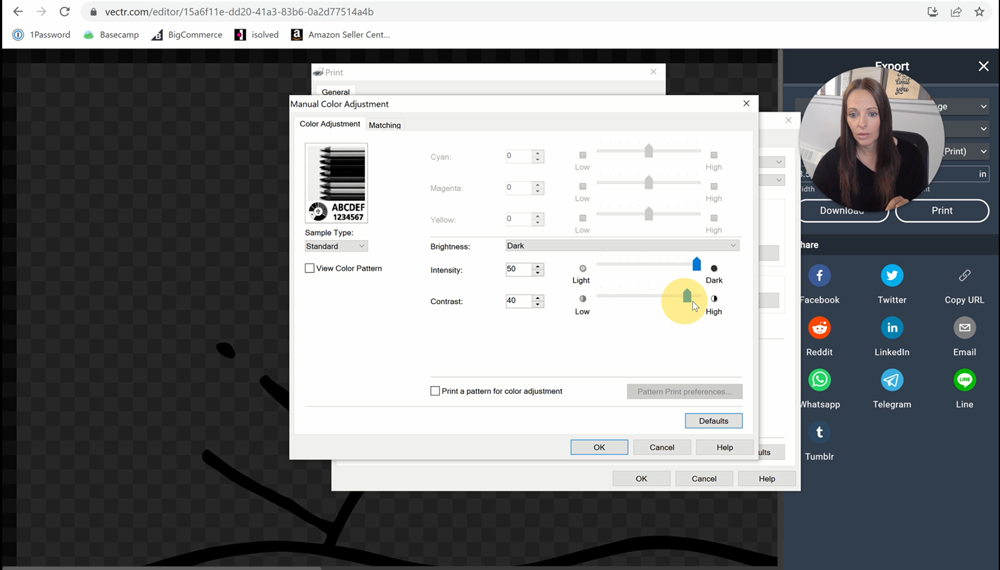
The first mistake I see people make is that they forget to adjust their printer settings before printing their artwork. This is very important to ensure you get the darkest print possible. In the video example above I show you how I adjust my print settings in Vectr, a free online editing program, but the general concept will be the same no matter which artwork program you are using. I go into more detail on print settings in this YouTube video, Print Settings For High Density Printing, but here are some general guidelines:
- Make sure you artwork is setup as 100% black
- Change paper setting to glossy or photo paper (for me that is Pro Platinum)
- Change print quality to the highest option
- Adjust your brightness, intensity and contrast (if your printer model gives you that option)
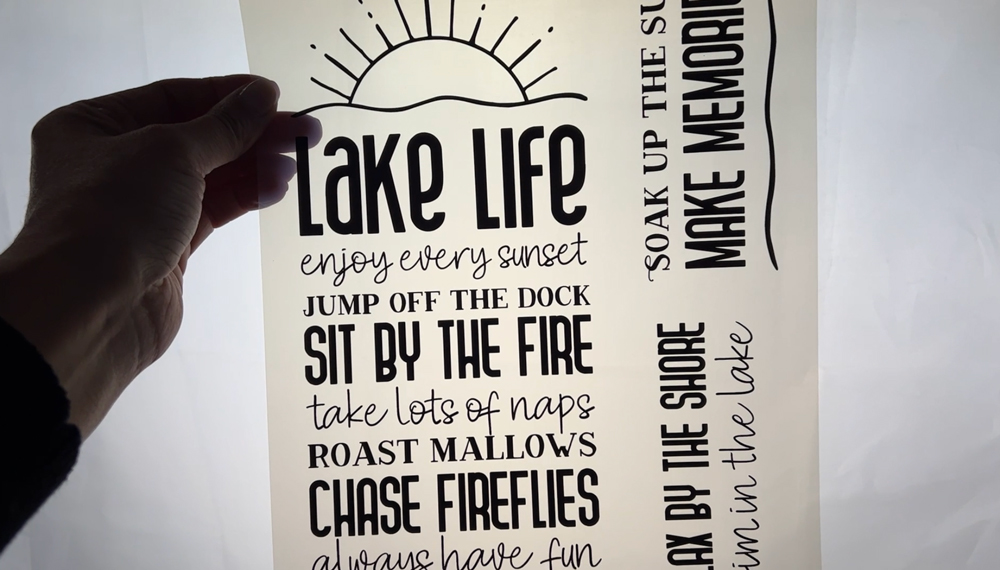
When you adjust your print settings what it does is it lays down as much ink as possible when printing. Your printer should print pretty slow; it shouldn't just shoot out the paper. After your artwork prints hold it up to the light (shown above). You should not be able to see through the printed artwork. You can also compare your printed artwork to the artwork sample that is in the Quick Start Packet in each Ikonart Kit.
2. Didn't Rub Down The Cover Sheet Before Exposing
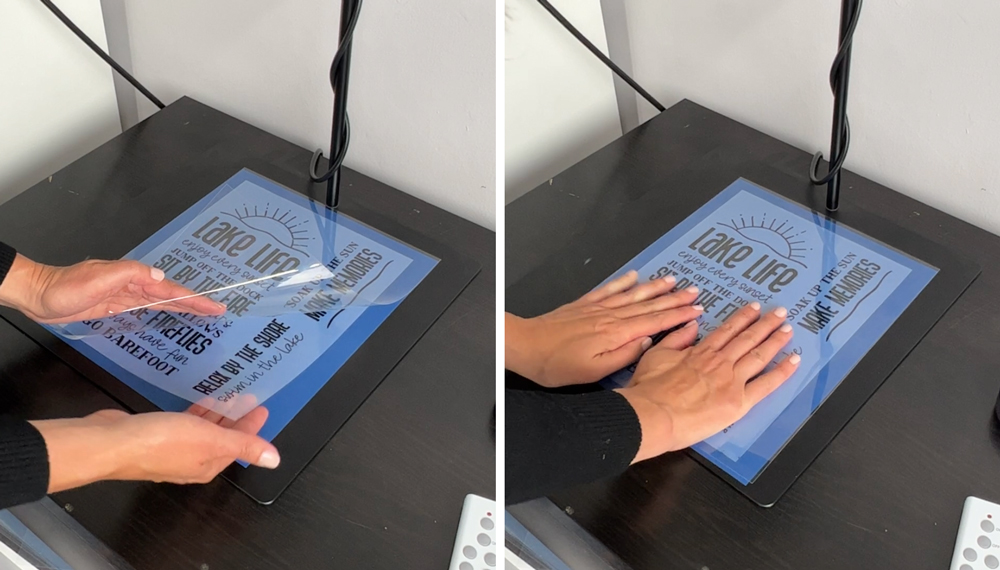
The second mistake I see when making Ikonart stencils is forgetting to rub down the cover sheet during exposure. When making your Ikonart stencils you don't want there to be a gap between your artwork and your stencil film (shown above, left). If there is any air between your artwork and your stencil film light can get under your artwork during exposure. In order to avoid that rub down the clear cover sheet really well before exposure. This will help avoid any gap between your artwork and your stencil film.
3. Exposed The Stencils Too Long
The third mistake I see when making Ikonart stencils is using the wrong exposure time. We recommend 35 seconds for our Inkjet Printer Film and 30 seconds for our Laser Printer Film. You may see a few people in our Ikonart Crafters Facebook group talk about exposing less time. That's usually if their artwork didn't print dark enough or if they have super fine details. However, there is no reason to ever expose more than the recommended time. If you expose longer than 35 seconds you risk the light going through your artwork and hardening that film underneath your artwork, which makes washout really difficult. For best results, follow the recommended exposure times. I print on inkjet printer film so I expose all my stencils for 35 seconds.
4. Washed Out In Bright UV Lighting
The fourth mistake I see when making Ikonart stencils is lighting. As you can see in the video and photos I work in regular lighting; I'm not working in the dark. However, I'm not working in front of a bright window that's letting UV light in and I am working quickly. I'm not just letting my film sit out in the bright light. The stencil film is light sensitive until the it is completely washed out, so if you expose your stencil and then you're washing out in front of a window, the bright UV light will continue to expose the film and harden the areas of the film that you're want to washout. If you're washing out your stencils in front of a bright window pull the shade or work when the sun sets.
5. Didn't Soak Stencil Before Washout
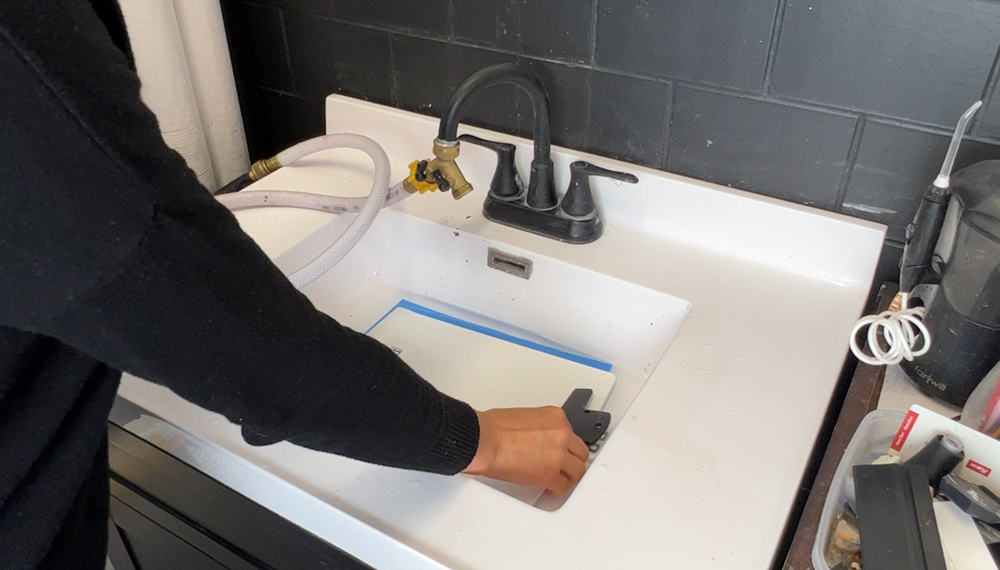
The fifth mistake I see people make is not soaking their Ikonart stencil before washing out. Before washout put a little bit of warm water in your sink. You don't need much. Then take my clipboard and put it over the top of the stencil to protect it from any light while it soaks, because again you don't want the stencil to keep exposing while it's soaking. Then soak the stencil in warm water for about a minute. That will really help to soften the coating on the stencil and make washout a whole lot faster. NOTE: You don't want to soak for too long because if you do then you can start to break down the stencil. I have found a minute to be a pretty good sweet spot.
6. Used Cold Water and Low Pressure To Washout
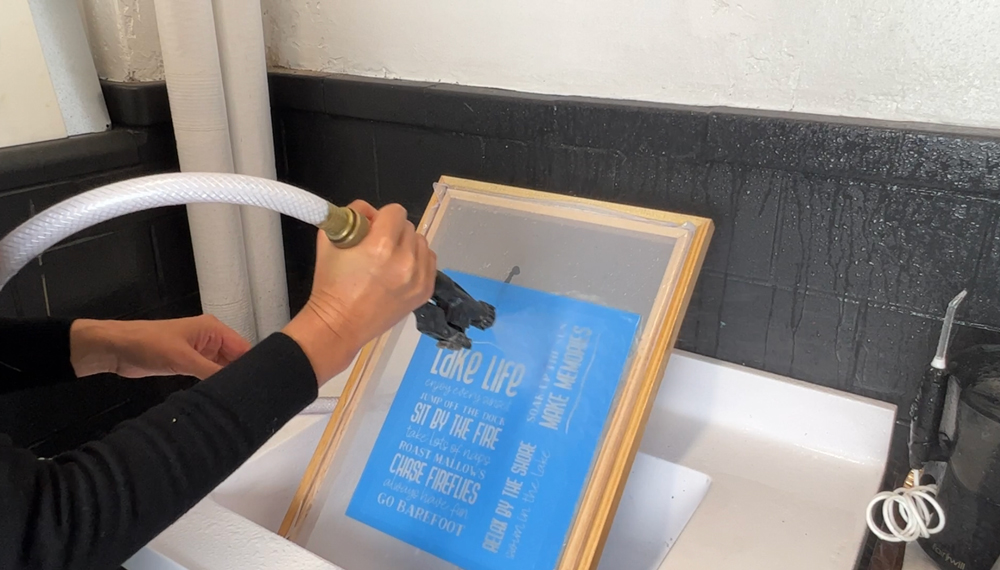
The sixth mistake I see made when making Ikonart stencils is the way the stencils are washed out. Both the water temperature and water pressure are very important when washing out your Ikonart stencils. You don't want to use cold water. Cold water will not soften the coating on the stencil film enough and it will take forever to wash out your stencil. We recommend warm water to wash out your stencils.
For water pressure you want nice solid pressure to be able to clean out that stencil. I use the TriggerJet Nozzle when I'm at work but when I'm at home I use my regular kitchen sink sprayer and that works great. If you are finding that you don't have enough pressure with your kitchen sink sprayer then there are attachments we have linked on our Ikonart Amazon Recommendations page to increase the water pressure of your kitchen sink. We also have some crafters who use a water pic with great success.

7. Forgot To Post Expose
The seventh most common mistake I see made when making Ikonart stencils is forgetting to post expose. I personally forget this all the time. It's a very easy step to forget, but it's also very important. When you post expose your stencil you are finishing hardening or curing the emulsion, or the coating, on your stencil so you're making it much more durable.
After the stencil is completely dry just pop it back under the light for a two minutes. If washout took you a really long time or if you're having problems with your stencils breaking down for some reason, then you can post-expose both sides of the stencil for two minutes. This really helps to make the stencil last a lot longer.
When you follow all these tips you will be making high detail Ikonart stencils in no time!
7 Common Mistakes When USING Ikonart Stencils
Now that you know what to avoid when MAKING your Ikonart stencils, lets cover the most common mistakes we see when USING them. Head to part two, 7 Common Mistakes When Using Ikonart Stencils, to discover the most common pitfalls we see crafters make when using their Ikonart stencils for the first time.
Those are the seven most common mistakes I see when making Ikonart stencils. If you have any additional questions about making Ikonart stencils you can contact us directly, or join our Ikonart Crafters Group on Facebook for more tips and examples from other Ikonart crafters. If you learned something here be sure to pin this post!