
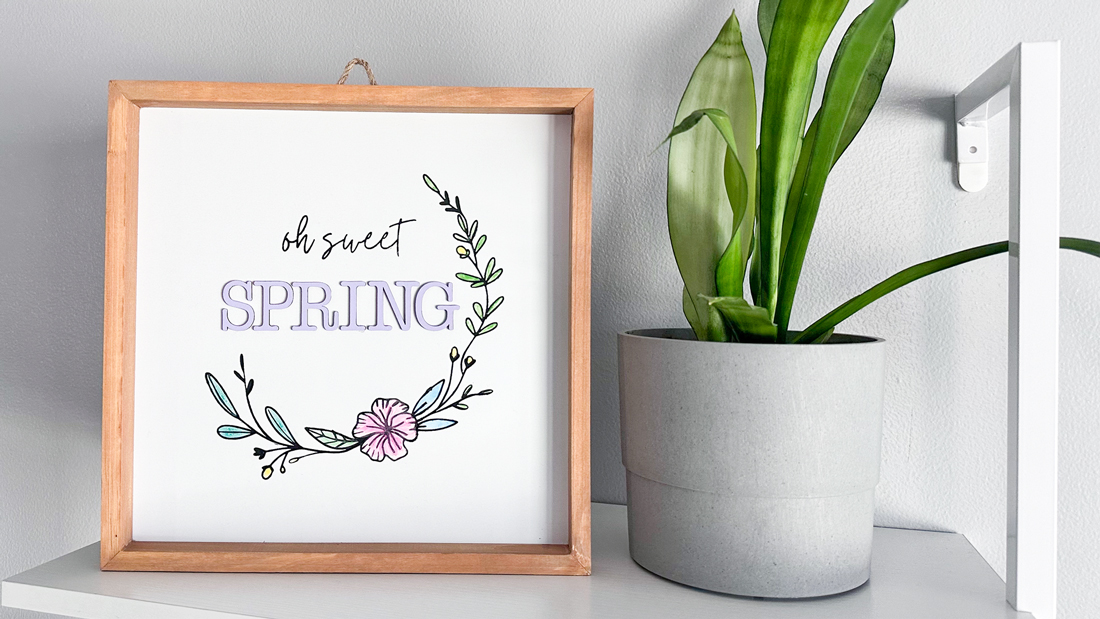
Spring has officially sprung, and what better way to celebrate than by diving into a new craft project with your Ikonart Custom Stencil Kit? We added a new Oh Sweet Spring Wreath design to our Free Artwork page so that you can spruce up your home decor with this dimensional wood sign project idea.
At Ikonart, we're all about making crafting accessible and fun, and today I’m excited to share two fabulous methods to add depth and personality to your wood signs using our stencils. Or if you prefer to watch our tutorials instead of read them, head to our YouTube video, How To Add Dimension To Your DIY Wood Signs With Ikonart Stencil.
How To Make Your Ikonart Stencil
Before you start creating your sign you need to make your Ikonart stencil using the Ikonart Custom Stencil Kit. The following is a quick overview of the process, but if you would like a more in-depth tutorial check out our blog post, Ikonart 101: How To Make Your First Ikonart Stencil.
- Choose Your Design: Start by selecting a design. You can use one of the free SVG files from our collection or create your own. For this project, I recommend one of our Oh Sweet Spring floral wreath designs, which you can download from our Free Artwork page. Save the file to your desktop for easy access.
- Adjust the Artwork: Open your SVG file in the design program of your choice. If you are new to adjusting artwork, we recommend checking out our Artwork For Beginner video series. Feel free to combine elements from different files to make your design truly unique. Resize the artwork to fit your sign, ensuring all elements are in black for optimal printing.
- Print and Create Your Stencil: With your artwork adjusted, print it out making sure the ink is dark enough to block out all the light during exposure. Use the Ikonart Exposure Stand to create your stencil, ensuring good contact and exposure before washing out the design.
- Dry & Post-Expose: After your design is completely washed out, blot your stencil with a paper towel to remove excess water, then let it air dry until it is completely dry. After it is dry you can put it back under the exposure light to post-expose. Then it is ready to use.
Two Creative Ways to Add Dimension to Your DIY Handmade Wood Signs
Now that your stencil is made you are ready to make your DIY wood sign. We like to add a one dimensional design to the background, and then layer on dimension with either watercolors and/or wood cutouts. This adds a 3D effect to each sign which makes them a little more interesting. Here's how we do it.
Method 1: Layering with Watercolors
The first method involves a charming play of watercolors that brings a soft, painterly touch to your wooden canvas. Here’s how you can achieve this look:
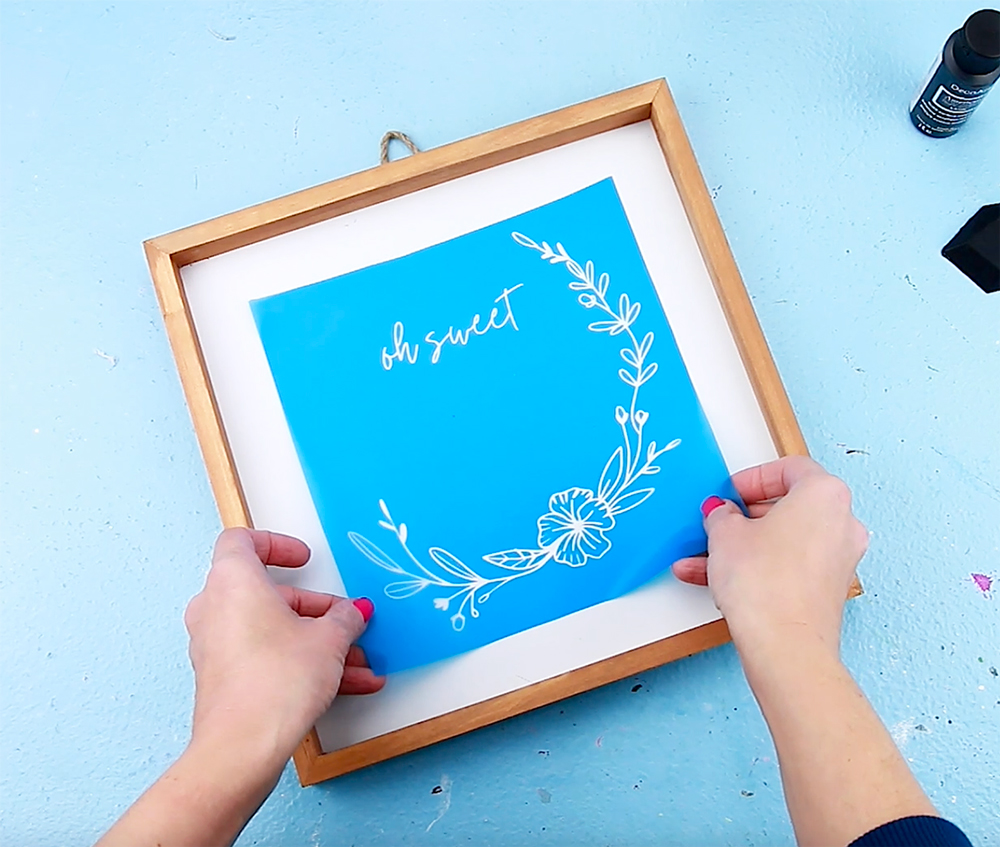
- Apply the Design: Once your stencil is dry, apply it to your wood sign using a multi-surface paint. The beauty of this step is how it sets the stage for the watercolor magic to happen. Let this outline completely dry before you start coloring it in with watercolors.
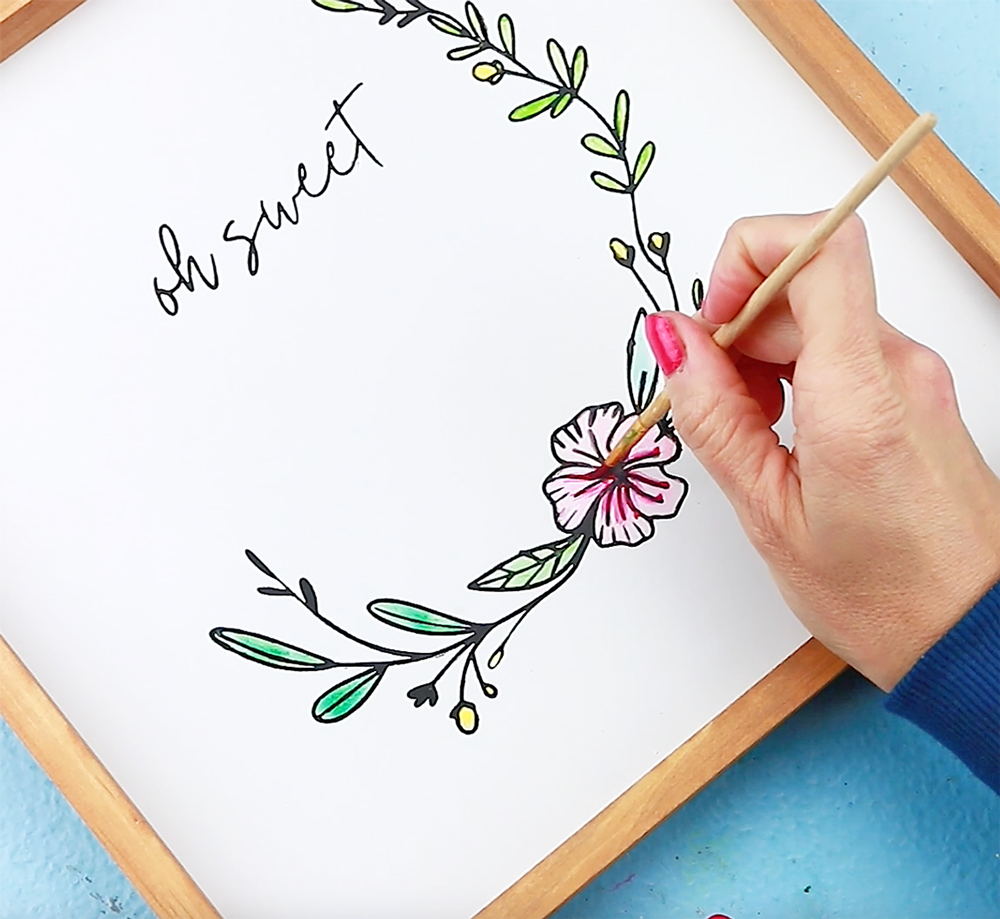
- Mix Your Paints: You can add water to any acrylic paint to make your own set of watercolors, or you can purchase pre-made watercolor paints. We like to mix our own. Just mix water with your chosen paints to achieve a watercolor consistency.
- Layer Watercolors: Gently apply the colors within the stenciled design, kind of like coloring in a coloring book. We like to overlap similar shades to create depth. The possibilities are endless and we love how each sign becomes a unique piece of art with this technique.
Method 2: Adding Wood Cutouts for a 3D Effect
If you prefer a more tactile element, incorporating wood cutouts or letters can create an impressive 3D effect. Here’s how to add this type of dimension to your sign:
- Stencil Your Base Design: Just as in the first method, begin by applying your stencil design to the wood sign. Use a steady hand and a squeegee to ensure an even application of paint.
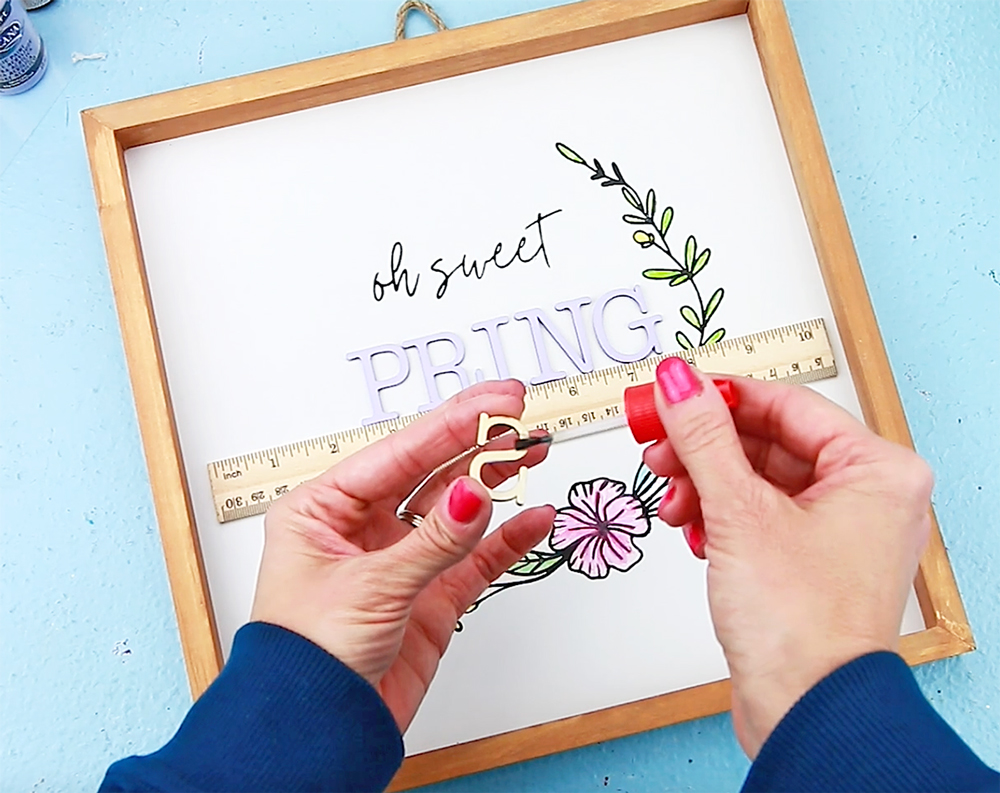
- Prepare Your Cutouts: Choose wood letters or shapes that complement your base design. A handy tip for easy painting and handling is to tape down your letters on a flat surface — it really does make the painting process smoother!
- Paint and Position: Once your base design is dry, paint your wood cutouts. Opt for colors that stand out against your base for a pop of visual interest.
- Attach the Cutouts: After the paint has dried on your cutouts, it’s time to attach them to your sign. Use a strong adhesive to secure them in place, adding that lovely layered effect that truly stands out.
You’ve now created a stunningly dimensional wood sign that’s not only stylish but also personal.
Creating with Ikonart Stencils is always a creative and fun experience. These two methods are just the beginning of what you can achieve with a bit of creativity and the right tools. If you have any questions or need tips on how to use our products, please contact us or comment in our Ikonart Crafters Group on Facebook. Happy crafting and welcome spring with your own beautifully crafted sign!