We are dusting off our cozy sweaters and gearing up for Fall. That means pumpkin spiced everything and allll the Fall decorations. We love a good DIY stenciled pumpkin but Jami Larson with Grey Fox & Meadowbrook takes it one step further by adding dimension with clay.
Jami creates beautiful vintage style pieces by combining her custom made Ikonart stencils with clay castings she makes using Iron Orchid Designs (IOD) casting molds. This combination creates such a fun look and style - the perfect combination of elegant and edgy. In this guest blog post Jami will be showing us how to create and use clay castings to really elevate your Ikonart projects.
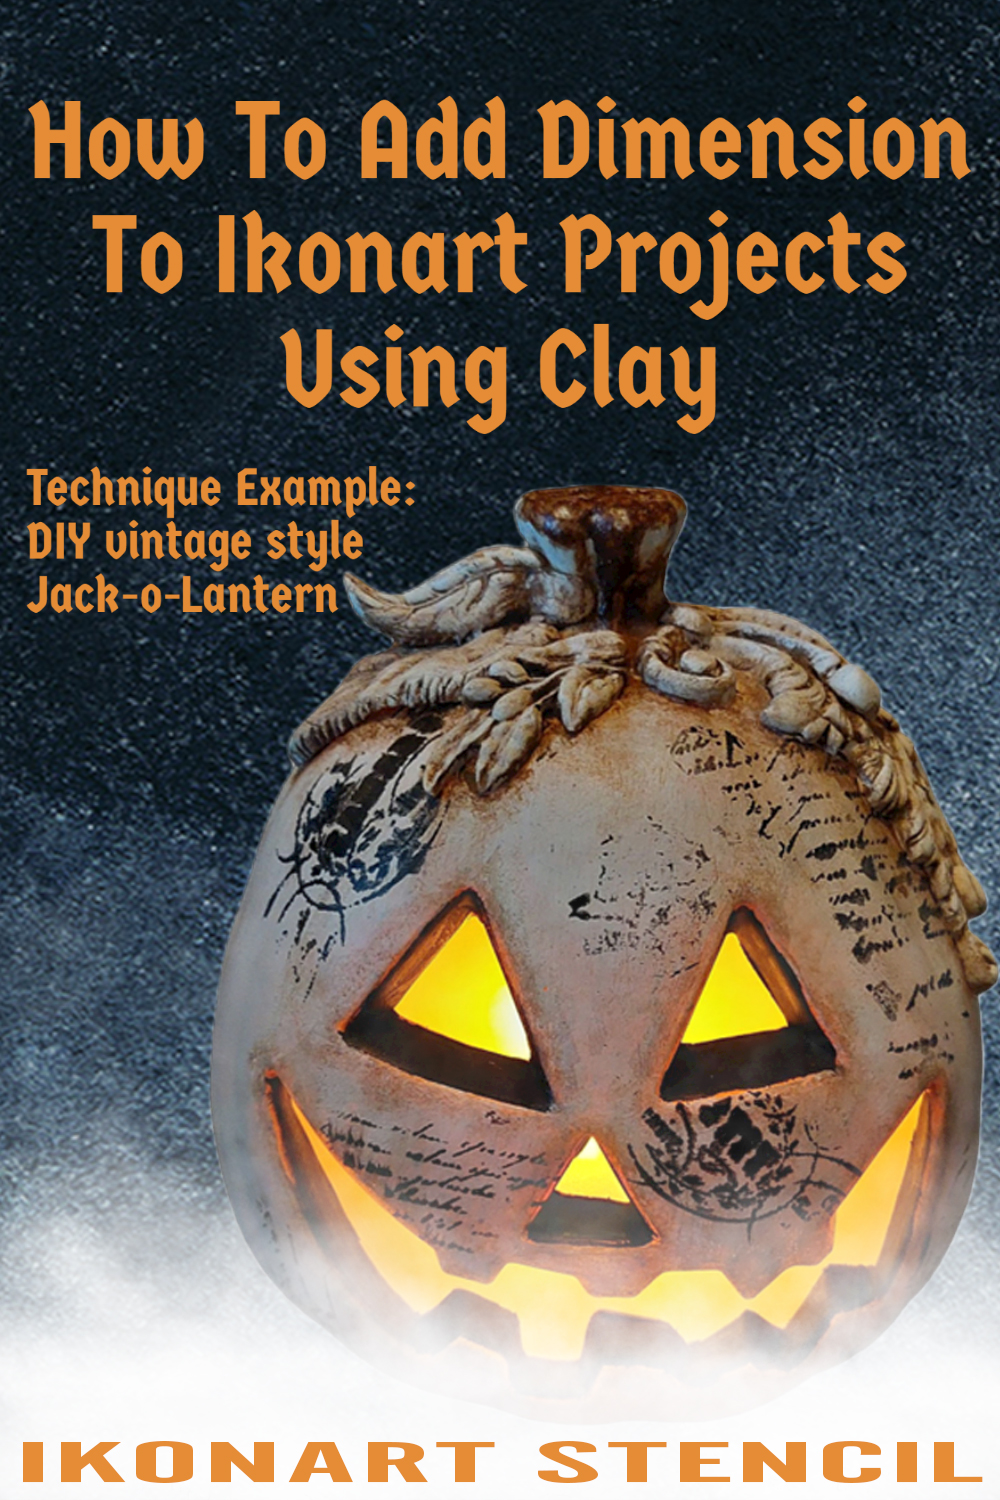
How To Add Dimension To Your Ikonart Projects with Clay Molds
Hello. My name is Jami and today's project is a vintage style light up pumpkin that I created with Ikonart and an IOD casting mold. Casting molds are great tools for adding dimension to your DIY stenciled creations. I get all my molds and casting supplies from Diane's Designs. Here are all the supplies I used for this project.
Supplies:
- Foam or Plastic Faux Pumpkin
- Ikonart Custom Stencil Kit
- Artwork of choice
- Casting mold (I used IOD Olive Crest Mold)
- Air Dry Clay (I used IOD Air Dry Clay)
- Multi-surface glue (I used Titebond)
- White or Ivory Paint (I used Waverly Chalk Paint in Ivory)
- Black paint (I used Speedball Acrylic Ink)
- Brown acrylic paint
- Paint brush
- Butter knife
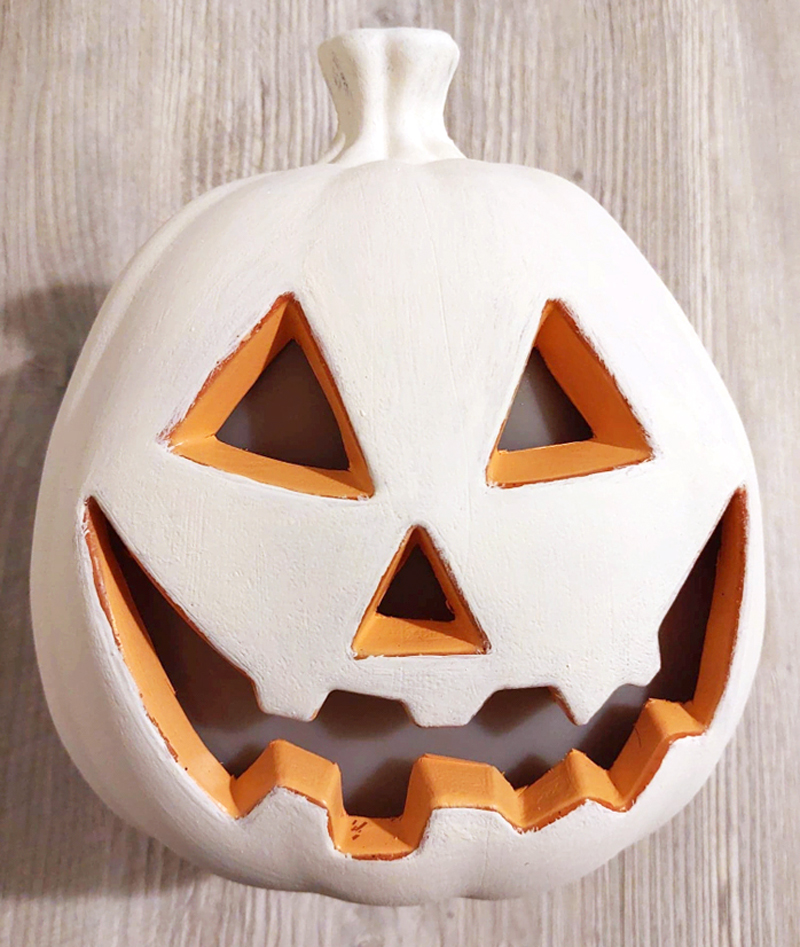
Step 1: Prepare Your Pumpkin
Before we can get to making casts and applying them, we have to prep and stencil our pumpkin. I started with a basic light up orange foam faux pumpkin that I got at the Dollar General, but any fake pumpkin will do the trick. I used Waverly Chalk Paint in the color Ivory and gave him a couple coats of paint, leaving the cut portions of his face orange.
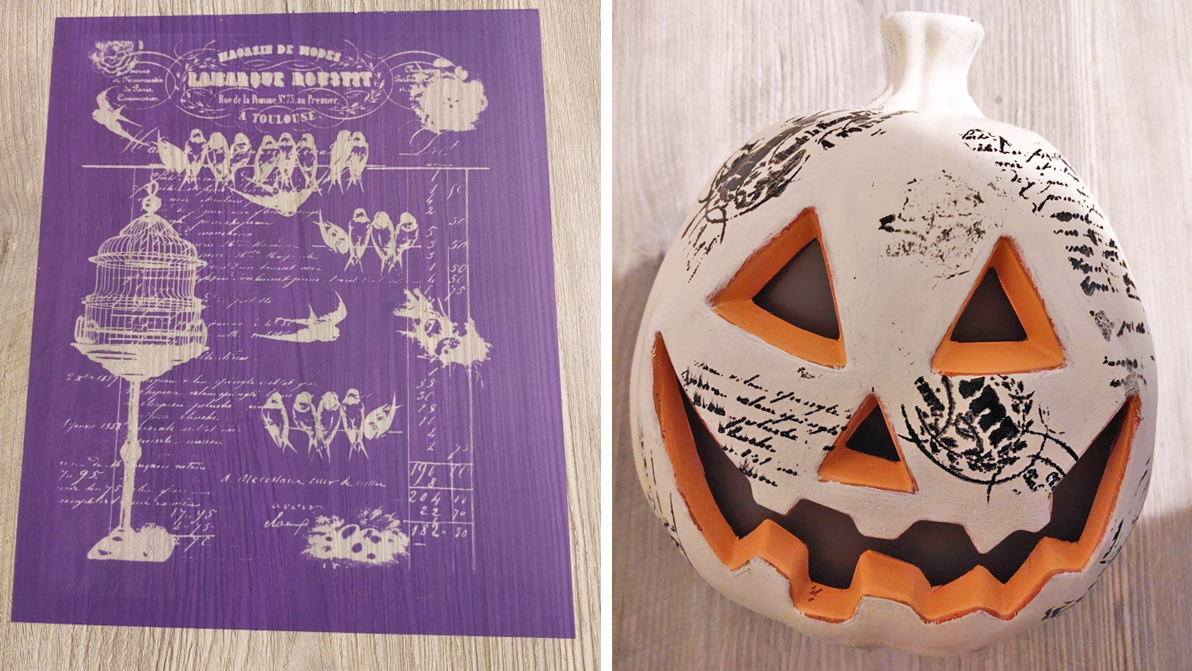
Step 2: Stencil Your Pumpkin
Next, we need to choose an Ikonart stencil to apply. I make all my own Ikonart Stencils using my Ikonart Custom Stencil Kit. For this project I used a vintage style Ikonart stencil that I had made for another project because I felt that there were some basic elements that would work for the look I was trying to achieve. I decided upon using the script and swirls for this pumpkin. I used black Speedball Acrylic Ink and applied the stencil design to the pumpkin in random places. He looks like a bit of a hot mess right now, but you have to trust the process!
Side note: because this project does not require a perfect print with your Ikonart stencil it is a great way to use a stencil that you messed up on or one that has lost its ability to give you a perfect print.
Step 3: Create Your Castings
Now we are ready to create our casts! I used an IOD mold though casting molds can be found from a variety of sources to create dimension.
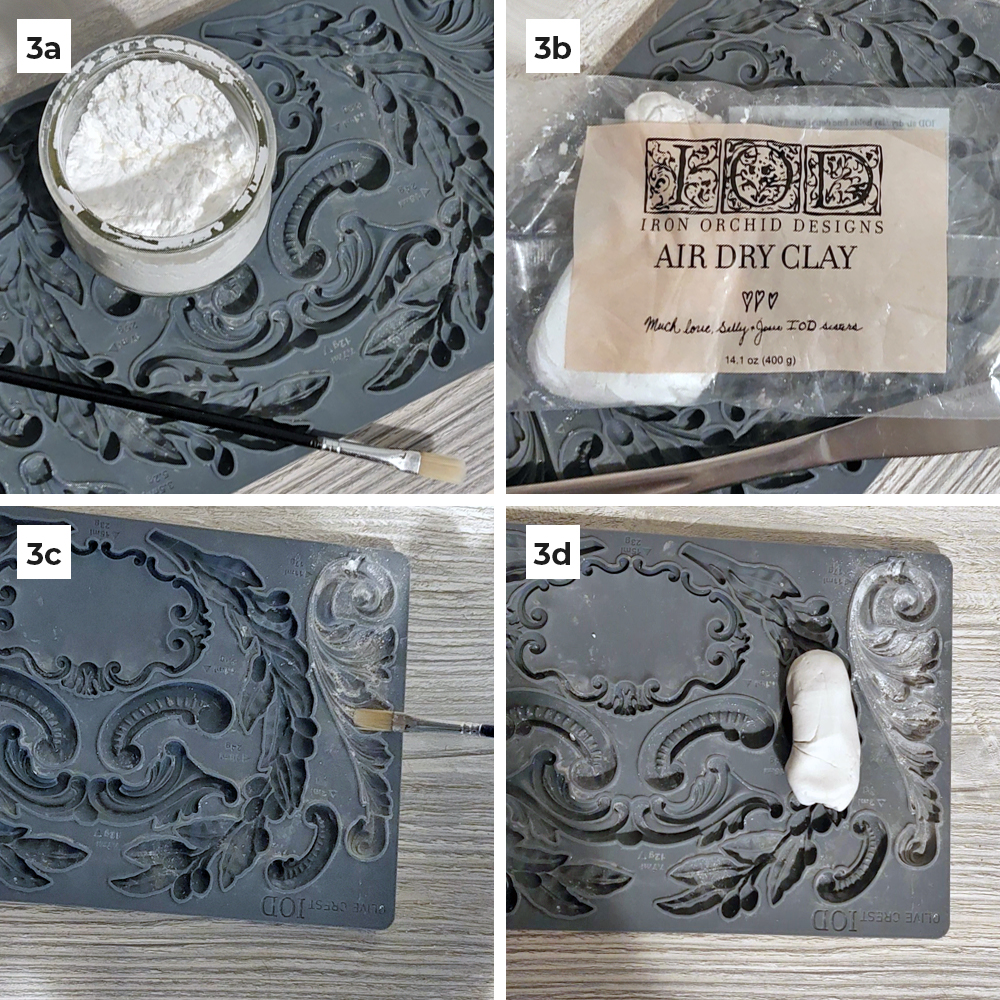
3a. Gather your supplies. You will need your casting mold, cornstarch, a small paintbrush and a butter knife.
3b. You will also need air dry clay. I store my air dry clay in a Ziplock bag with as much air removed as I can and also a damp paper towel folded up inside to keep the moisture.
3c. Dip your paintbrush into cornstarch and dust the inside of your mold cavity with it. This will ensure that your clay does not get stuck in any of the areas and comes out of the mold cleanly later on. Make sure that you get it in all of the nooks and crannies. Once you feel satisfied with the coverage turn your mold upside down over a trash can and lightly tap it to get excess cornstarch out.
3d. Take out a chunk of your clay, making sure that you keep the rest of the clay in the sealed package so it doesn't start to harden or dry out. Knead the clay in your hands to warm and soften it. I usually eyeball how much clay I will need and take out that much.
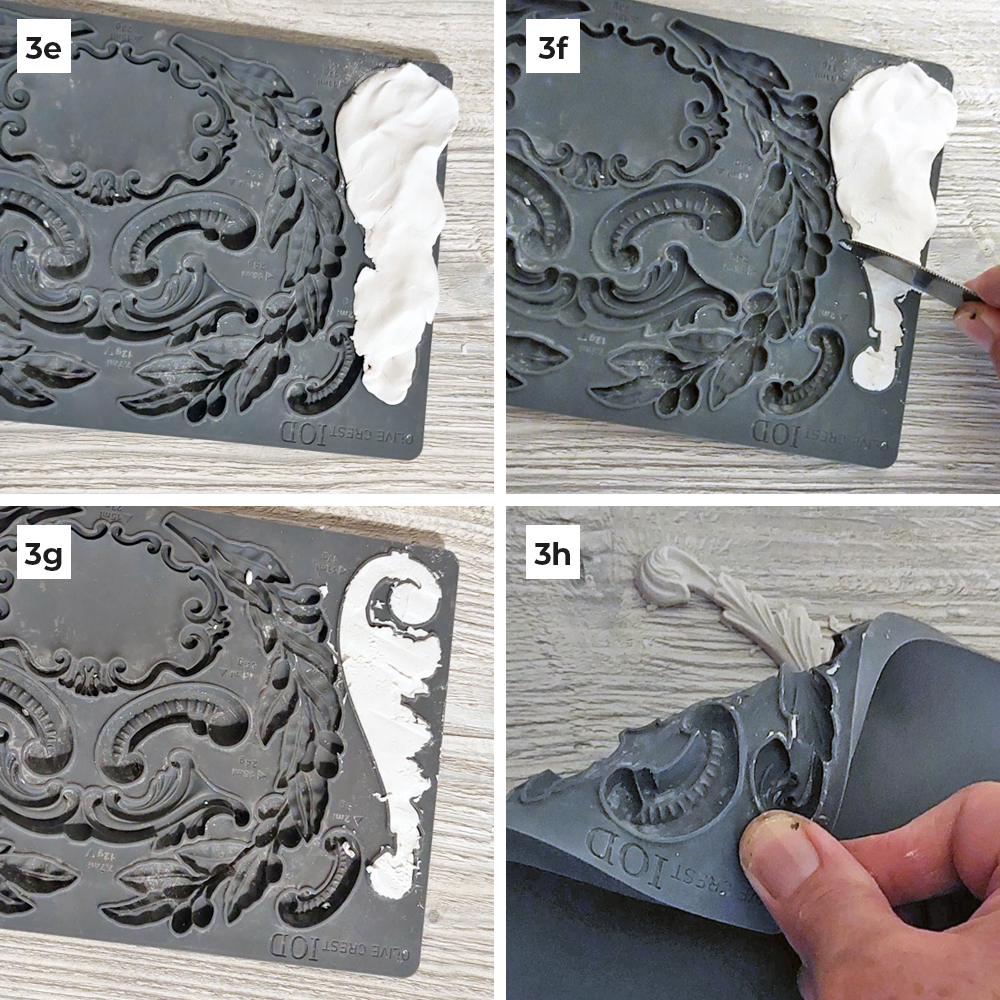
3e. Smoosh the clay into the prepared cavity of the mold. I like to work from the thicker part of the mold design to the thinner parts. If you find that you misjudged how much clay you would need, you can just pop it out and add or remove some without needing to reapply cornstarch. If you are just a bit shy, I again would add to the thicker part and work that into thinner parts. Squishing it into the skinnier parts may cause a weakness in the finished piece and cause it to break off easier.
3f. With a straight edge or back of butter knife, remove any excess clay. IOD molds have a nice ridge around them, making this easier to do. I like to work from the center out, pushing the straight edge away from you. Pushing it seems to help you get a good impression from the mold.
3g. Your clay does not have to look perfect but should be relatively flush with the mold.
3h. Place the mold face down on a flat surface to remove. Slowly peel the mold back, making sure that it is releasing as you go.
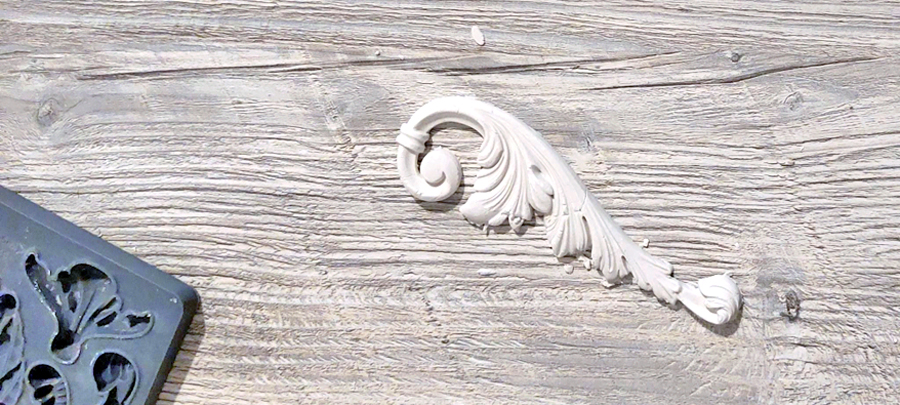
Take a minute to appreciate the beauty of your fabulous creation!
Step 4: Apply Your Castings
I use Titebond Quick and Thick to glue the castings to the pumpkin while the clay is still wet. Working while the clay is still wet allows it to form to the shape of the pumpkin.
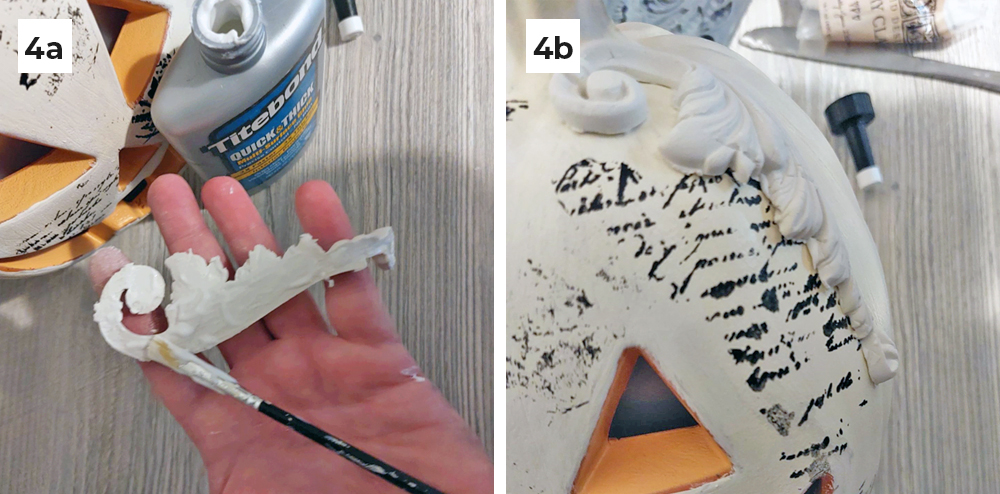
4a. Apply Titebond liberally over the back surface of the clay casting, making sure that you are getting the edges yet being gentle. Try not to push very hard and handle your casting the least amount possible so you don't lose any of the details or get fingerprints in your casting.
4b. Apply the casting to the top of your pumpkin. If you made multiple castings butt them up next to each other nice and close. Continue to butt and overlap the pieces until you are happy with the end result.
Step 5: Paint and Add Finishing Touches
At this point, I like to let the piece dry for a few hours or overnight. Some people simply let the clay get a crust on it and continue to paint. I have found that I lose detail doing that but it might work for you or your needs. Then the last step is to add color and any additional finishing touches that you want to add. I like to add paint and cinnamon to give my pumpkin a distressed look. Here is how I do it.
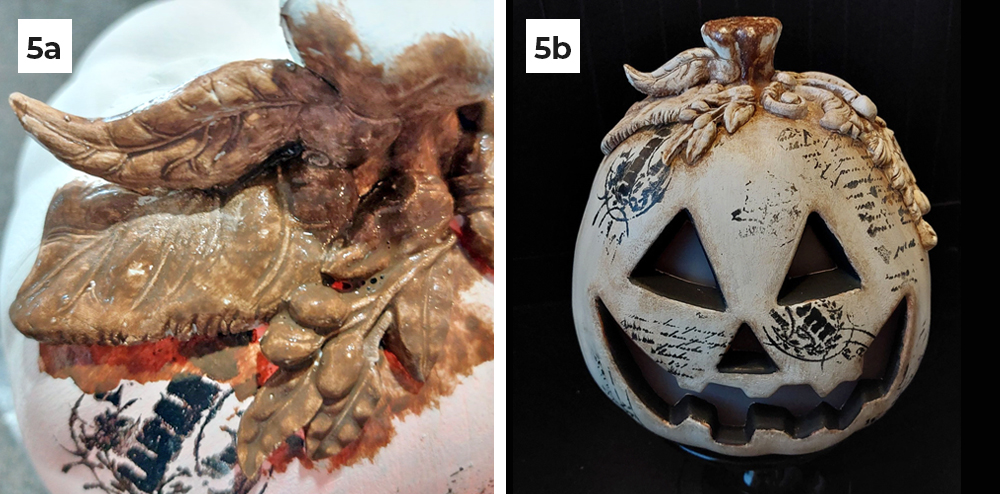
5a. Using a mixture of watered down brown paint, paint the castings making sure to really get into the cracks and crevices. Then with a damp paper towel clean off the raised portions of the clay pieces leaving the pigment behind in the deeper areas to create dimension and contrast.
5b. Dip a small paint brush in the brown paint mixture and dab off any excess on a paper towel until the brush is almost dry. Then dry brush shadows around the clay castings and facial features to add dimension and distressing. At this point I decided I did not like the orange around his face holes so I painted them black instead. I also added mod podge and a good sprinkle of cinnamon then another layer of mod podge to the stem to give it that rusty-worn look.
All that is left to do now is turn his lights on and admire your work!
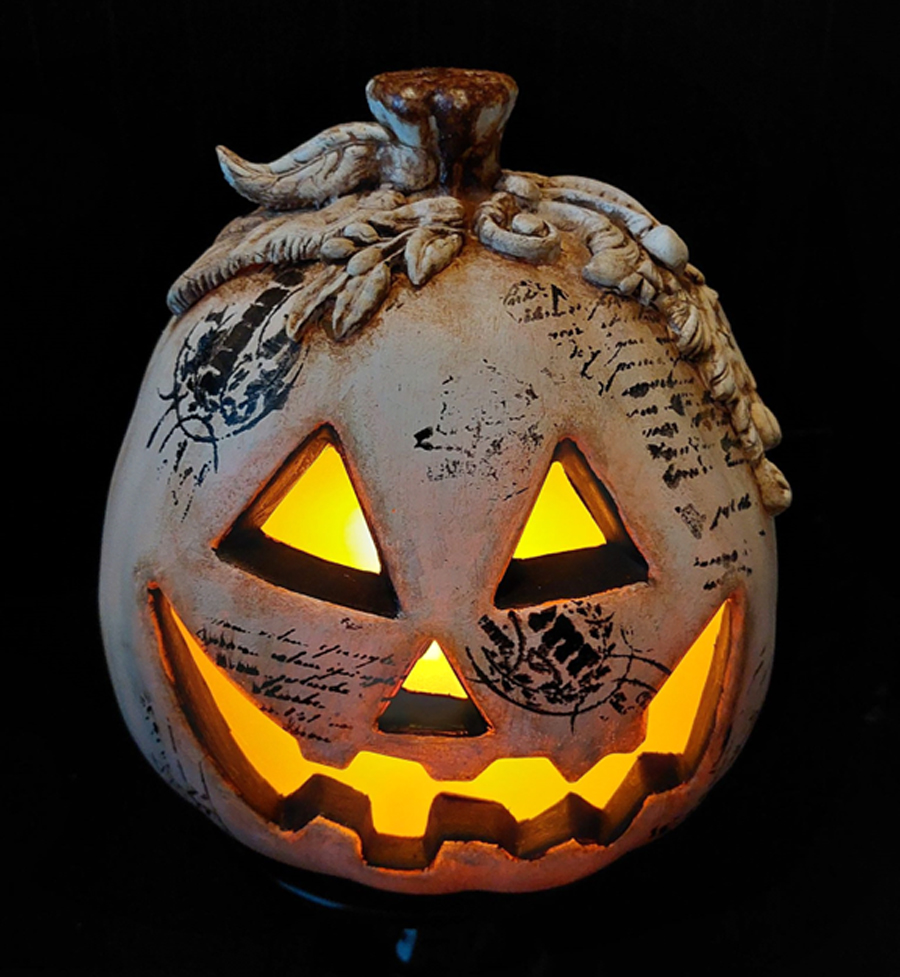
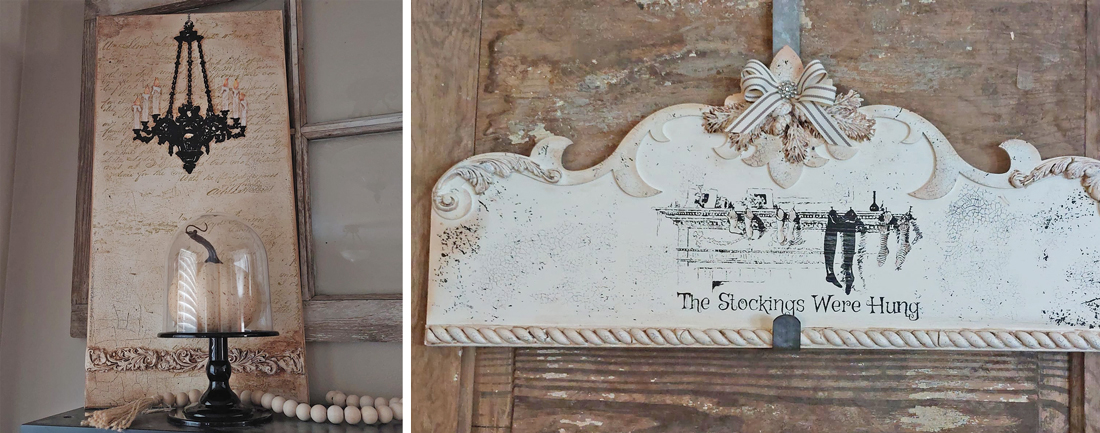
I adore the transformation of this project. It was SO easy to make using Ikonart and my IOD molds. I also just love the versatility of this technique as it can be applied to an endless amount of projects, either seasonal or year-round. I used this exact technique to make this chandelier canvas (pictured below, left) and this custom stocking hanger (pictured below, right).
To see more of my creations, join my Facebook Group Grey Fox & Meadowbrook or get some imaged Ikonart stencils in my Grey Fox & Meadowbrook Etsy shop. If you decide to try this project out for yourself, don't forget to share it in the Ikonart Crafters Facebook Group so I can see your lovely works of art!
Happy Crafting!
Jami Larson
Facebook: Grey Fox & Meadowbrook
Etsy: Grey Fox & Meadowbrook
For more project ideas, troubleshooting support, and to share your Ikonart creations, join our community of crafters on Facebook. If you have any questions about our Ikonart Stencil Films or the Ikonart Custom Stencil Kit, please contact us.