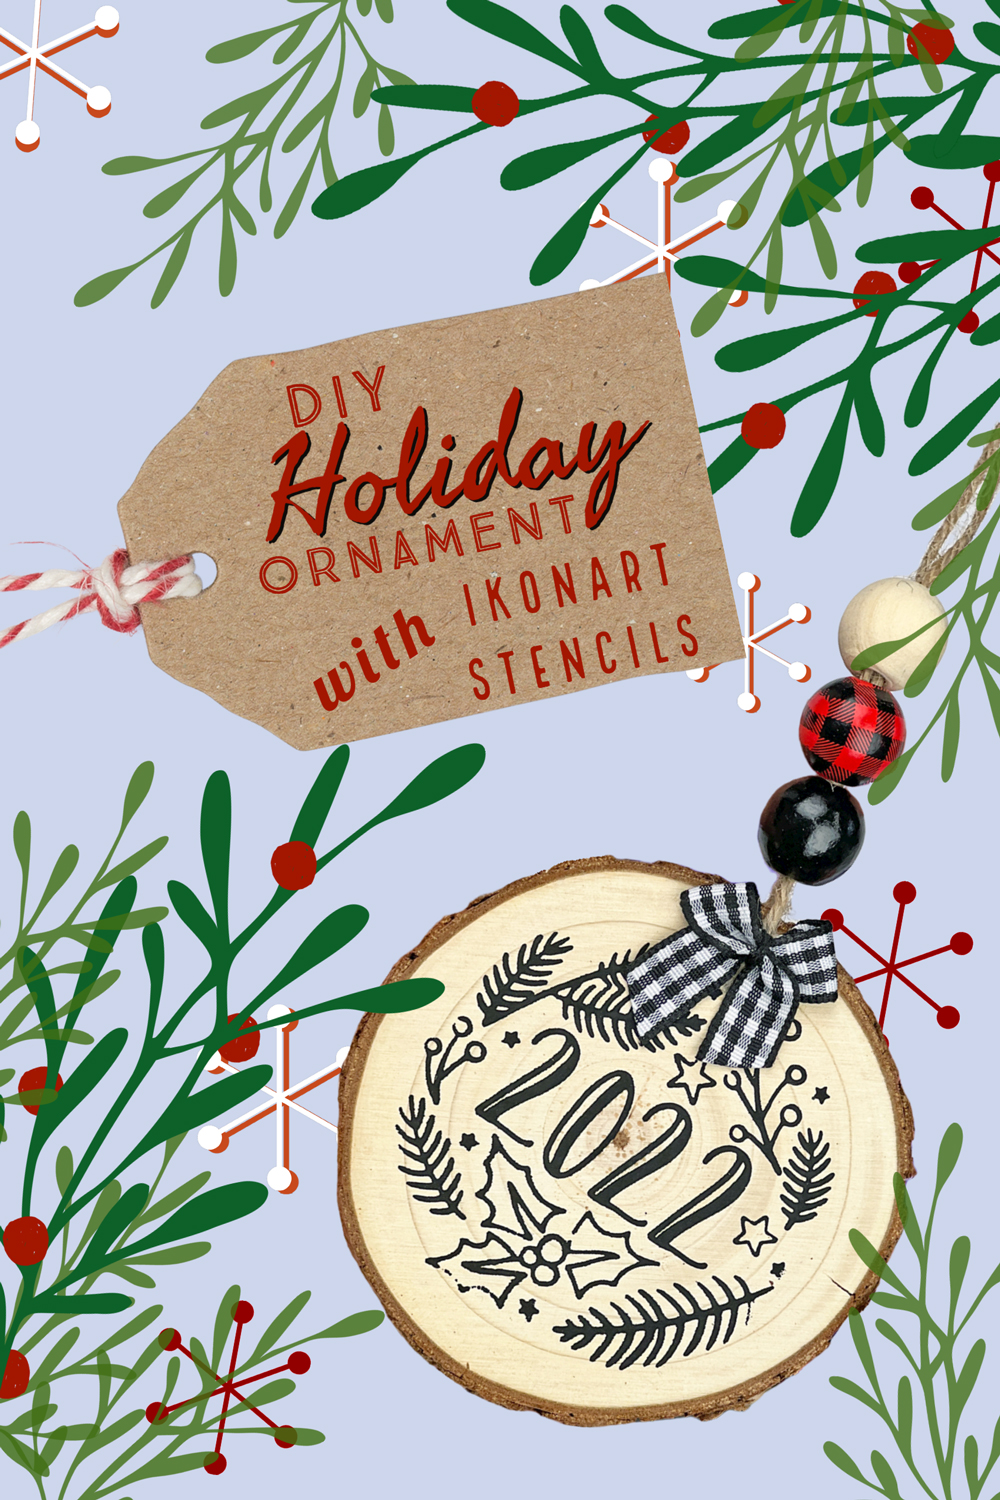
'Tis the season to be crafty! The holiday season is our favorite time of year for DIYs and crafting. There are so many fun and unique ways to get into the festive spirit - holiday shirts, holiday signs, holiday mugs... and of course, ornaments!
We all know just how rewarding it is to give a gift and have the recipient ask where you bought it, only for you to answer, "I made it myself!" We put together these Ikonart Ornament Mini Try-Me Kits with that in mind. These sweet wood round ornaments are sure to yield a delighted reaction whether you keep it for yourself, give it as a gift, or use it as a gift topper.
If you prefer to watch this tutorial the YouTube video is at the end of the blog post, or you can click here to watch it.
How To Stencil A Wood Ornament Using Ikonart
If you've received one of our adorable mini stencil kits as a free gift your mini try-me kit includes everything needed to create your own live-edge wood round ornament. In this blog post we will be showing you step-by-step how to prepare your wood, use your stencil, and clean your stencil so you can use it again and again.
If you haven't received one of our mini try-me kits but you would still like to make these ornaments, I have linked all the products below. These would be the perfect craft project for for a holiday craft night, craft party or kids craft party.
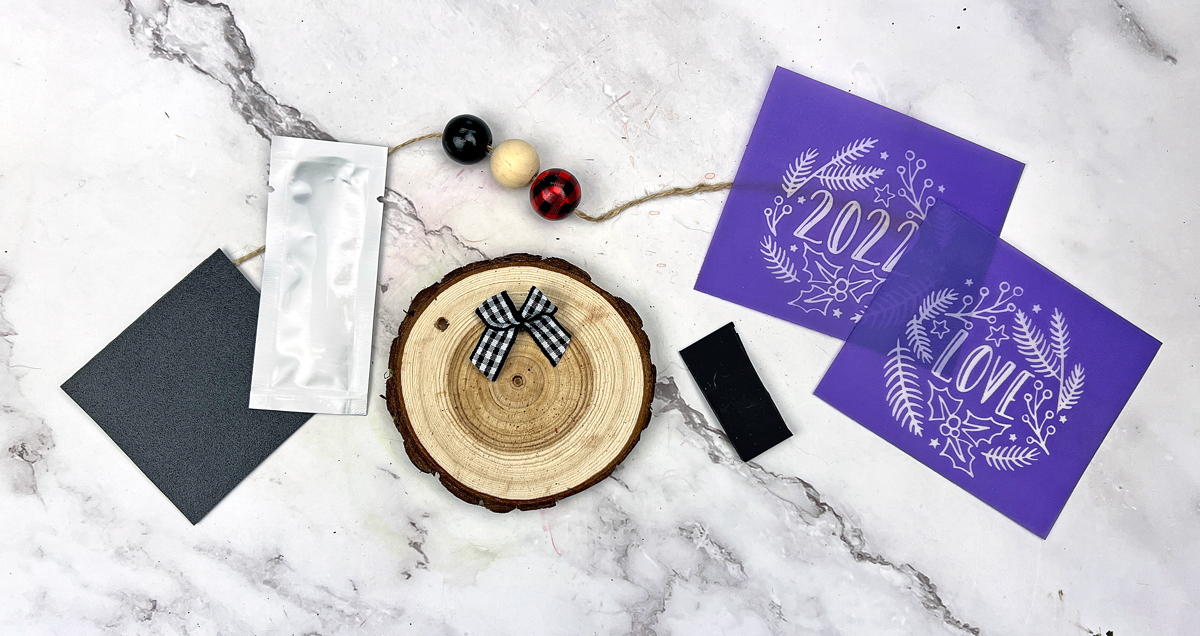
Supplies Included in the Try-Me Kit:
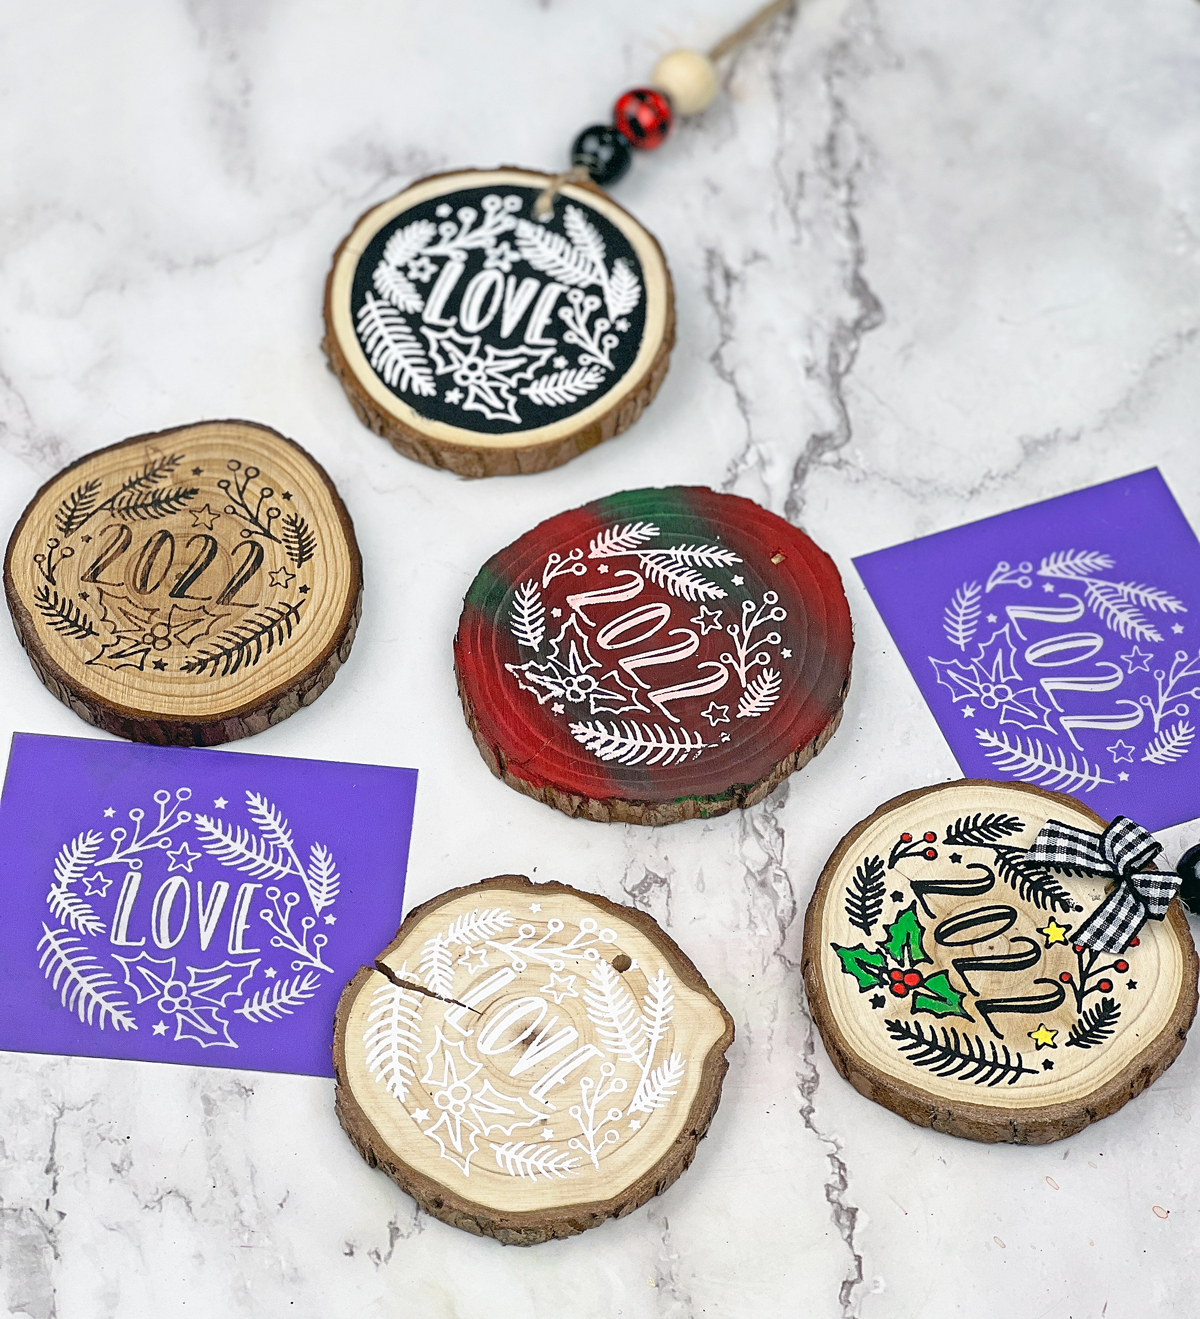
- Two imaged Ikonart stencils (we used this Christmas Ornament Bundle from So Fontsy)
- Wood round
- Twine (included with wood rounds)
- 220 grit sandpaper
- Black Speedball acrylic paint (silver packet)
- Mini squeegee
- Wooden beads
- Small bow
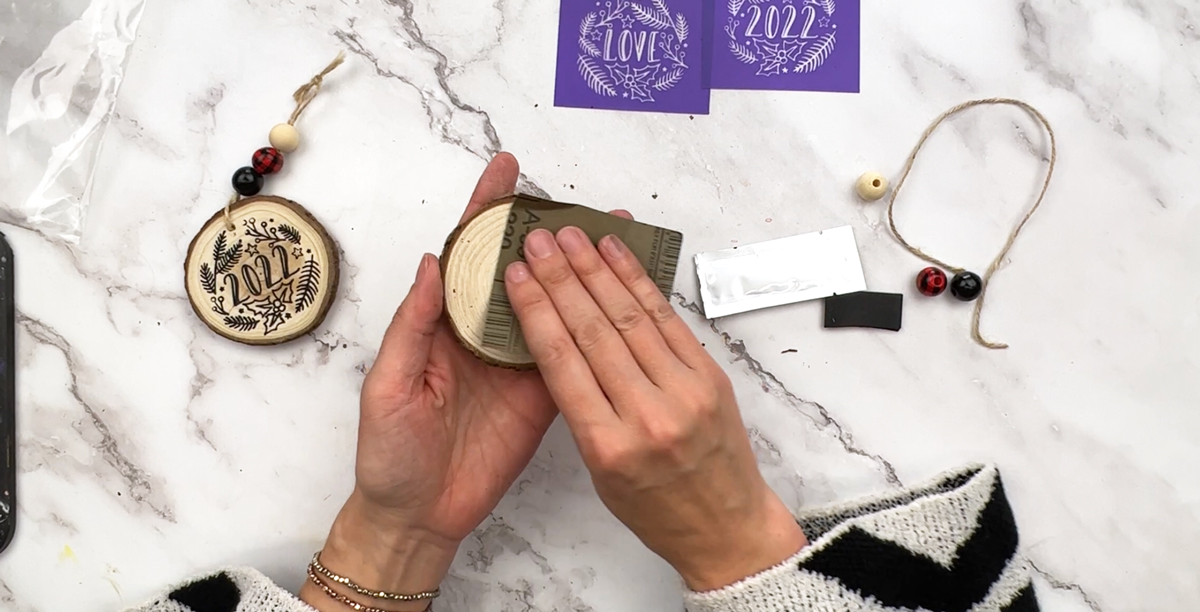
1. Sand Your Wood Round
You want to make sure your surface is nice and smooth before applying your stencil, so sand that wood round real good. Stenciling on a rough surface will increase your likeliness for paint seeping between the stencil and the wood. If you plan to stencil on both sides, be sure to flip the round over and sand down the other side too. Don't forget to wipe down your surface after sanding to get rid of any residual wood dust.
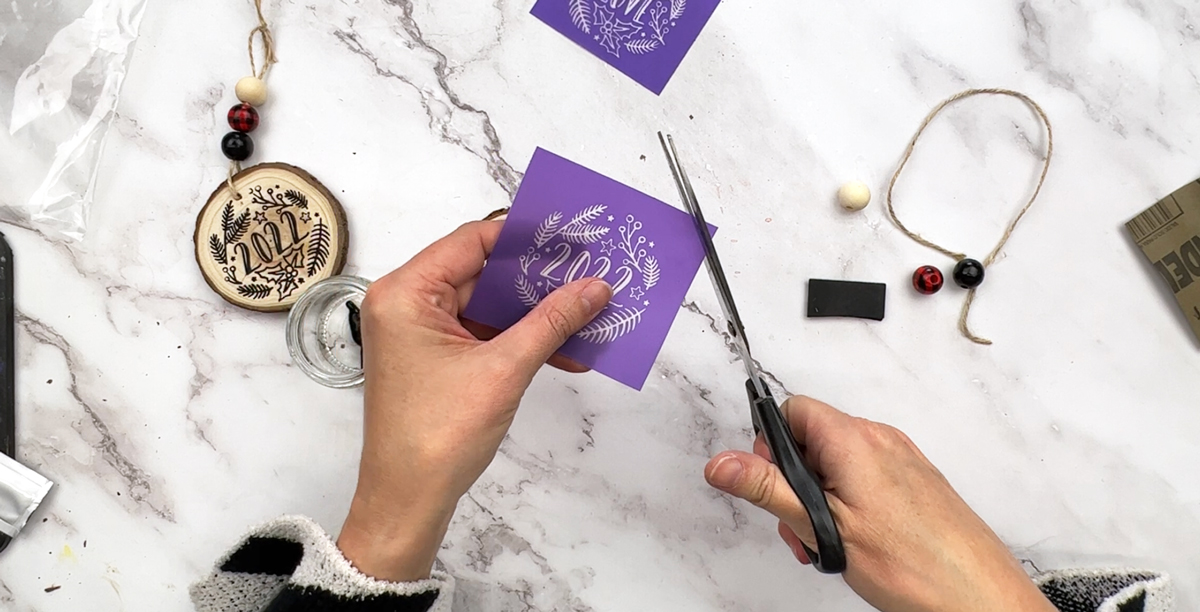
2. Cutting Corners
Doing this step now will come in handy later after you've finished stenciling. Use a scissors to clip off a corner of each of your stencils. This doesn't need to be a perfect cut, it simply aides in removing your stencil's backing and makes it easier to reapply the backer facing the same way it was when you removed it. Replacing the backer after stenciling is crucial to keep the stencil's adhesive in good condition for reuse.
If you are making your own Ikonart stencils, you can watch one of our Ikonart Demo Videos for tips.
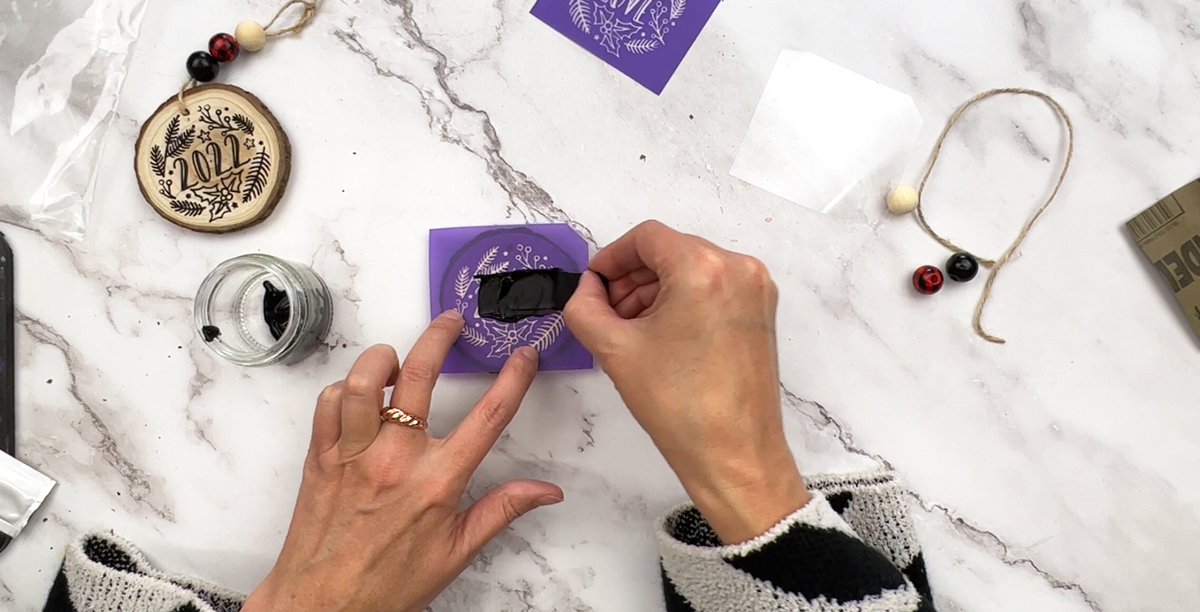
3. Apply Your Stencil and Paint
Remove the clear backer from the stencil and apply the stencil to your wood round, pressing the stencil down on to the wood surface firmly. Open your silver packet of Speedball Acrylic Paint and squeeze the paint out into a container or paint palette. This project does not require as much paint as is provided, so the excess can be saved in a sealable container for use on other projects.
Once your paint is prepared, it's time to grab your squeegee and start applying your paint. When applying paint or ink to Ikonart stencils, your application pressure can be key to a clean print. You don't need to press down too hard, but you do want to be sure your paint is going through the mesh openings. Glide your squeegee across the stencil until you have covered your whole design (think of it like buttering bread).
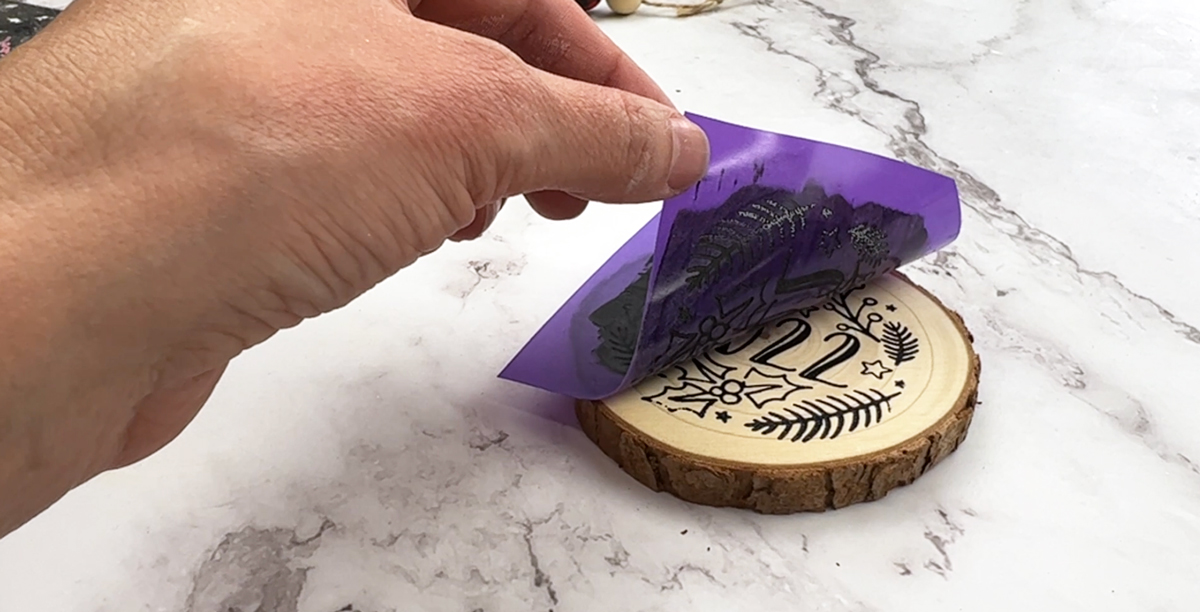
4. Peel and Reveal
This is the exciting part... you are about to reveal your beautiful stenciled design! Lift from one corner gently and slowly, checking the design as you go. If at this point you notice any areas you'd like to touch up with more paint, before you remove your stencil completely, lay it back down carefully. As long as part of the stencil was still adhered to your wood, you should be able to place it back down easily to apply more paint. Once the stencil has been completely removed from the surface, it can be tricky to line it back up exactly right, especially while the paint is still wet.
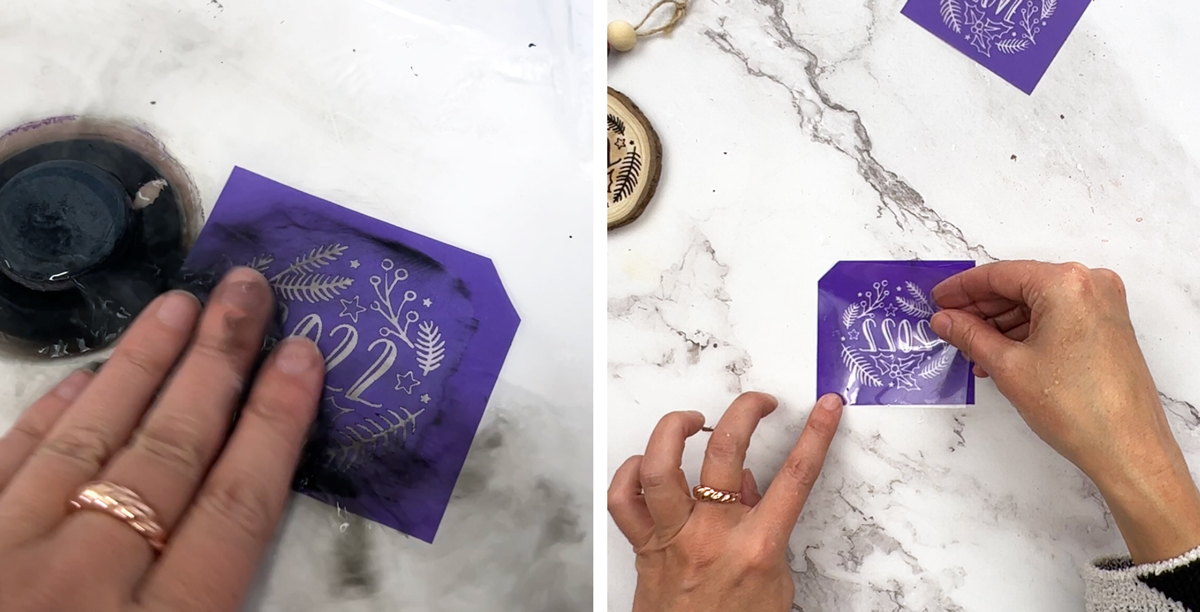
5. Clean Stencil and Replace Backing
Take your stencil to the sink and rinse off all the paint so it's good-to-go for the next time you want to use it. We only rub the top side of our stencil, never the adhesive side. Don't use any harsh chemicals or scrubbers on your stencil, as that can break down your stencil faster.
Now is a good time to make sure you have your backing ready so it can be reapplied once the stencil is clean. This is where the cut corner comes into play. After all the paint is off your stencil lay your stencil down so that the adhesive backing is facing up and line up your backing accordingly. With the backing replaced to the stencil, allow the stencil to lay flat and dry completely before storing.

6. Adding Embellishments (optional)
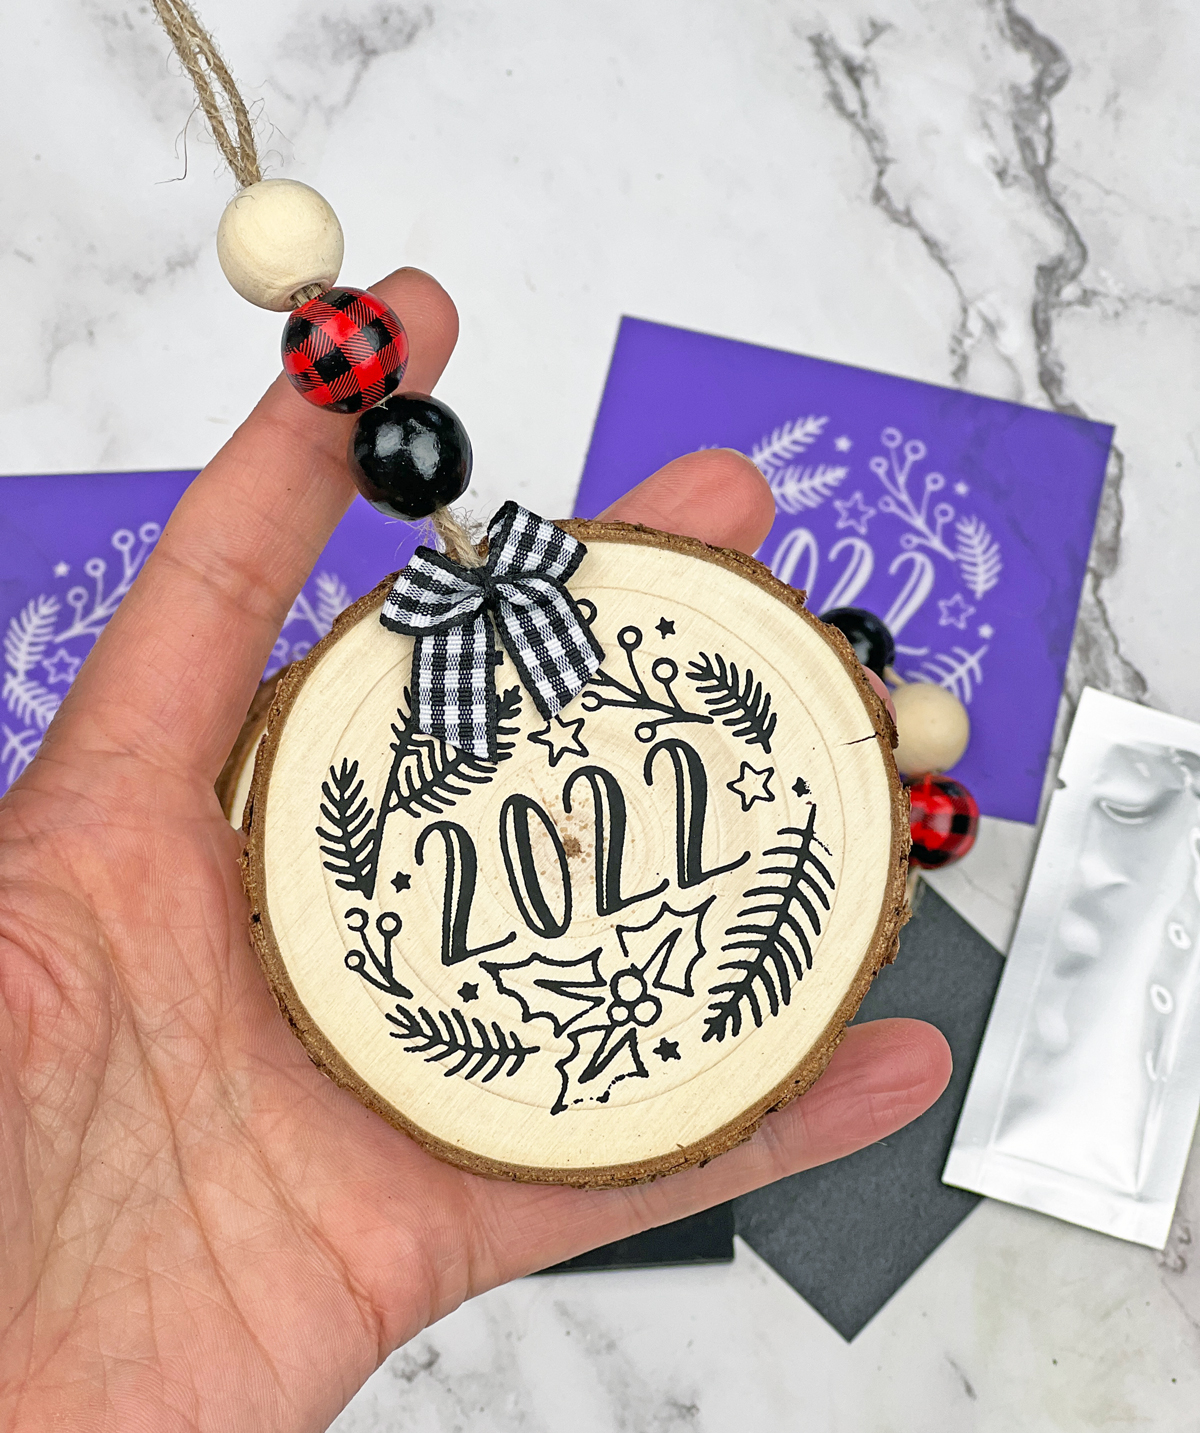
If you would like to apply another design to the other side of your ornament, let the paint on your first side dry thoroughly before flipping it over and repeating steps 3, 4, and 5. Once both sides are stenciled and dry, you're ready to add any additional embellishments you'd like. Included in this project kit is a length of twine, 3 wooden beads, and a small bow.
Thread your twine though the pre-drilled hole in your wood round. If you are having trouble getting the twine through the hole, we found it useful to wrap the end of the twine in a little bit of clear office tape to keep the end stiff and then thread it through. From here you can add your wooden beads to the twine, and tie off the ends to make your hanging loop. If you want to add the bow, use a small dab of hot glue or other adhesive to secure it in place.
7. Admire Your Beautiful Work
Step back and appreciate the sweet little ornament you just made! These would make fabulous gifts or products for a small business. The best part is these stencils are reusable, so you can make a dozen for all your friends and family this holiday season. These circular designs are a great size for other substrates as well such as coasters, magnets, keychains, or the bottom of a cocktail glass.
8. Get Creative
If you have some spare craft supplies laying around and feel like getting extra creative with this project, go for it! These are just a few examples we created to inspire you (pictured above), but there are so many possibilities! Watch the full DIY Christmas Ornament Tutorial on YouTube to see us make all these ornaments.
If you have any questions about how to make these ornaments using the Ikonart Ornmanent Mini Try-Me Kit or any other questions about Ikonart Stencil, please contact us or join our Ikonart Crafters Facebook Group for more project ideas, tips, tricks and troubleshooting help.