
Round wood signs are a popular craft all year round, but we especially love Christmas wood rounds, which look great hanging on your wall or your front door.
Shelley Ruiz with Shellrae Designs used her Ikonart Custom Stencil Kit along with her Glowforge to to create this beautiful DIY Christmas Ornament Door Hanger. Here is exactly how she did it.
Note: Shelley is an Ikonart affiliate. You can use her code SHELLRAE at checkout for 15% off Ikonart branded products.
How To Use Ikonart Stencils for a Merry Christmas Wood Round Door Sign
Hello crafters! My name is Shelley and I have been a hobbyist crafter for many years. I love gadgets and enjoy technology so adding an Ikonart stencil maker to my crafting collection was an easy choice. I use my Ikonart Custom Stencil Kit to make t-shirts, items for tiered trays, wood signs and pillow covers. I take my time and when things start to pile up I’ll go sell off some of my creations at a booth, market or boutique. I also enjoy making gifts and custom orders.
I have wanted new decor for my front door for Christmas. I tend to get my inspiration from other crafters, so the whole idea wasn’t my own. However, Ikonart allows me the flexibility to create my own version, and I was able to add my own touches and details. Here is exactly how I made my Merry Christmas wood round door hanger using Ikonart. You can keep scrolling to read the blog post or watch the video tutorial, DIY Christmas Ornament Door Hanger.
Supplies List:
- Merry Christmas & Snowflakes SVG
- Inkjet or Laser Printer
- Ikonart Custom Stencil Kit
- 16" Wood Round
- Stain
- Acrylic Paint
- Painters Tape
- Foam Brush, Detail Brush and Wax Brush
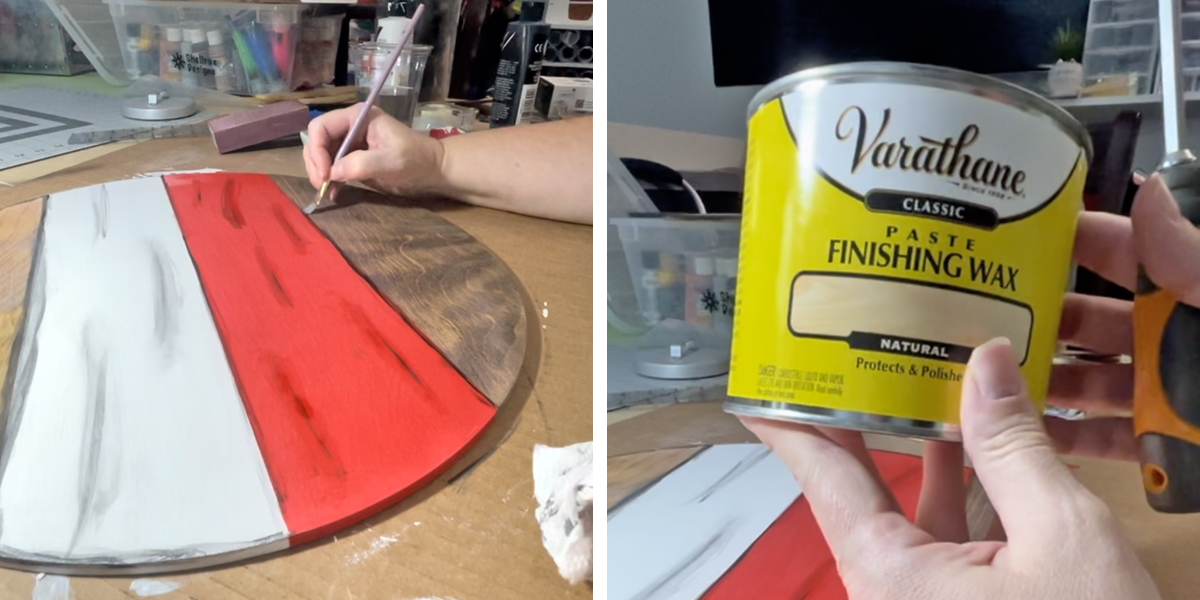
- Varathane Finishing Wax Paste
- Coco's Chalky Powder
- Squeegee
Create Your Artwork
You can use any program to create text in your desired font, and then measure the board to create the right sizes. I also found some free snowflakes on Google. To adjust artwork I use Procreate on my iPad or Silhouette Studio on my computer. I love having access to the Ikonart system to create the stencils on demand. It made it really easy to recreate this project exactly the way I wanted to. If you are new to creating artwork check out Ikonart's Artwork For Beginners video series.
How To Make Your Ikonart Stencil
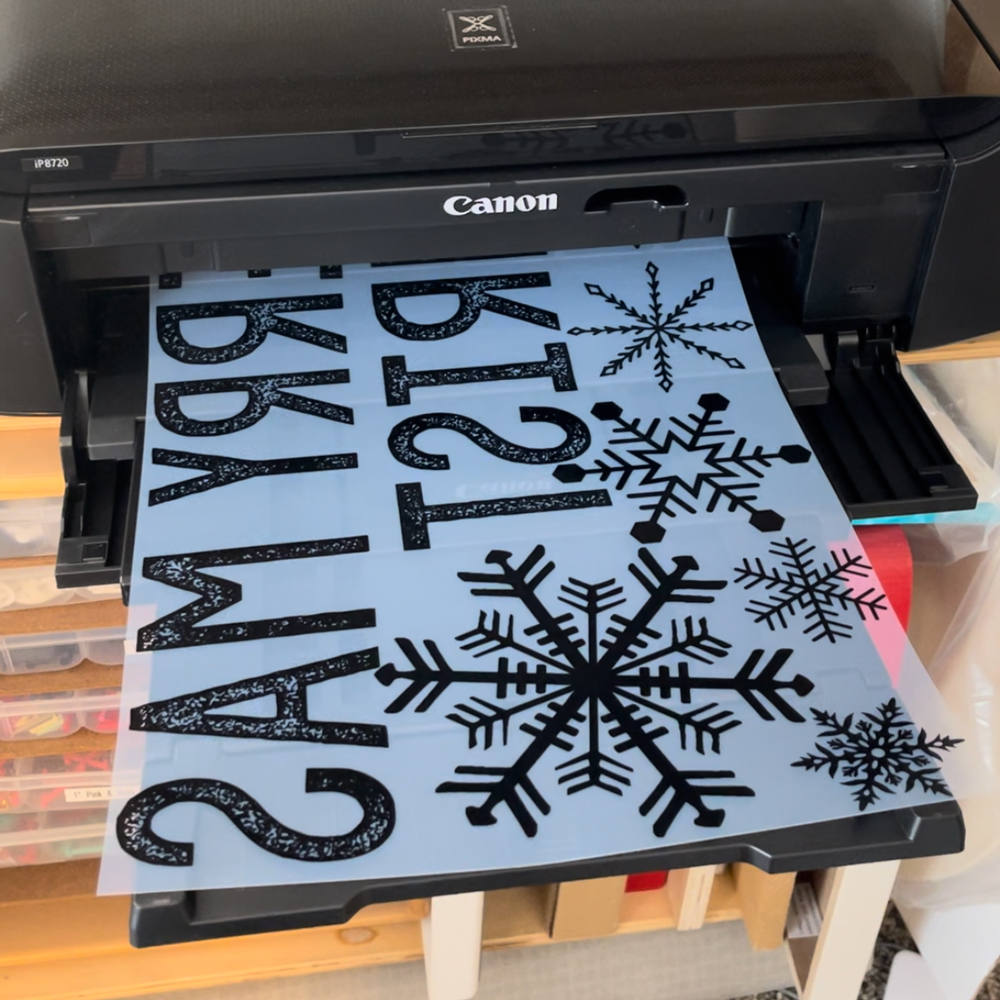
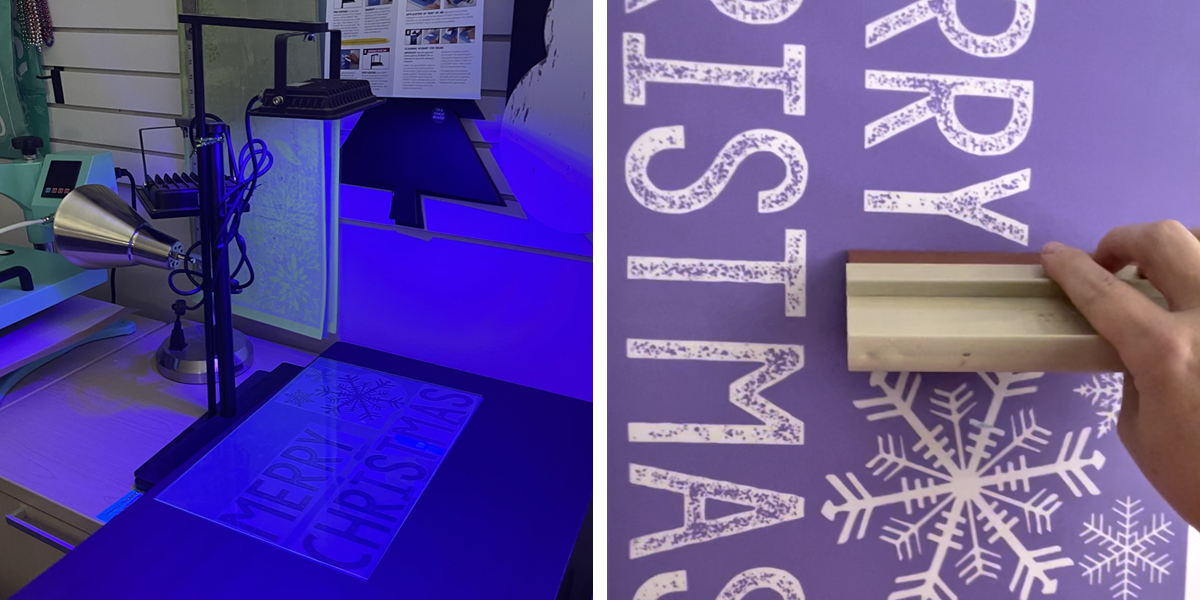
I printed the text and snowflakes onto my printer film transparency (that comes in the Ikonart Kit). Then I created a large 12"x18" Ikonart stencil by exposing the stencil film with the transparency on top. It’s pretty straightforward to wash out the stencil in a sink with a sprayer; I haven’t needed any special equipment.
To dry my stencil I stick the stencil to the plain white cabinet I have above the sink (or you can use a window). I lightly squeegee off the excess water to speed up the drying time, then just leave it there until it dries. I have also used an Excalibur dehydrator when I’m doing a few smaller stencils. It works great for drying them quickly. Pro Tip: Don’t forget the second exposure, or post-exposure, to harden the stencil before using. Just pop your stencil back under the light for a few minutes after it is completely dry.
If you are new to making Ikonart stencils, check out Ikonart's Demo Videos page.
Paint and Prep Your Wood Round
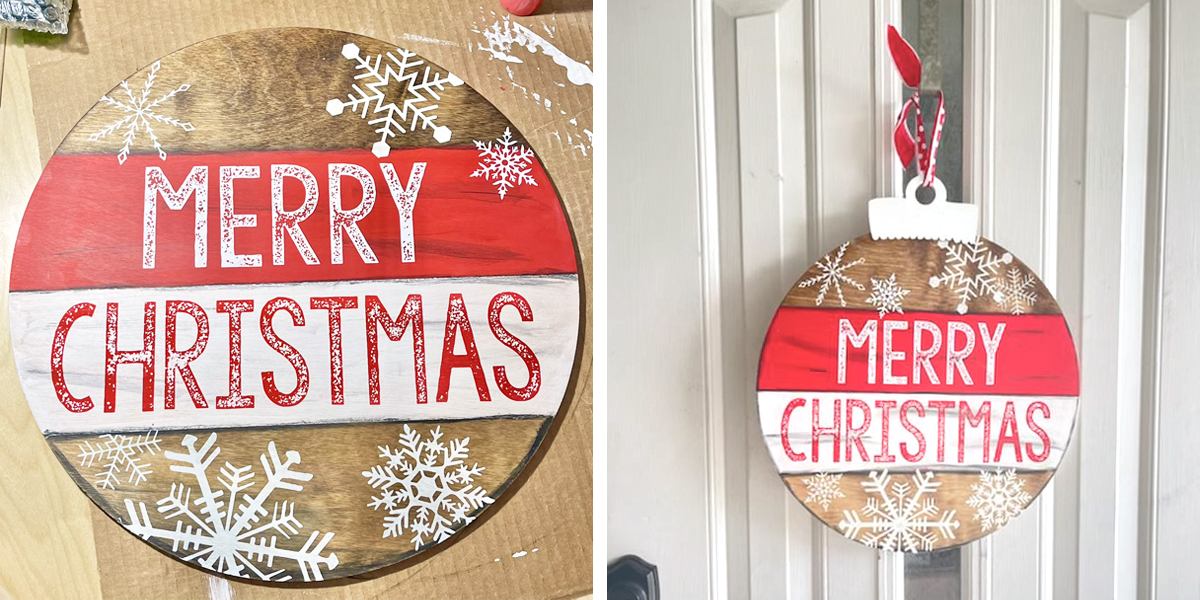
While the stencil was drying I got my wood rounds prepped and ready. I used a 16” pre-cut wood round and taped off sections of it to prep the background. First I stained the top and bottom sections in two different stain colors, then I removed the tape and repositioned it to paint the center sections. I painted one section red and one section white, making sure to pull up the painters tape while the paint was still wet.
Once the paint dried I lightly sanded it, then I used with watered down black paint and a detail brush to add a distressed look. Once that was dry I added a thin coat of wax using a wax brush. This helps to seal the background, and also makes it easier to remove my stencil design if I make a mistake.
Add Your Design Using Your Ikonart Stencils
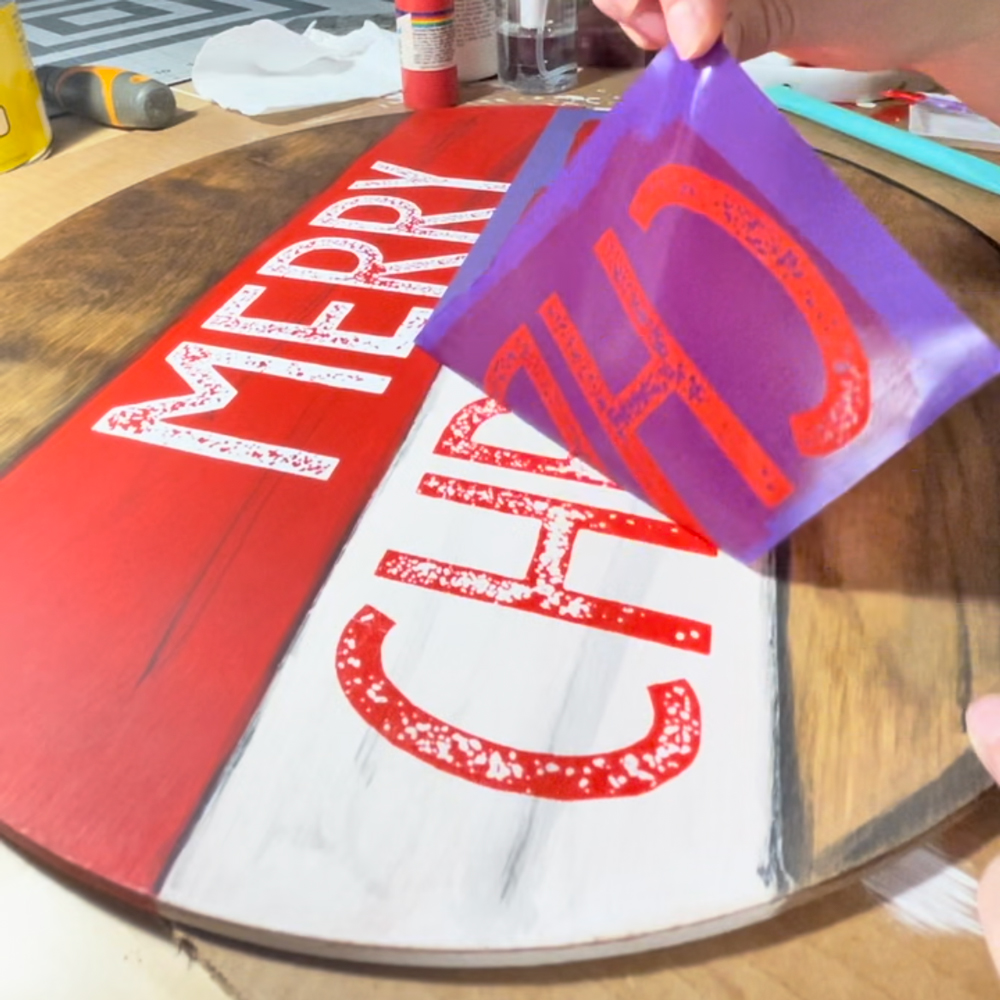
I let the wax dry for about 20 minutes then I added my text and snowflakes using my Ikonart stencils and DIY chalk paste. I love to make my own chalk paste using Coco’s Chalky Powder mixed with Anita's Acrylic Paint for my stencils. I have found that pre-mixed chalk paste dries out too fast, so I like to mix as I go. I chose to use red paint on the white background, and white on the red. Makes for a great look with the white snowflakes.
Often after using a stencil, I’ll stick it to the edge of the table after pulling it up. Then I can take the stencils to the sink to wash and dry for reuse. For this project, I made a couple of signs at once, one to keep and one to sell. But the stencils will easily make many more signs. I tend to make more one-of-a-kind crafts or I make to order. Since I don’t pre-make too many items having reusable Ikonart stencils on hand is great for me.
Add Finishing Touches To Your Wood Round Door Sign
At this point you could be done with this Christmas wood round, but I really wanted this to look like an ornament as well. To do this I scribbled a rough ornament top outline into Procreate, then cut the design out on my Glowforge laser. I glued the ornament top cutout to the top edge of the sign and secured with a pin nailer. That turned out quite sturdy and gave me the look I really wanted.
I think variety in signs is really nice, and I love mixing my Ikonart stencils with laser cut details. I make part of my design with Ikonart and the other part on the laser, and then combine for a dimensional look.
When crafting, the main thing is to always have fun! Ikonart allows you to create exactly the size and design you need for your desired project, giving you more flexibility than premade store bought stencils. Also the quality is significantly better, making it easier to work with and giving you finer details on your finished products. Thank you for following along with me on the DIY Christmas Ornament Door Hanger tutorial and happy crafting!
Shelley Ruiz, Shellrae Designs
Facebook: Shellrae Designs
Instagram: Shellrae Designs
Etsy Shop: Shellrae Designs