Calling all wood sign makers! Ikonart is a total game changer in the sign making game. If you have a small business where you make a lot of the same signs over and over again, stop weeding vinyl each time! You can make a reusable Ikonart stencil in minutes and save yourself a TON of time.
That is exactly what Jessica Lynne of Shine Designs Customs does. Jessica has been making wood signs since 2017, but discovering the Ikonart Custom Stencil Kit in 2020 allowed her to grow her sign making business faster and easier. In this post Jessica will share with us some of her best tips for creating wooden décor signs.
Using Ikonart Stencils for Your Sign Making Business
Hello, my name is Jessica. When I get asked what the biggest game changer has been in growing my sign-making business, the first thing I always say is Ikonart. Sure, there's some other things that certainly have helped along the way, but Ikonart has been the crafting tool that has allowed me to grow my business faster and easier. Using Ikonart products to create my signs, I am producing more while cutting down my costs in both time and materials.
I sell my custom wood signs online via my website and Etsy, as well as wholesale to boutiques across the country. I wouldn't be able to do that if it weren't for discovering Ikonart a little over a year ago. I originally heard about Ikonart through a friend and will NEVER look back!
Here are just a few of the reasons I love Ikonart for making signs:
- I save time by not needing to weed stencils
- I save money and produce less waste by not using disposable materials like vinyl
- I can stencil designs with fine details, which isn't something that would be easy to do using vinyl or Mylar stencils
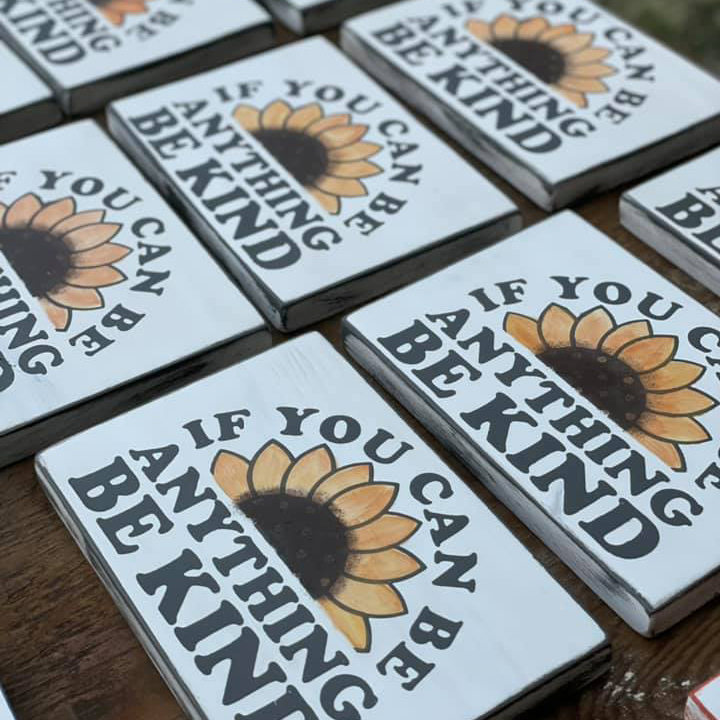
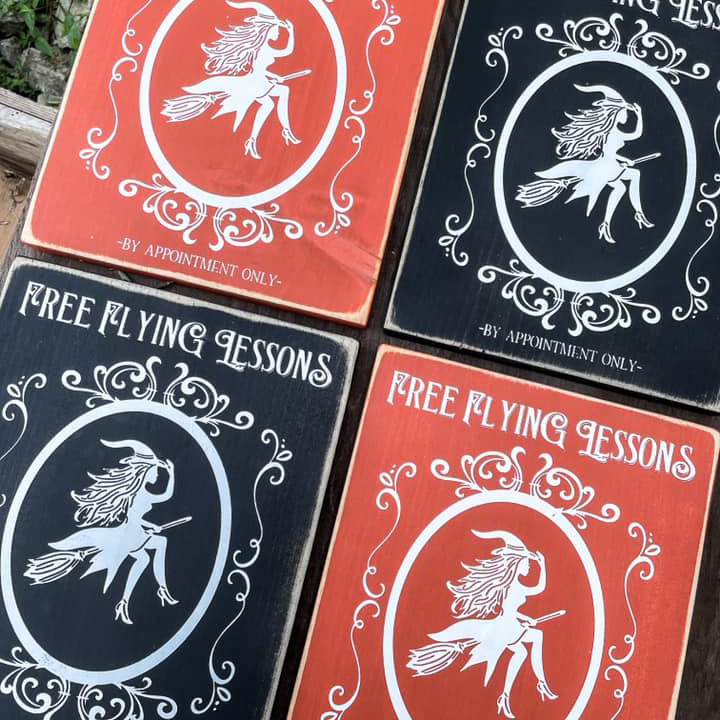
- I am able to create multiple signs in a row with one stencil which makes creating wood signs in bulk much easier (this technique takes a little practice but it's definitely worth the results!)
- It is extremely easy to create an Ikonart stencil from any custom design
Best Products for Painting Wood Signs
I have tried so many products for sign making over the years. Here are the products I find I use the most.
- Designs: I regularly share free SVGs in my Facebook group and I also offer a Shine SVG Club with additional designs. You can also get free designs on the Ikonart Free Artwork page. If you are looking for something specific I recommend checking out So Fontsy, Design Bundles, or Etsy. You can also create your own designs using a program like Gravit Designer or Silhouette Studio.
- Wood: I buy larger pine boards and cut them down to the size I need.
- Stencils: Occasionally I will make a vinyl stencil for a simple personalized design, but for the most part I use custom Ikonart stencils that I make using my Ikonart Custom Stencil Kit. I prefer the purple Ikonart Textile Film for wood signs. It is sturdier and stickier than their blue film.
- Dollar Tree Sponges: I use inexpensive sponges for easy base coating.
- Plastic Condiment Bottles: I put my paint in plastic condiment bottles which makes applying my paint for my background or my stencil easier and less messy.
- Folk Art Chalk Paint: This is my favorite paint to use for the sign's base coat (or background) as well as for painting the designs. I find that Folk Art is fairly thick and helps to eliminate bleeding. Using paint that is too thin can lead to the paint bleeding under the edges of the stencil which means messier lines/edges. Folk Art can be found at most craft stores including Joann's, Michael's, Hobby Lobby, etc.
- Rustoleum Chalked Paint: This is another brand that I use for base coating.
- Coco's Chalky Powder: If you are stenciling with a thinner acrylic paint you can mix in Coco's Chalky Powder to make it thick enough to use with your Ikonart stencils. The loose powder allows you to adjust your paint/powder ratio to fit your needs for each project. Coco's Chalky Powder is available on the Ikonart website and you can also find it at Hobby Lobby.
- Squeegees: My absolute favorite way to apply my paint to my stencils is with a squeegee! Ikonart sells 3 different types of squeegees, a white plastic squeegee, a multi-sided black silicone squeegee, and a 10-pack of mini silicone squeegees. You get the white squeegee with the Ikonart Kit and the large black squeegee with the Textile Bundle. You can also purchase them individually via the Stencil Making Accessories page.
- Rustoleum 2X Matte Clear Spray Sealer: This is the sealer that I use if I need to seal my signs. I find that it doesn't yellow and keeps my designs protected.
Top Tips for Making Wood Signs
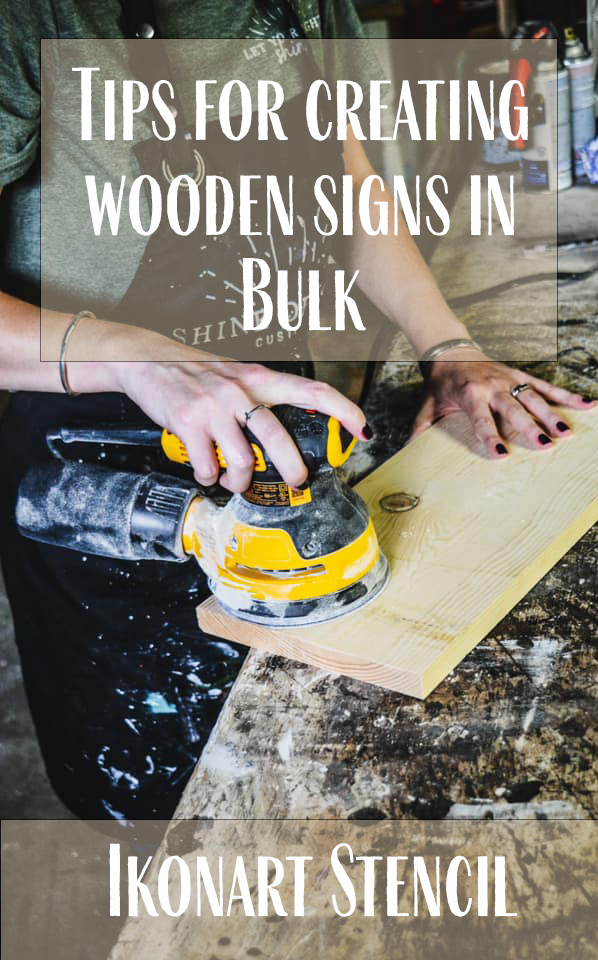
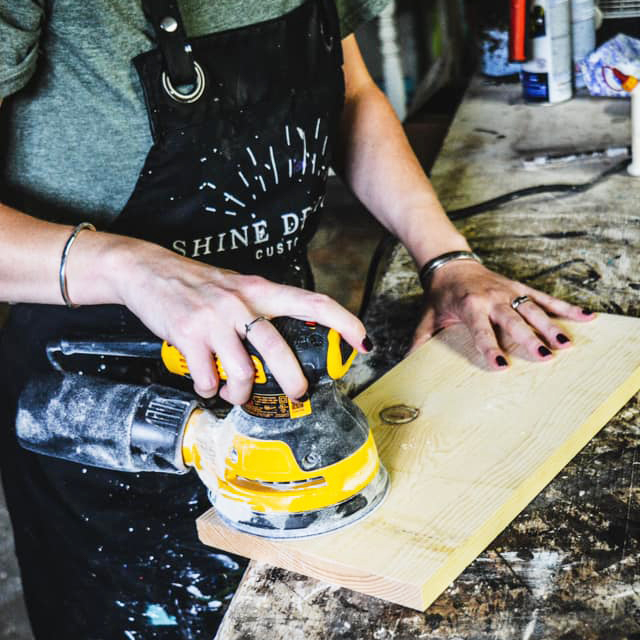
1. Start With A Smooth Surface
The texture of your wood is typically the biggest factor when it comes to how your final design is going to turn out. You want to be sure that your board is totally smooth without any ridges, bumps, gashes or dents. I sand down my boards with 220 grit sandpaper all over, then paint my base coat, and then sand again with either 220 grit or 400 grit sandpaper. For sanding I use a handheld orbital sander to make the job go faster. Don't forget to wipe your surface with a dry towel to get any and all of the paint dust off after your final sanding. Dust particles left behind will keep your stenciled design from printing cleanly on your board.
2. Learn How To Apply Your Paint
Use more paint than you think you need and glide it across the design (think of it like buttering bread). When you're starting out, put more paint on your stencil than you think you need, then use your squeegee to spread it across the top of your stencil. It may be tempting to press down and "push" the paint through the mesh, but with these smoother surfaces you will get crisper lines and better results if you're able to drag your paint across the top gently with your squeegee.
3. Practice, Practice, Practice!
Getting the hang of using Ikonart for multiple wood signs can take a little practice. Don't give up! Use one piece of wood and a small stencil and practice over and over on the same "test" piece. That way you won't waste product, but you're also able to figure out the amount of paint and pressure that works best for you personally. I have stenciled over 30 signs in a row with one stencil and the last one looked just as good as the first!
4. Ask for help!
There are so many people in the Ikonart Crafters Group and my Shine Designs Digital Creative Community group on Facebook that are extremely helpful in troubleshooting any issues that you're having. If you are able to post a picture, often someone will answer and be able to help within just a few hours. We are all enjoying Ikonart together and we are here to help each other grow our skills and creative abilities.
5. Give Yourself Grace
Will every sign turn out perfect? Nope. And that's just fine! When things don't work, sand it off, start over and remember that some minor imperfections are what makes each and every handmade sign unique.
I truly cannot wait to see what you create - so be sure to post it in the Facebook group!
Jessica Lynne, Shine Designs Customs
Website: Shine Designs Customs
Facebook Page: Shine Designs Customs
Facebook Group: Shine Designs Digital
Instagram: @shinedesignscustoms
TikTok: @shinedesignscustoms
Etsy Shop: ShineDesignsCustoms