Channa Riley is a die-hard DIY-er who dabbles in all things crafty including sewing, screen printing, photography, cake decorating, scrapbooking, woodworking and graphic design. She started Tangerine Lane Co. to share her crafty creations.
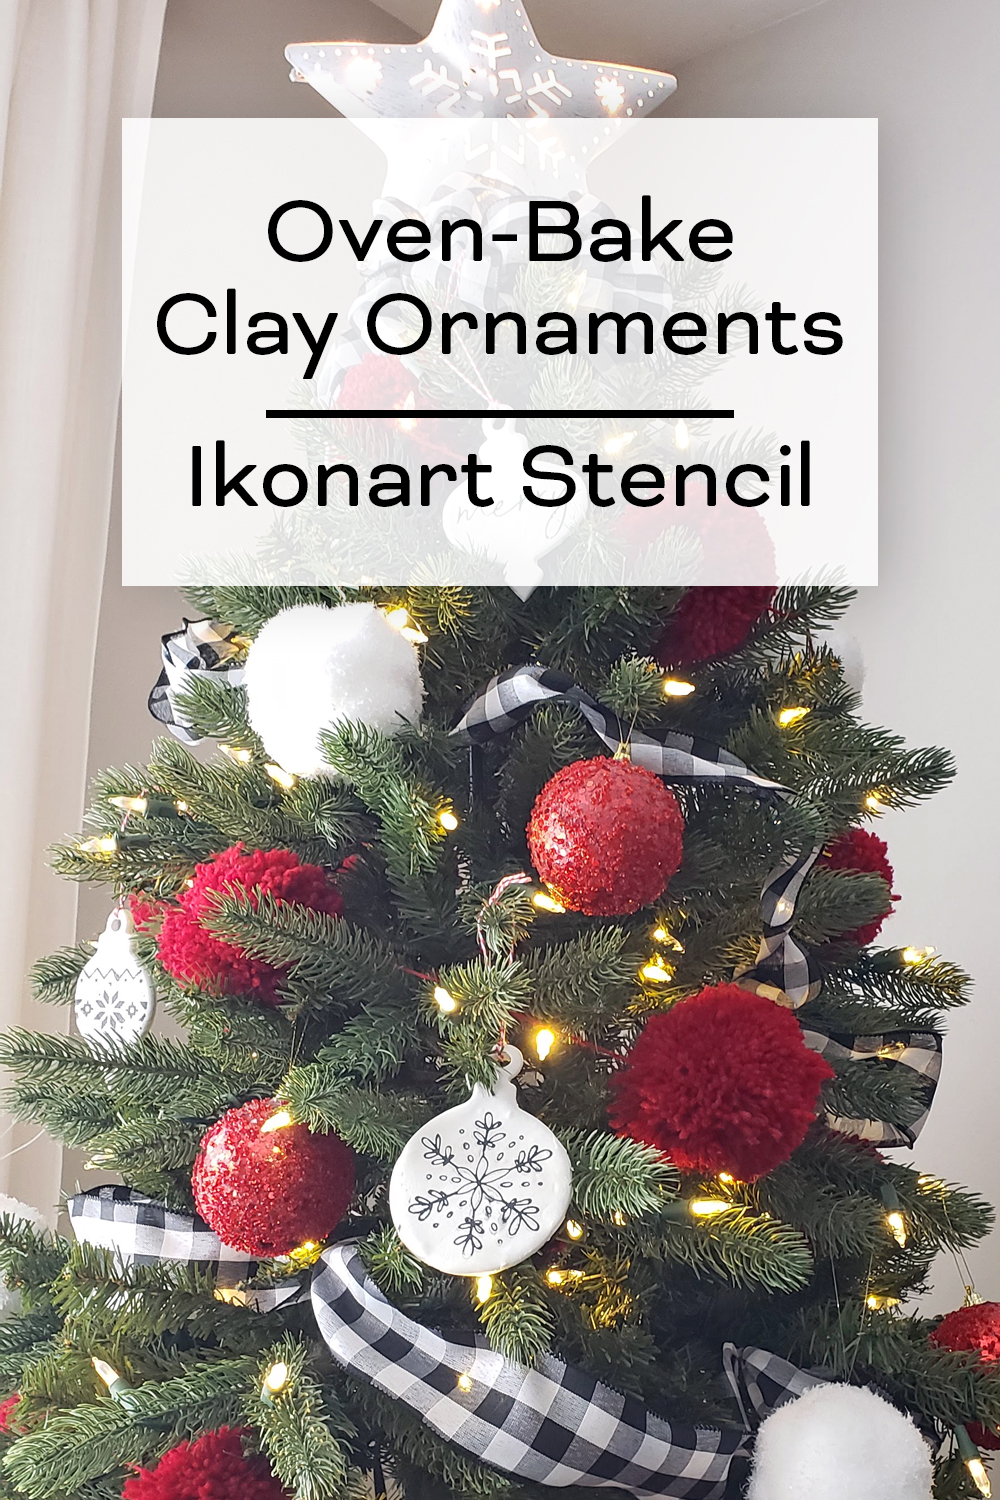
Channa wanted her Christmas tree to have a very specific theme this year but didn't want to buy all new ornaments. Ikonart Custom Stencil Kit to the rescue! Keep reading to find out how Channa turned artwork she designed into stencils which she used to customize clay ornaments for her tree.
Themed Christmas Trees - Love It or Leave It?
Hello! My name is Channa and as a Christmas Eve baby, this is my absolute FAVORITE time of year. I love everything about the holidays... carols, cocoa, gingerbread cookies, and especially the decorations. Oh, the Christmas trees!!
My family thinks I’m a little nutty, but I am obsessed with themed Christmas trees. There is just something about a beautifully coordinated tree that makes my heart happy. The rest of my family prefers to throw every crazy ornament we’ve ever collected onto a tree and call it good (the heathens), so we’ve always had at least two Christmas trees in our house. The formal tree and the family tree.
Christmas Tree Theme: Sweaters & Snowflakes
This year I wanted to give our formal tree a little refresh with a new theme. 2020 has been... well, 2020. A fresh theme is definitely warranted, right? So I decided my new theme would be Sweaters & Snowflakes.
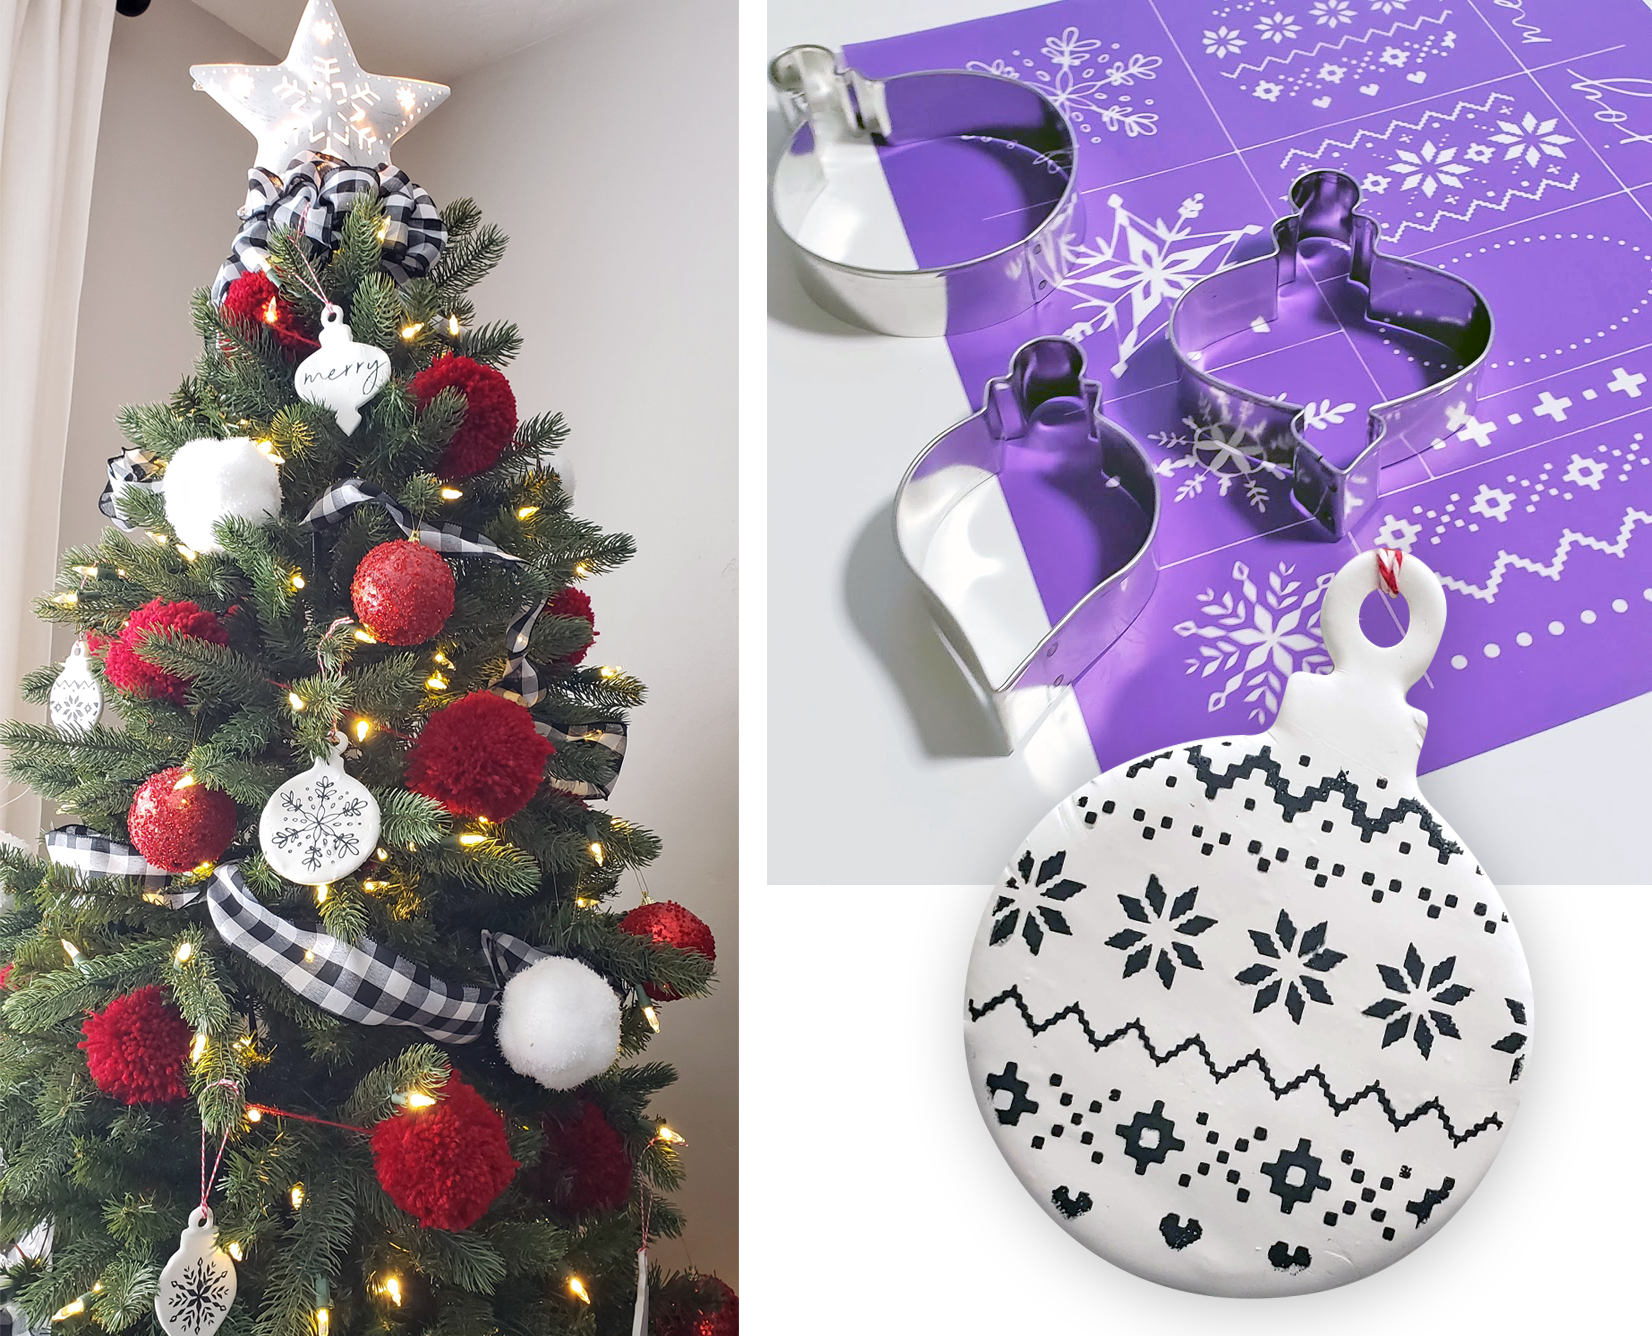
I dragged all five (yes FIVE) totes of tree decorations into the living room and picked through until I found all the red and white ornaments. A spool of black-and-white buffalo plaid ribbon and a new light-up star topper from a trip to Michael’s added to the wintery feel I was going for, but I wanted more white on the tree. However I did NOT want to invest in a ton of new ornaments. I needed something relatively inexpensive, easy, and cute that I could make with what I already had on hand, and that is how these darling baked-clay ornaments came to be!
How To Make Clay Christmas Ornaments
Making baked clay ornaments is easy. First gather your supplies. You will need:
- Oven-bake clay or salt dough - I used Sculpey (8-oz block made 11-12 ornaments)
- Ornament-shaped cookie cutters - I used these
- Custom stencils made with the Ikonart Custom Stencil Kit
- Rolling pin
- Clear plastic wrap
- Straw
- Baking sheet
- Screen printing ink, chalk paste, or acrylic paint
- Small squeegee to spread paste/ink/paint
Once you have all your supplies you are ready to begin!
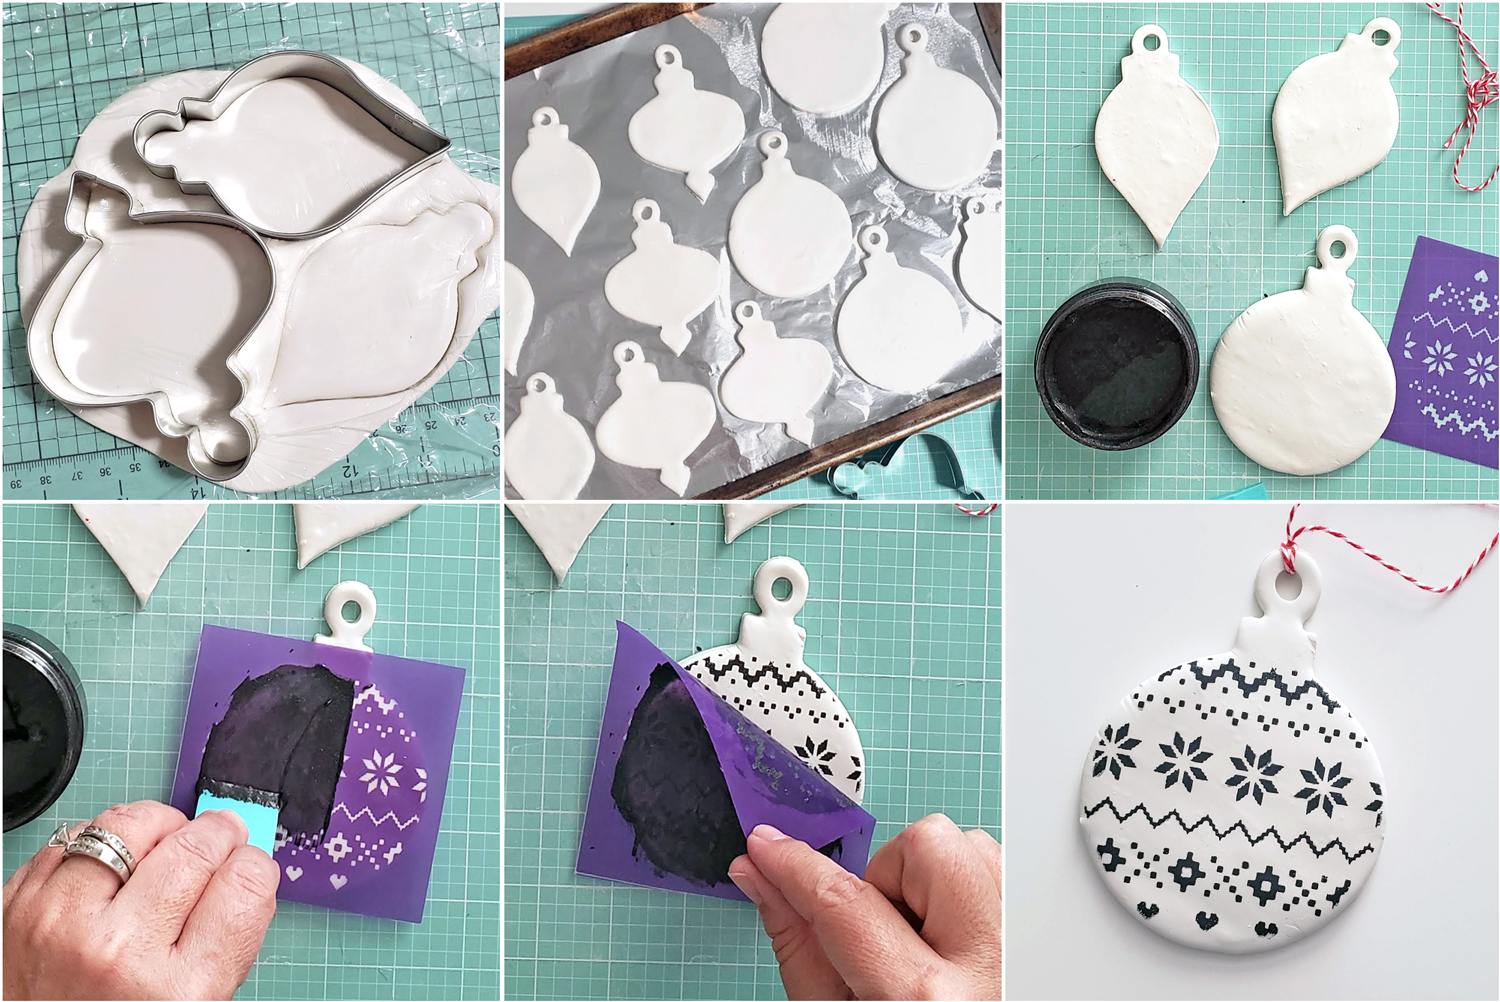
- Start by rolling out your clay or dough about ⅛ in thick. I flip mine over after each pass so it doesn't stick to the mat as much, but a sprinkle of cornstarch or flour will also help. Note: When I use faux gingerbread to make the ornaments sturdier and more like cookies I roll them a bit thicker, but clay will be fine at ⅛ in thickness.
- Cover the surface of your rolled clay/dough with a piece of plastic wrap. Use your cookie cutters to cut out your ornaments through the plastic wrap. This gives the ornaments pretty, rounded edges. Remove the plastic wrap and use the end of a straw to punch holes in the tops so you can hang the ornaments.
- Carefully move the cutouts to a baking sheet and bake following the instructions on the clay package or dough recipe. Let cool thoroughly before you start decorating them.
- Apply your stencil to the ornament. I like the stickier purple stencil sheets for this project, but the blue stencil sheets will work if that’s what you have on hand. Clay and dough are a little harder for anything to stick to, so I lightly rubbed the backs of my Ikonart stencils with a damp cloth before I stuck them down to increase the stickiness.
- After your stencil is applied to your clay ornament, use a small squeegee to apply your chalk paste/ink/paint and immediately pull up the stencil film. You don’t want the paste/ink/paint to dry in the mesh of the stencil before you remove it. A thicker substance like chalk paste works much better than thinner paint or ink, but ink and paint tend to be more durable. The chalk paste will give you nice crisp lines without bleed, while the ink/paint may take a few tries to get the pressure right so you don't get bleed. Any of them can be sealed with a matte polyacrylic after they dry.
And that’s it! This is such a fun, easy project! It would make a great activity to keep the kids busy, or even work as inexpensive neighbor or co-worker Christmas gifts. I hope you and your family will enjoy making these as much as we did.
Free Sweater Artwork File
I had a very specific look in mind for my ornaments so I designed my own artwork and made a custom silkscreen using the Ikonart Custom Stencil Kit. The Ikonart stencil films are MAGICAL! I’ve used adhesive silkscreens for years, but I would get so dang frustrated when a design wasn’t quite the right size, or more often the design I wanted just didn’t exist. Ikonart makes it possible to create exactly what I need for a project. Check out my blog for my full review of Ikonart (also includes a discount code for Ikonart). Make sure to sign up for my newsletter to stay updated!
If you want to follow along with this tutorial with the exact artwork I used, you can download the free Snowflakes and Sweaters SVG on the Free Artwork page.
Enjoy!
Channa Riley
www.tangerinelane.com
Instagram: @tangerinelaneco
Facebook Page: Tangerine Lane
Facebook Group: Tangerine Lane DIY Studio